FCS Internal Processing
In this page, we explains FCS processing, from tracking the actor’s facial expressions in video images to outputting the character’s expressions.
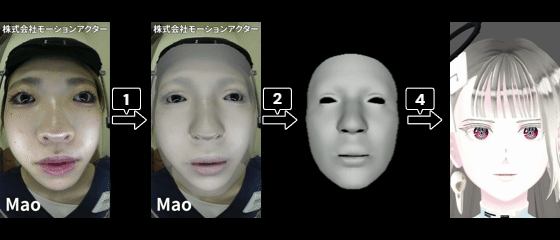
Perform tracking on the actor’s facial images (1). After correcting the head orientation (2), and selecting / filtering the tracking information (3), output the character’s expression (4).
1.Facial Tracking
First, facial tracking is started to obtain the actor’s facial expression from video images. The FCS auto-tracking system generates the 3D model of the actor’s face (actor model) based on video image. As a result, we get facial information, such as the coordinates of contours points of the actor’s eyes and mouth, and the position of the nose (landmarks), as well as expression parameters (ARKit blendshapes).
The 3D model used for facial tracking varies by pipeline; pipelines with “+” in their name utilize a new proprietary model developed by TOEI Zukun Laboratory.
2.Correct Face Orientation
In performances involving intense movement, the actor’s face often shifts position in the video due to factors like camera shake. Furthermore, removing and reattaching the camera (e.g., during breaks) can change its mounting position, causing the face’s position in the video to shift relative to its position in the tracking profiles. To mitigate the effects of such camera shake and position changes, the pipeline called “RP” applies a correction process so that the face orientation aligns with Neutral profile orientation.
3.Select / Filter Tracking Information
FCS cannot automatically determine which controller corresponds to which facial parts of the actor, because it does not directly reference the internal structure of the user-registered character model. Therefore, facial tracking information used during the conversion to controller values may contain movements unrelated to the target controller.
To further improve accuracy, FCS is equipped with ARKit blendshapes selection settings for each controller. This allows for manually limiting blendshapes relevant to each controller and the landmarks that consequently change position, thereby narrowing down the tracking information used for conversion to controller values.
※Blendshape selection settings is optional, and FCS operates correctly without this settings; therefore, if you are unsure, we recommend using default settings.
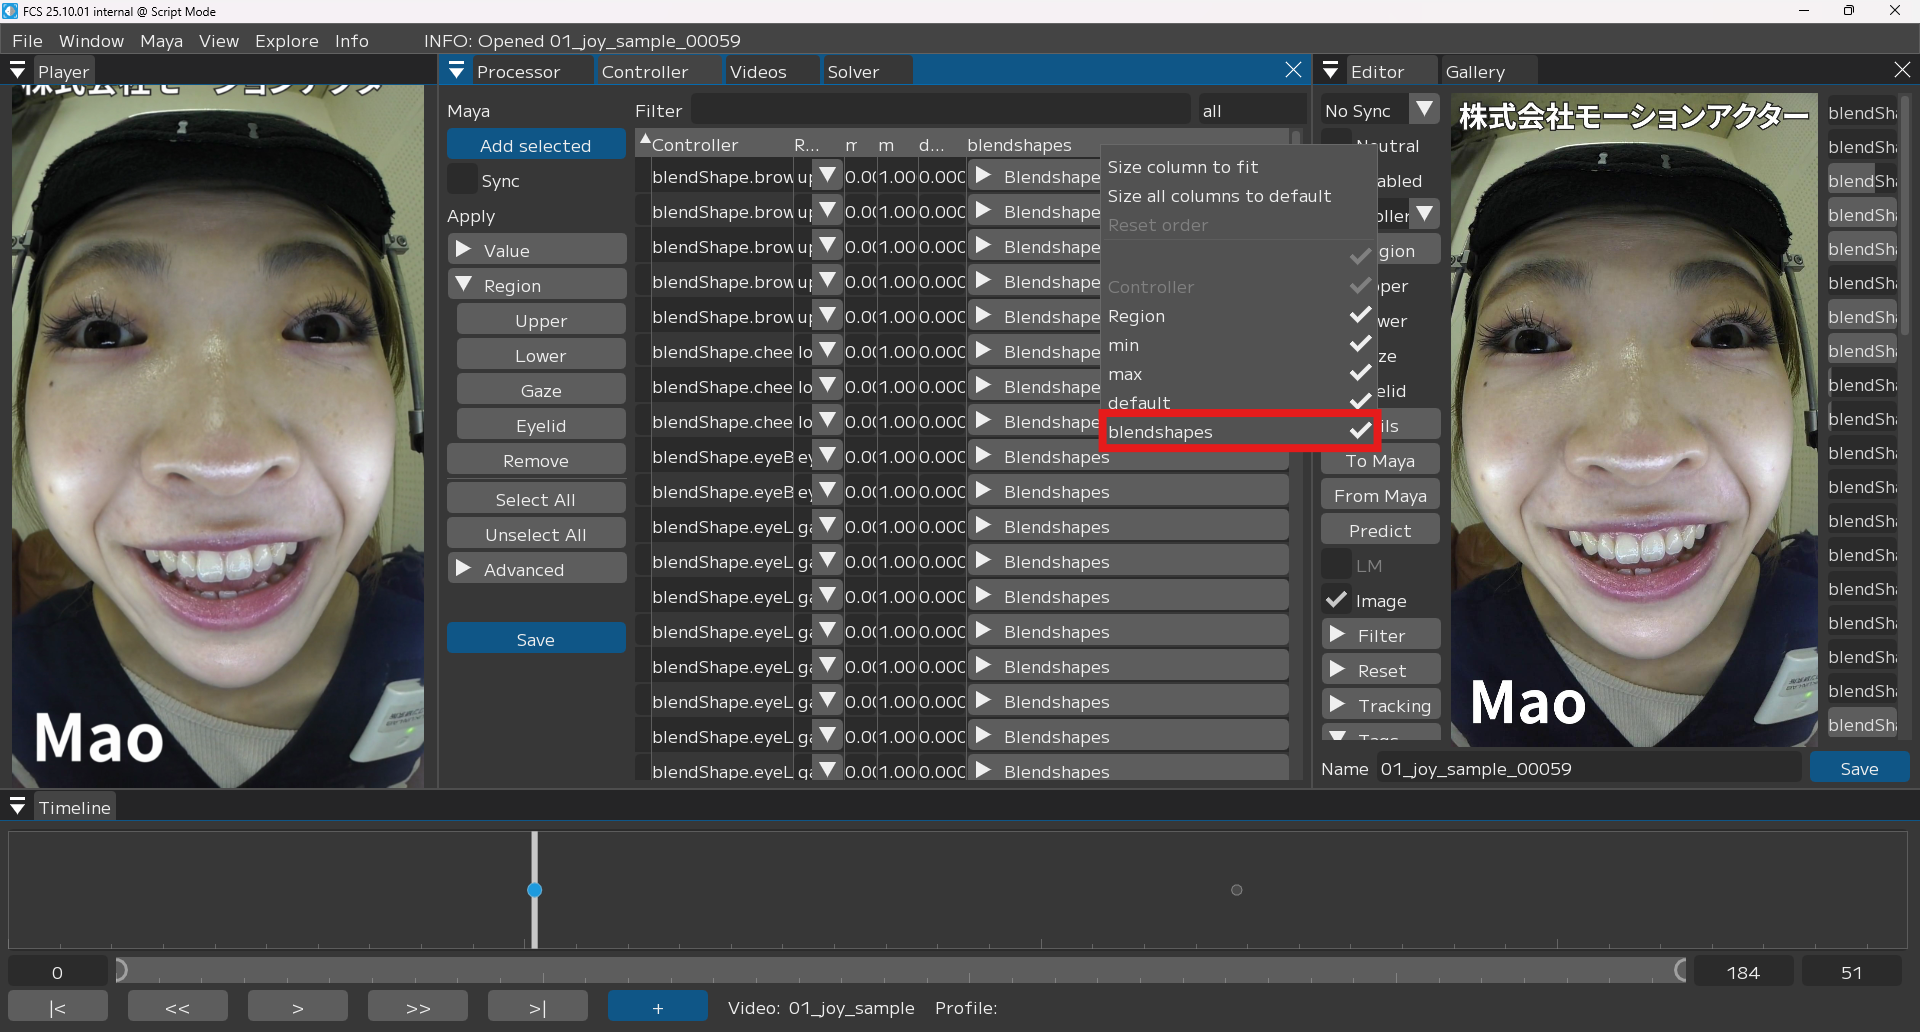
How to use blendshapes settings
In Controller window, right-click the header of Controller table to display the context menu. Then, enable the “blendshapes” setting and select the blendshapes for the controller. Once settings are complete, click the “Save” button to save them.
In Controller window, enable the “blendshapes” settings.
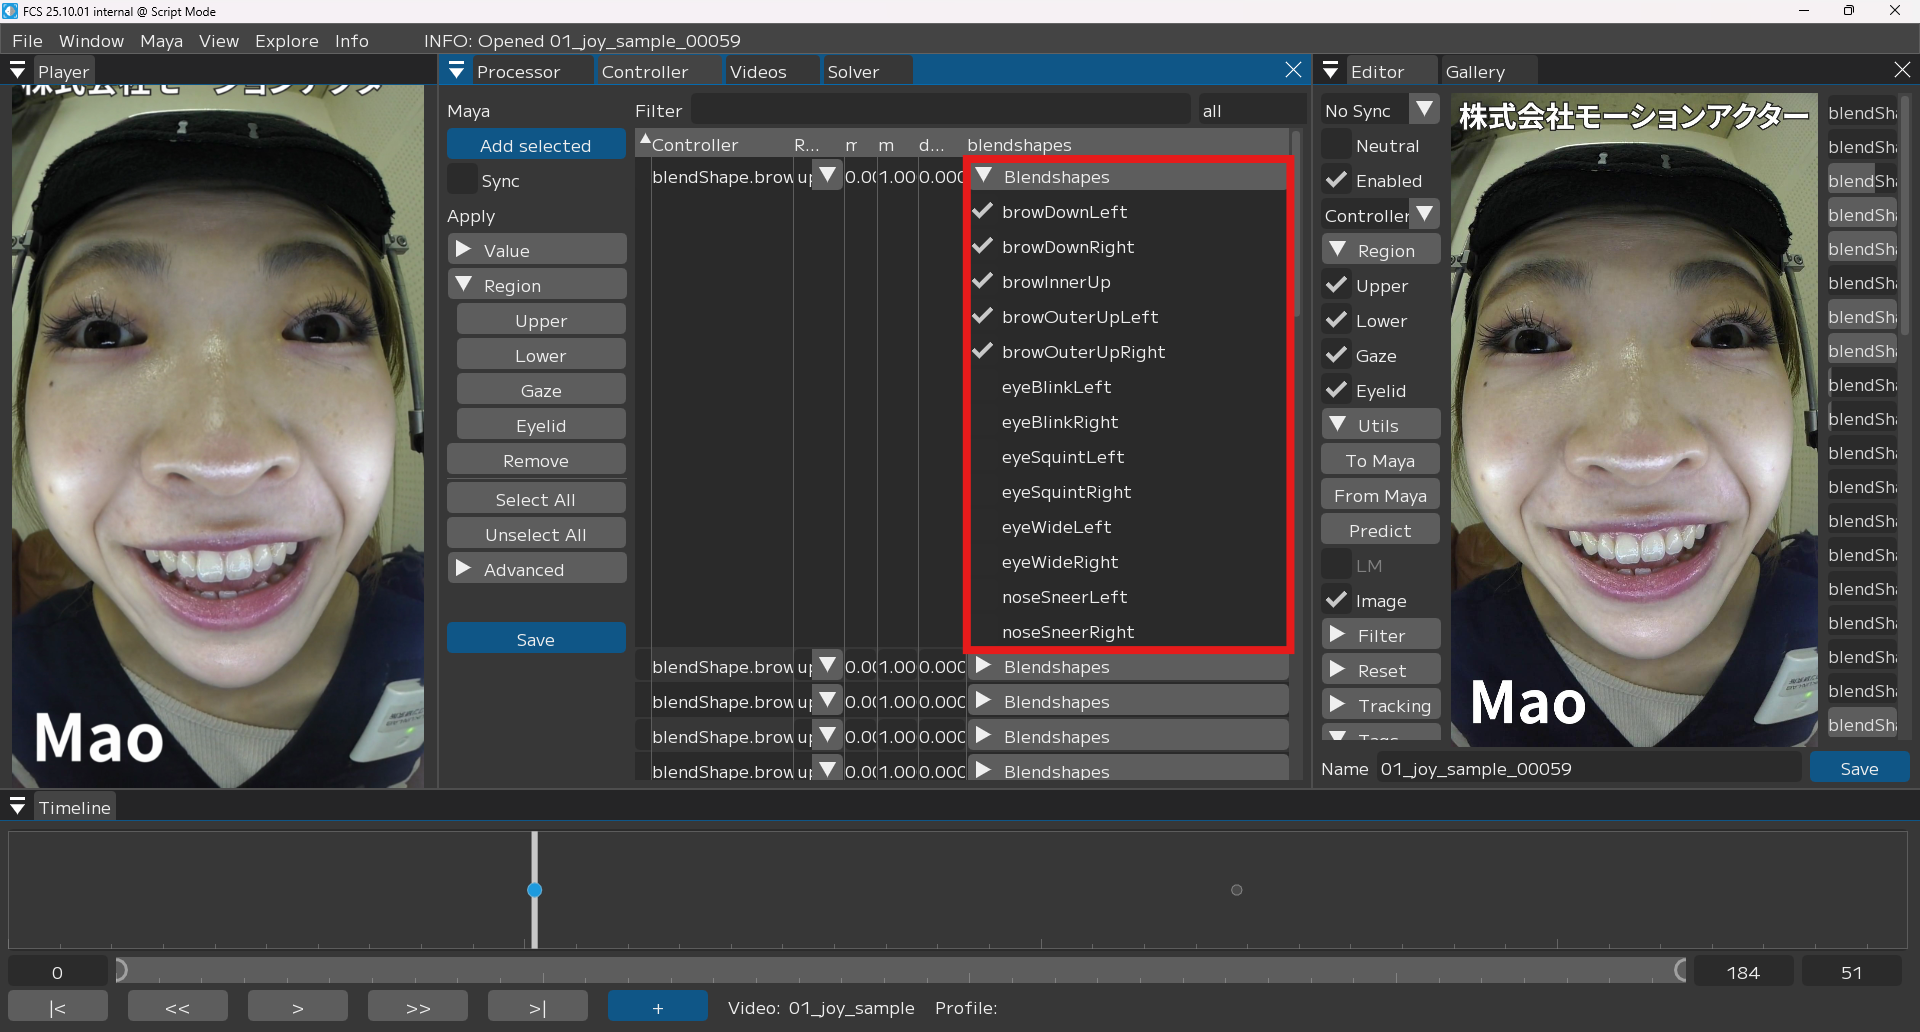
Select blendshapes and save settings for facial controller.
4.Convert To Character Facial Expressions
Finally, the actor’s facial expressions are converted into the character’s facial expressions, and the animation is output. The figure below illustrates a general overview of conversion process, but this is an conceptual image, and may differ from actual calculation.
First, we select similar profiles and calculate their ratio based on the actor’s expressions obtained from the processes described up to this point. Next, the actor’s expressions are converted into the character’s expressions by blending the corresponding character profiles according to the calculated ratios.
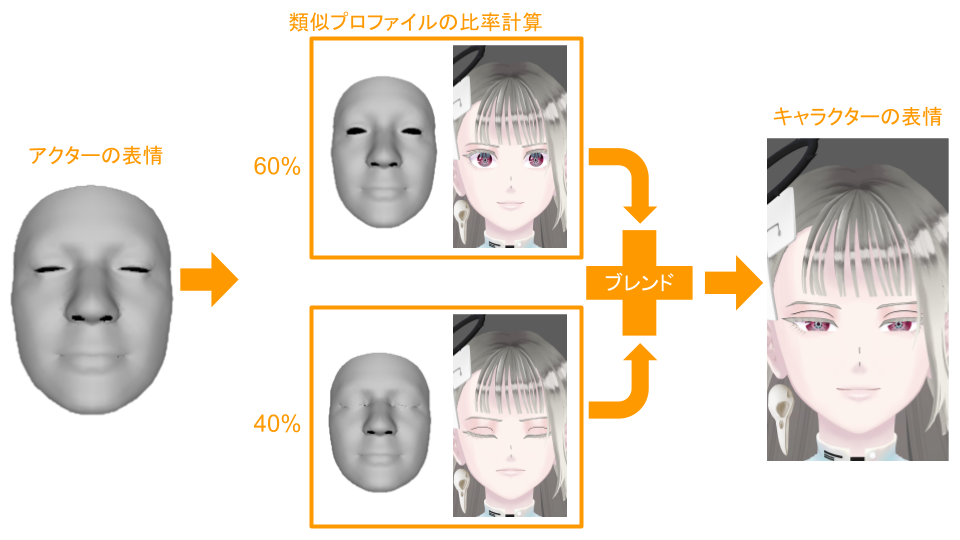
Blend and output character expressions, based on the ratio of similar profiles.