Creating profiles
Before creating profiles…
Open an analysis video
Open the video window by clicking on Window →Videos to open and import the video you want to analyze
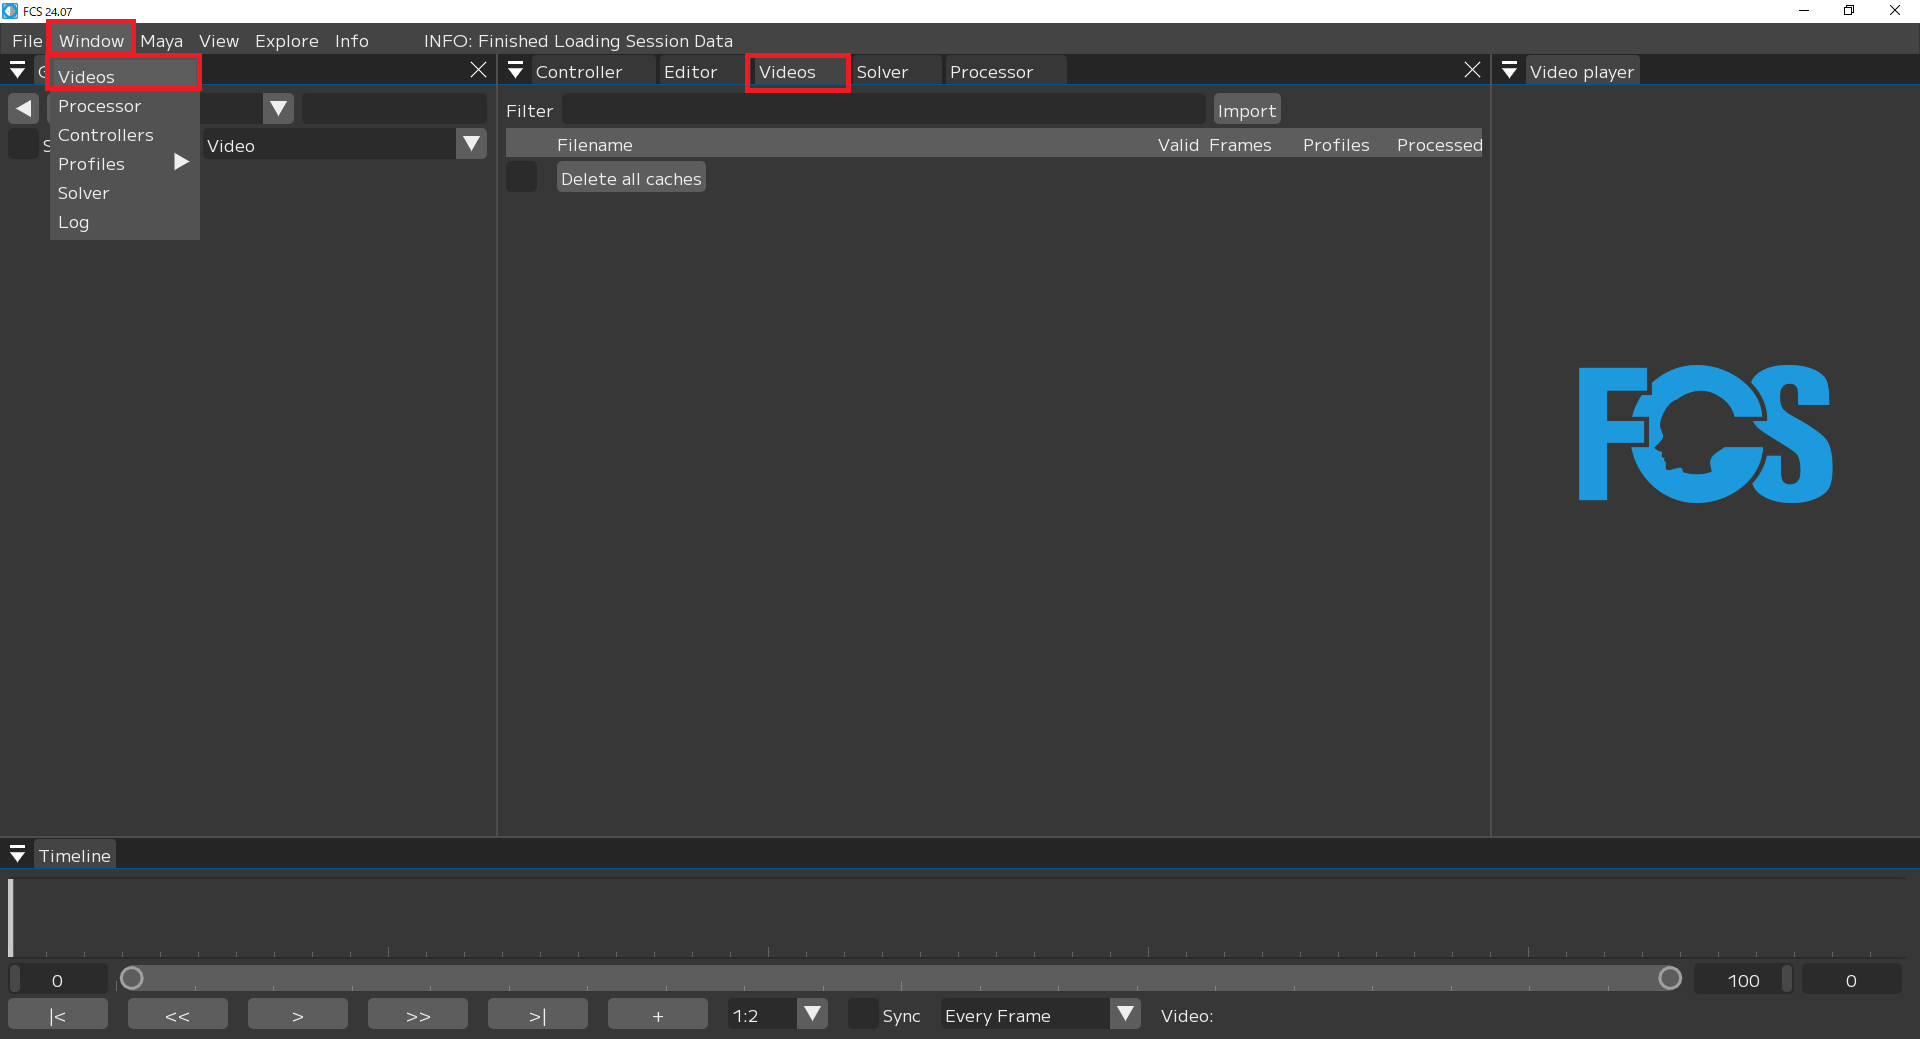
Windows→Videos

Import
A popup will appear
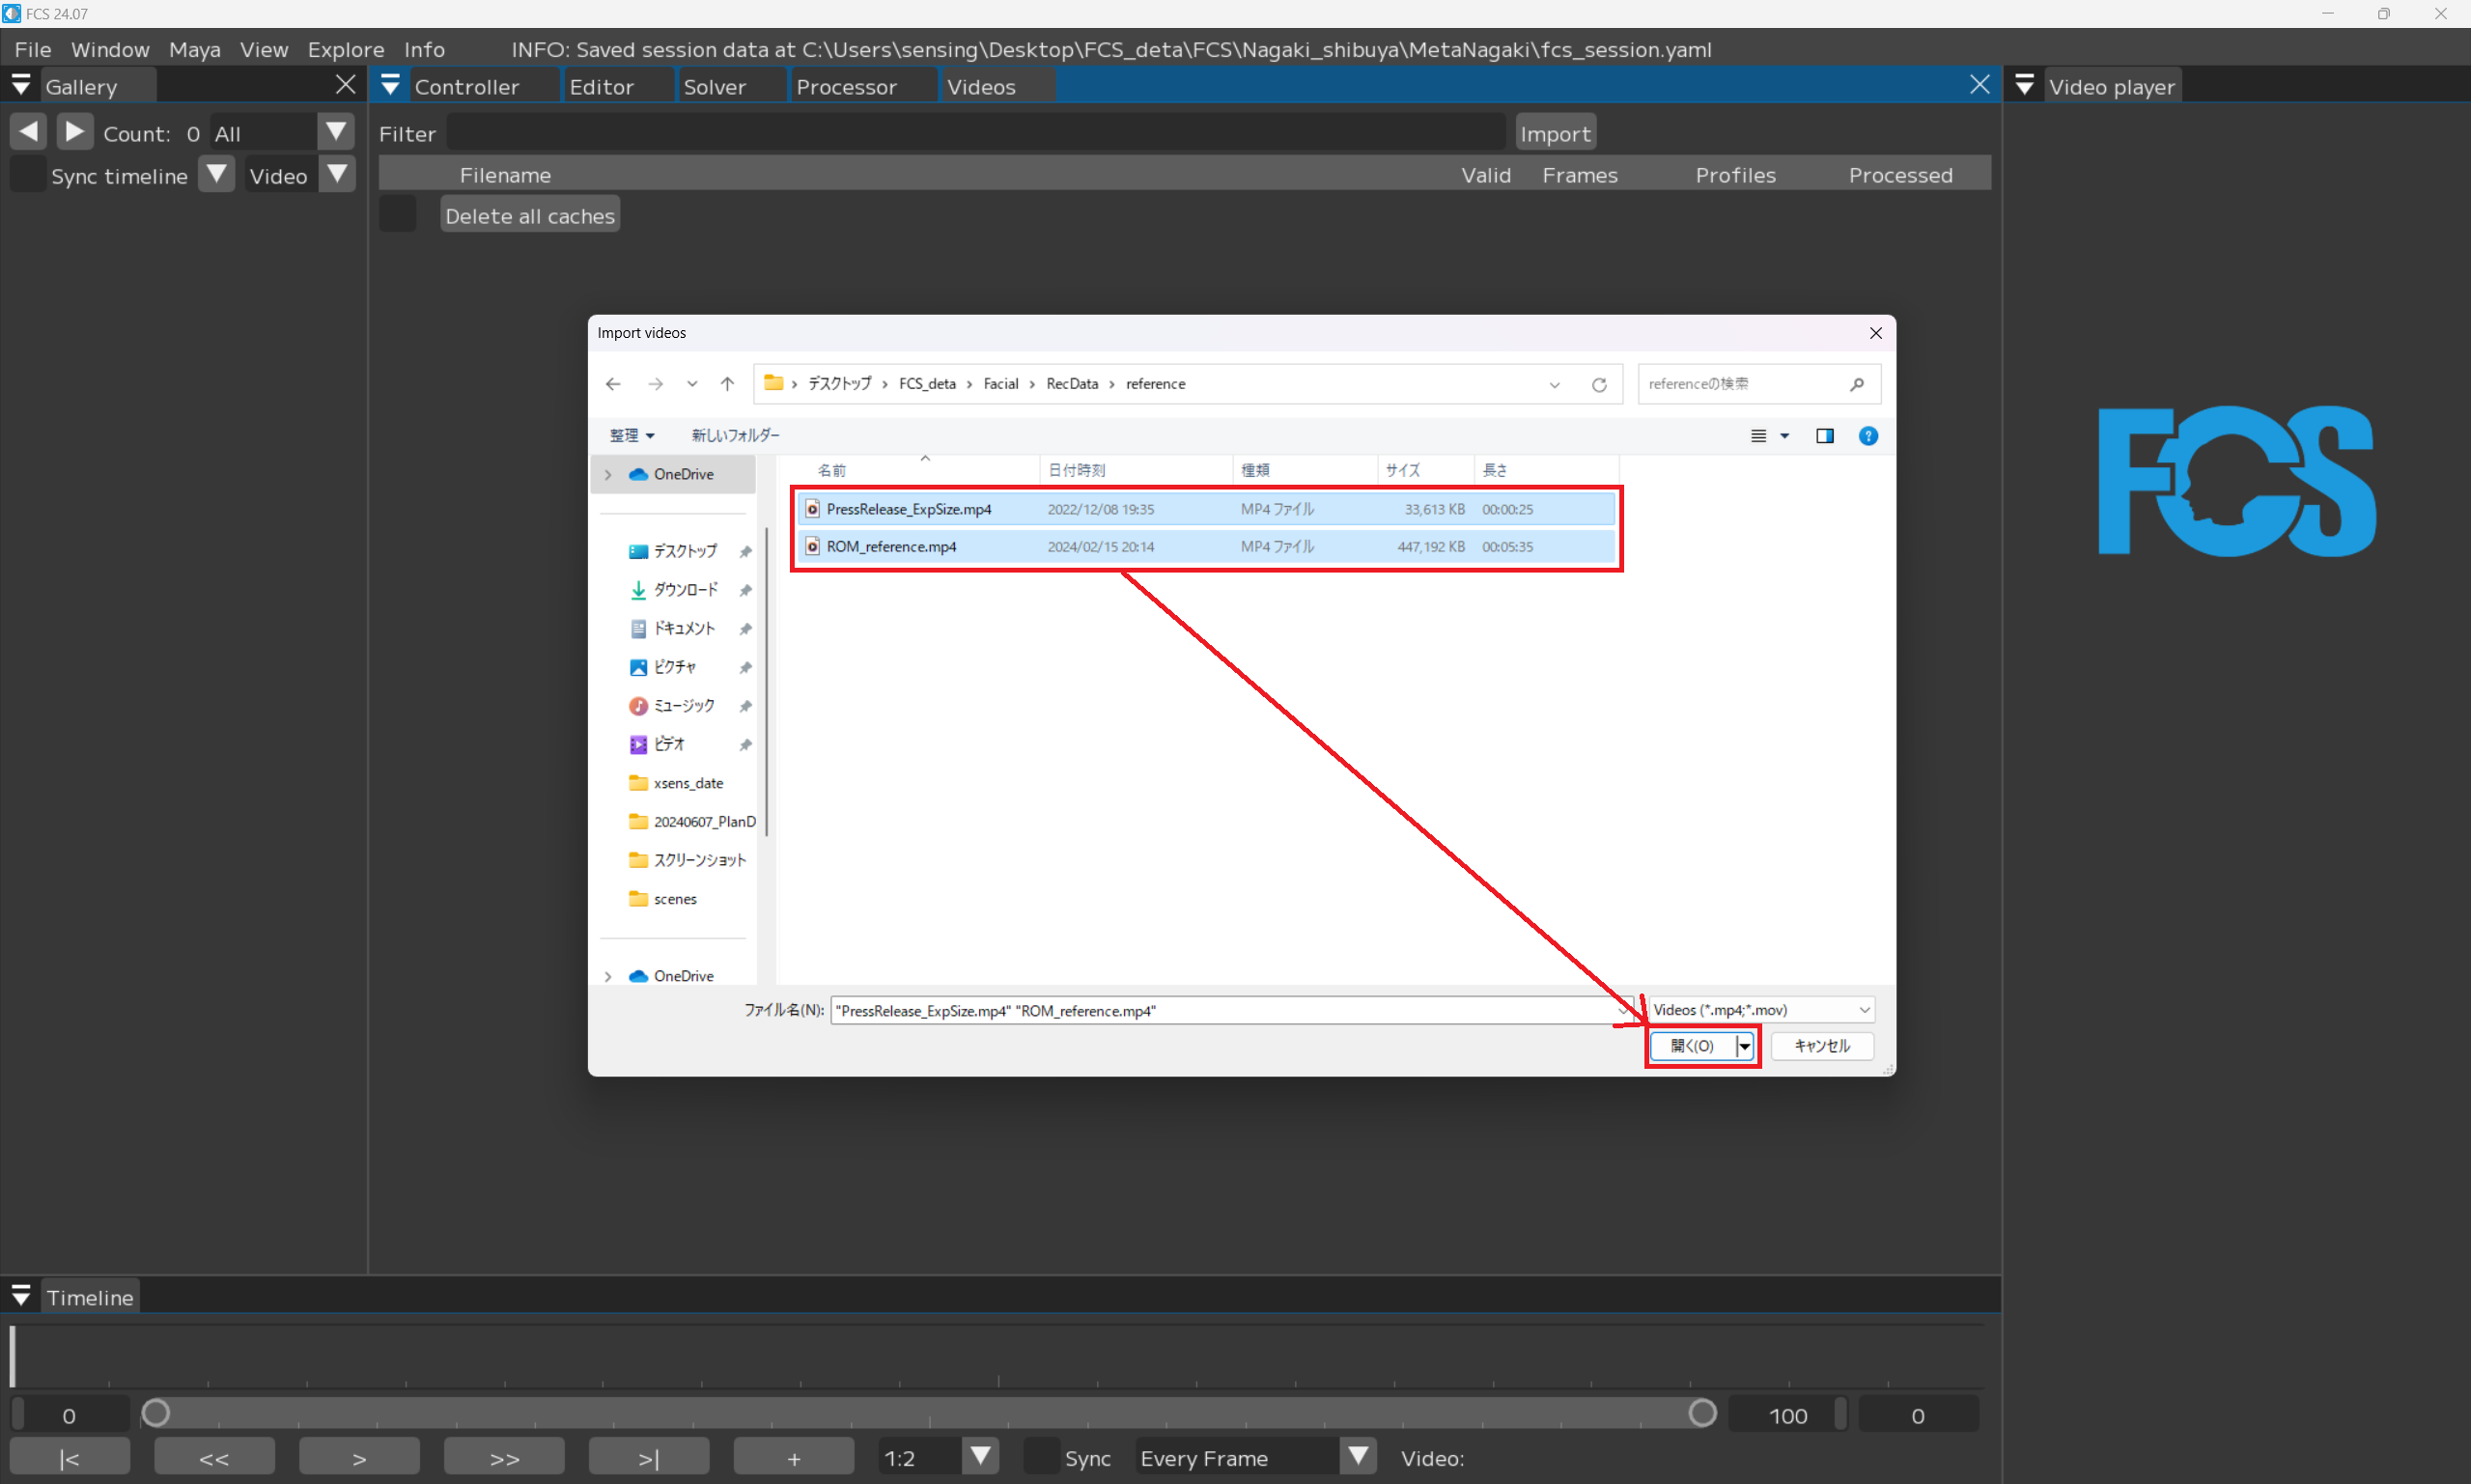
Select video(s) to import
Note
You can import multiple videos at the same time by Shift+click
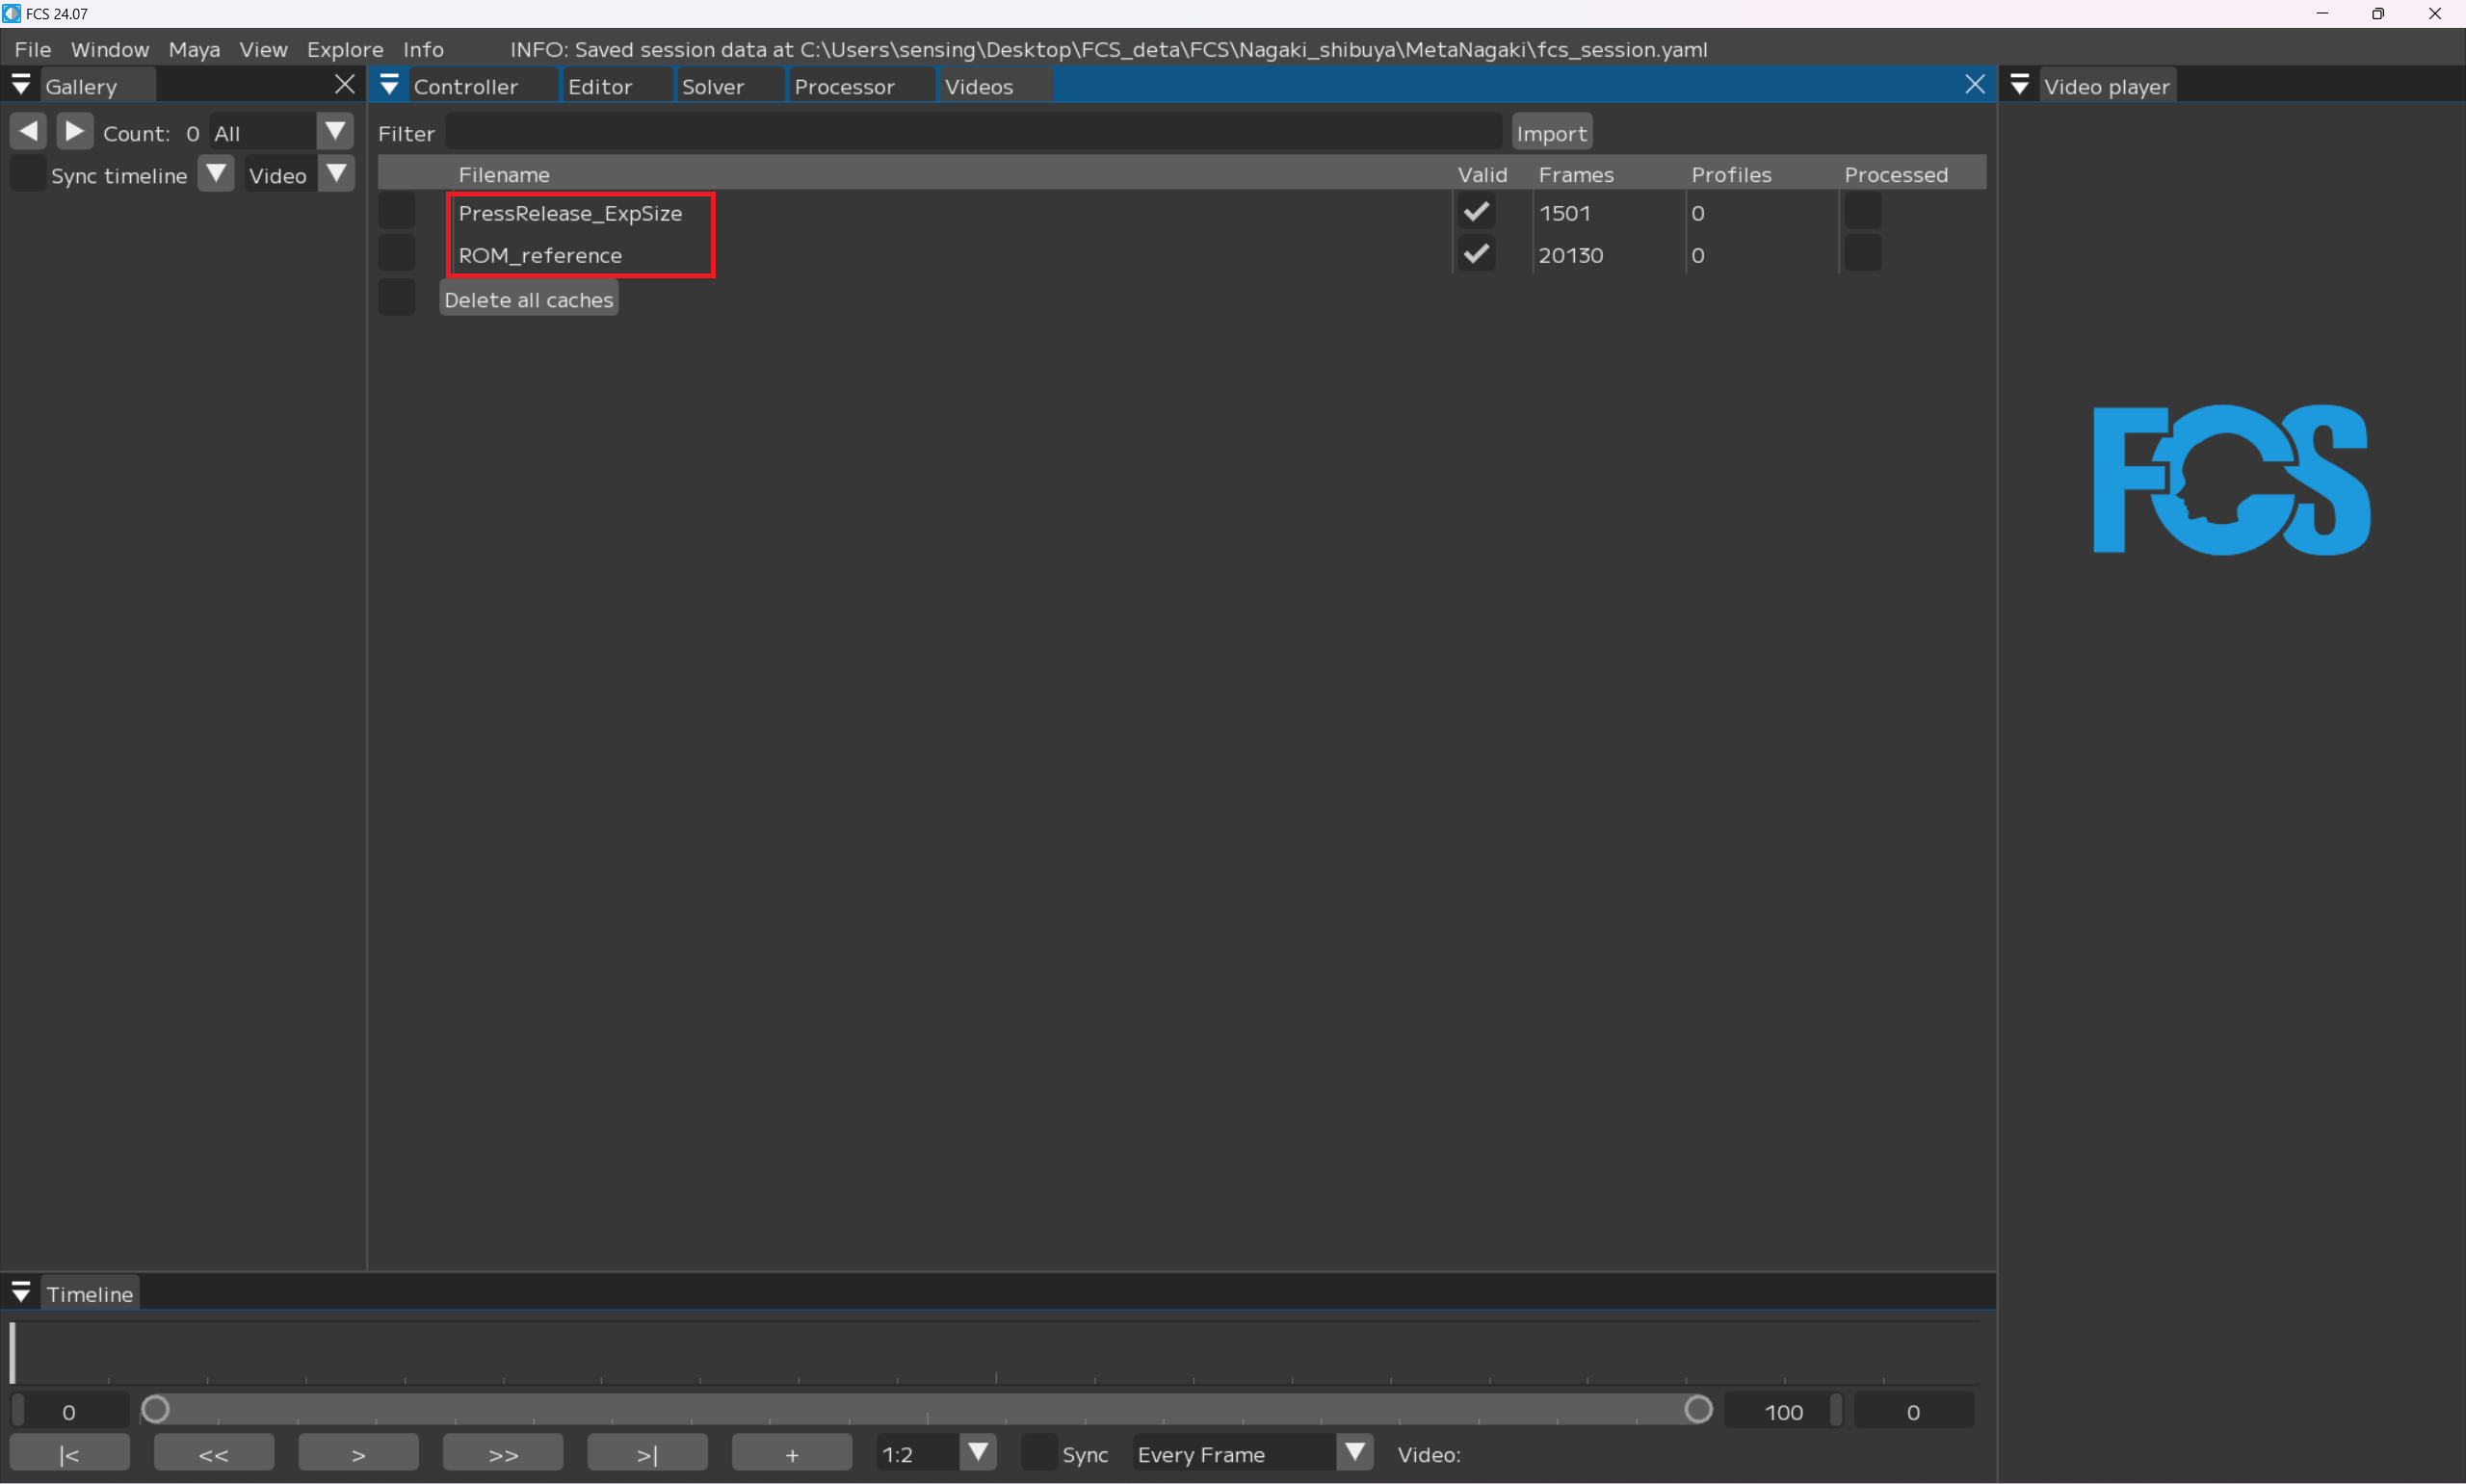
The video you want to analyze will be displayed in the video window.
Timeline

Timeline: move the bar from side to side and manually play the video
[0][20130]:You can adjust the frame size of the video
[7967]: current frame count
|< >|: Move 1 frame backward/forward.
<< >>:Jump to the registered profile
> ||:Play/stop video (pause button appears while playing)
1:2▼:Change the resolution of the displayed video (the smaller the scale, the clearer the preview; the larger the Scale, the rougher the preview)
Sync: With ☑, synchronize the timeline operations with Maya’s TimeSlider.
EveryFrame/Realtime: change the playback speed
Video: video name displayed in the video player
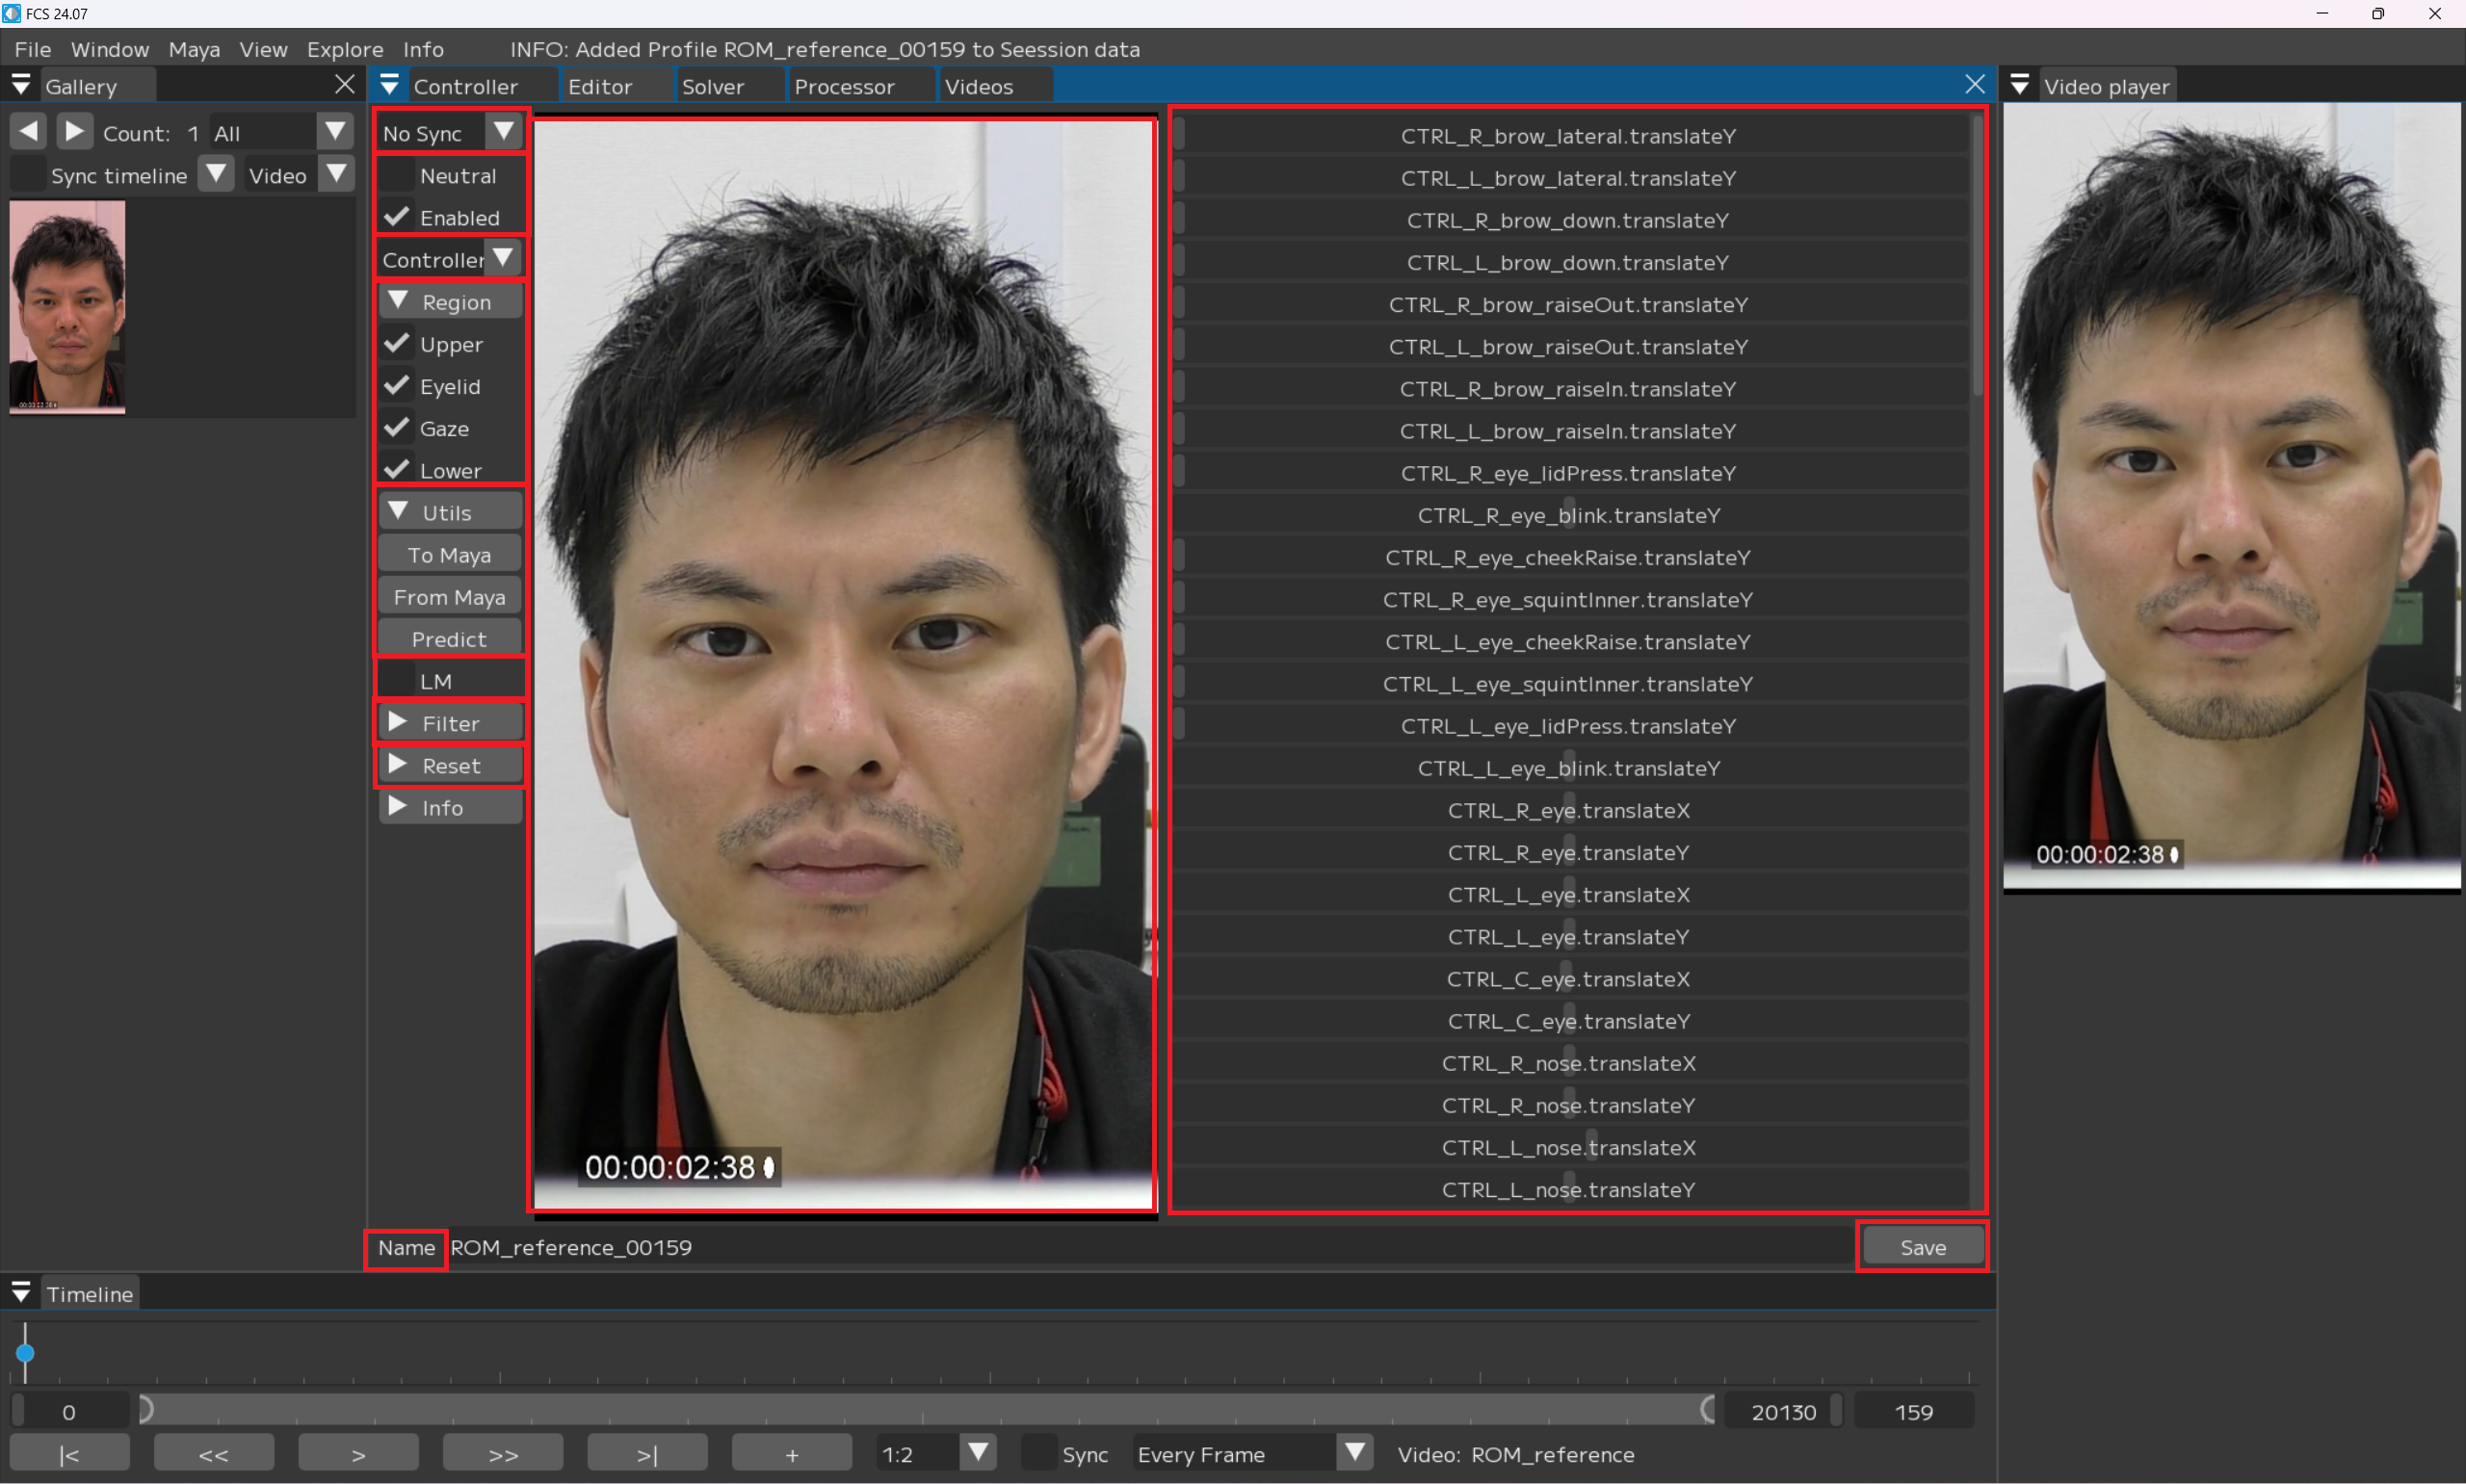
Explanation of the Editor screen
Sync:
To Maya: Transfer the registered profile information to Maya.
From Maya at save: When saving, retrieve the adjustment data from Maya and reflect it in FCS.
Both: Enable features from both and to.
No Sync: Do not sync FCS and Maya.
Note
This page describes how to add and edit profiles. You can chose either Maya or FCS as a base for adjusting facial expressions, but we recommend using Both for the first time.
Neutral: Always register one as a default expression
Enabled:Use as material to analyze
Controller▼
Controller: controller display becomes name
Value: controller display becomes a number
▼Region
Upper/Eyelid/Gaze/Lower:Register adjusted information
▼Utils
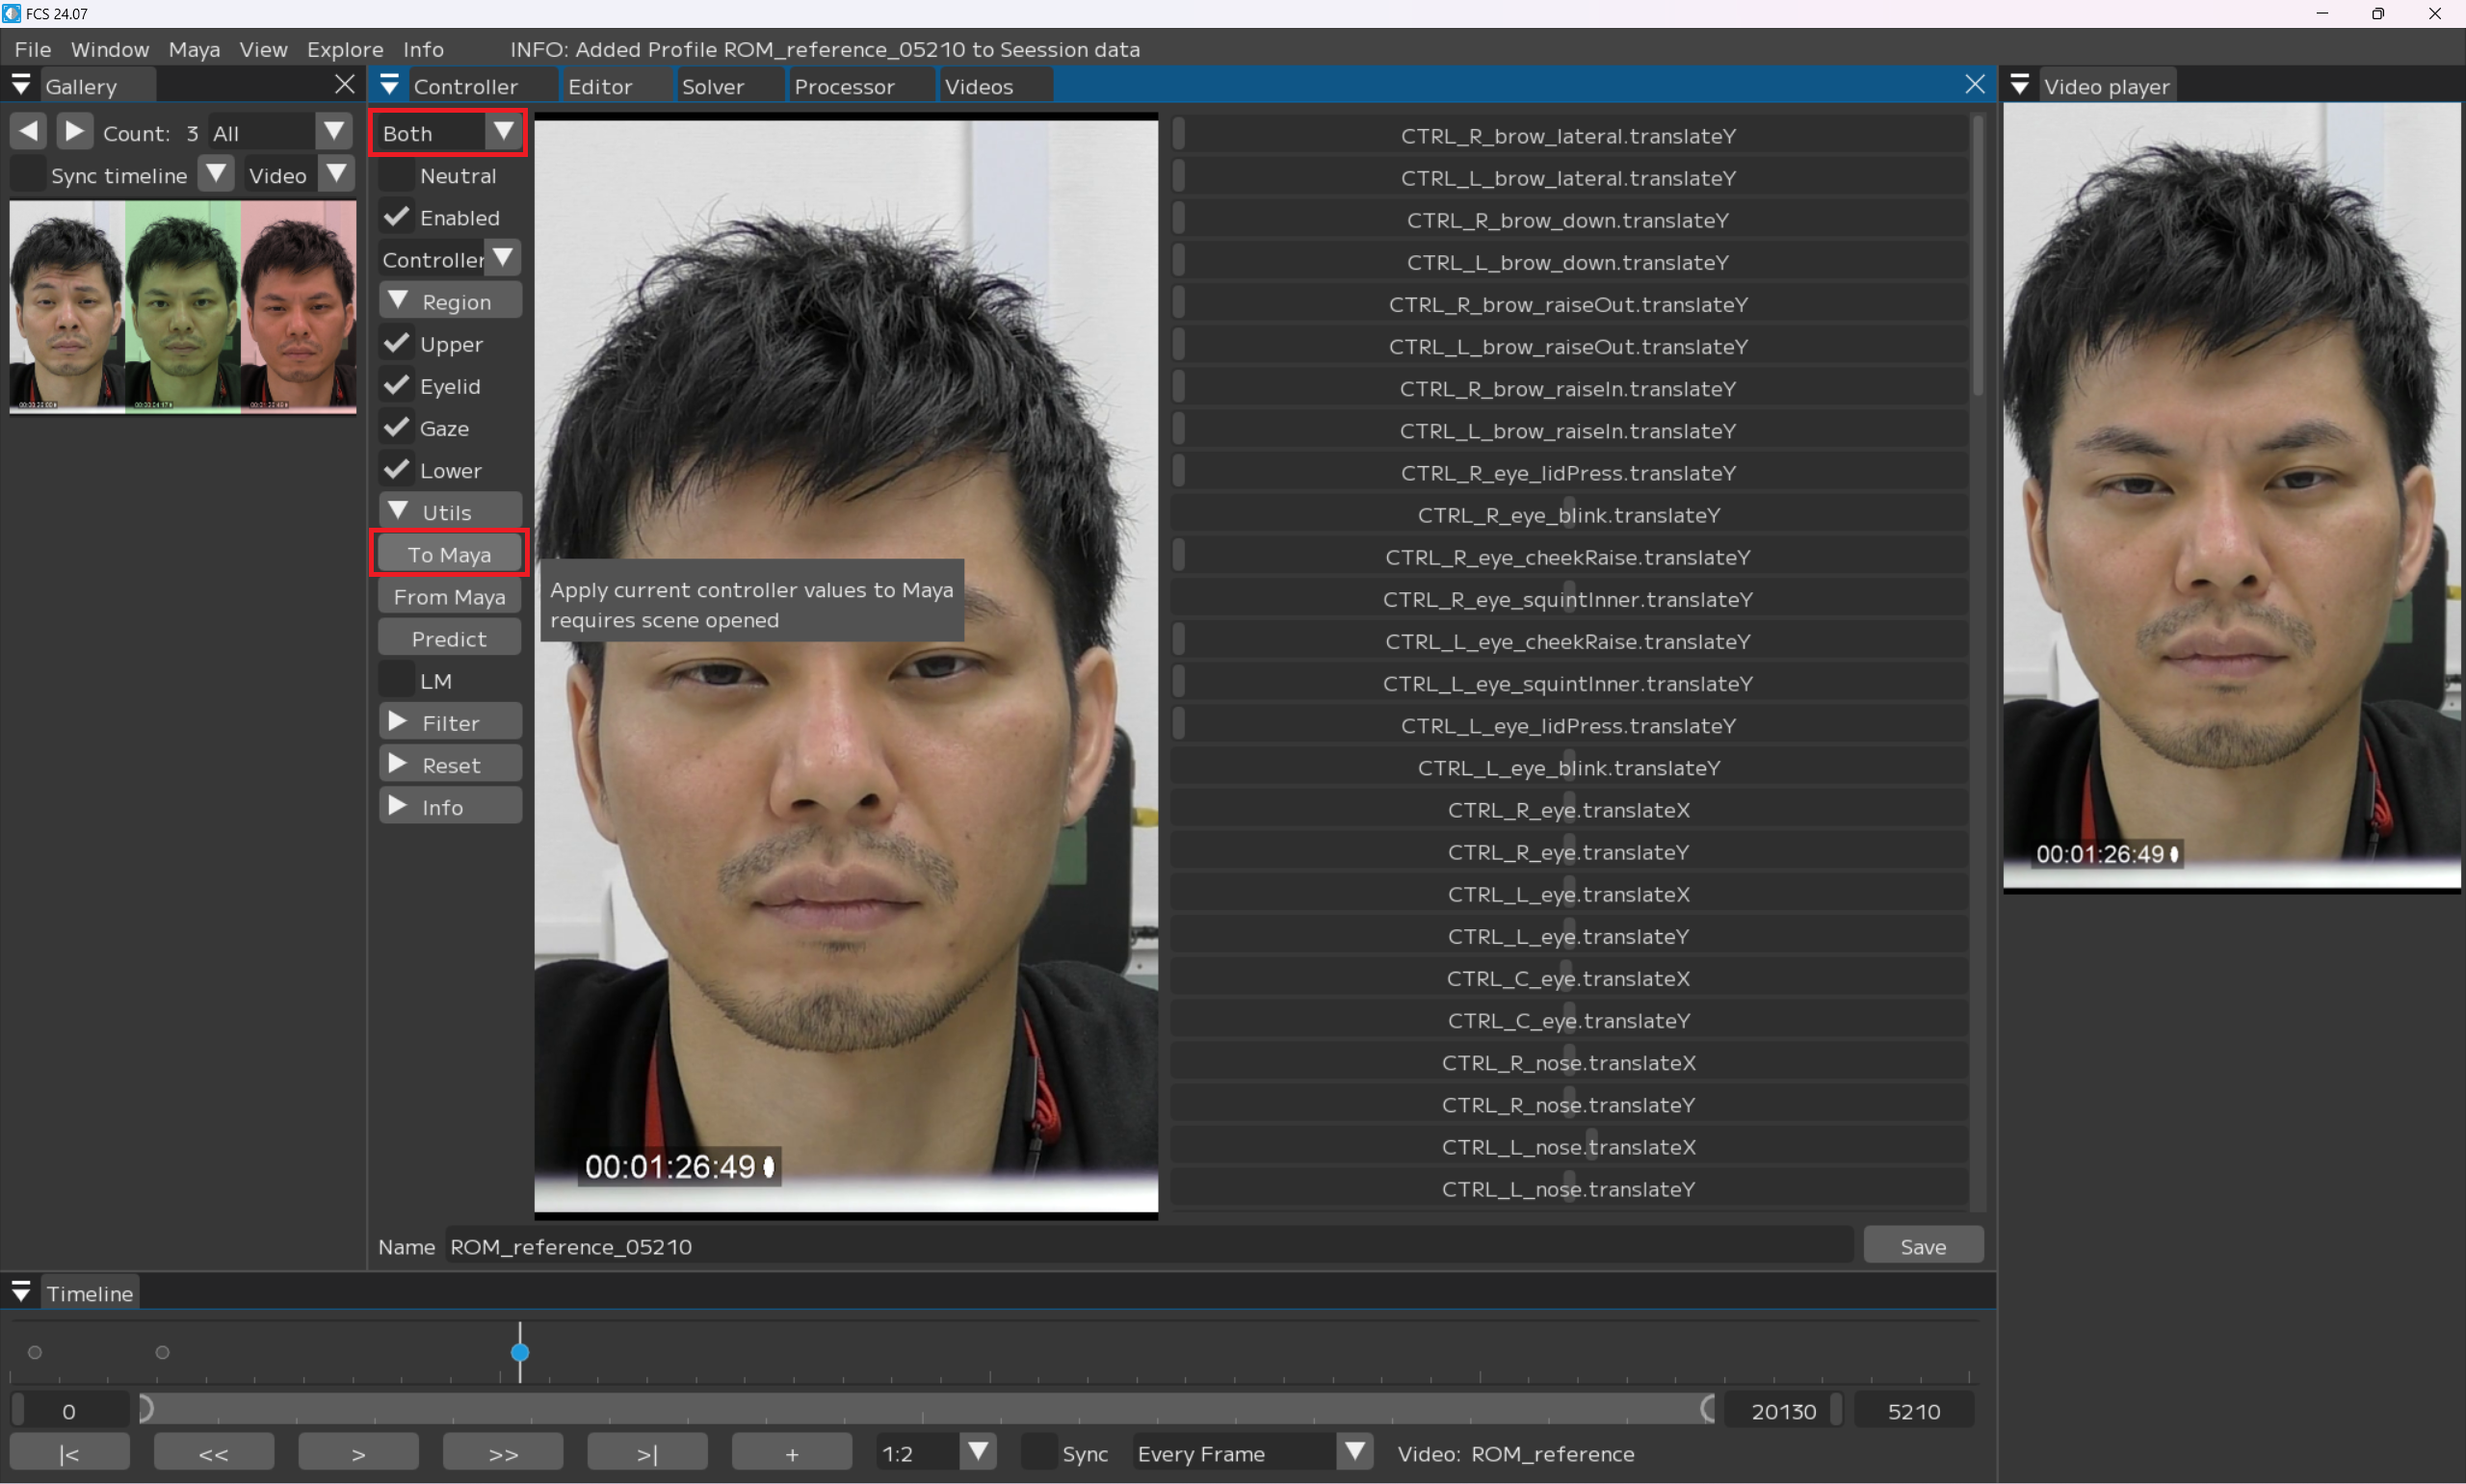
To Maya: send adjusted values on FCS to Maya
From Maya: send the adjusted values in Maya to FCS
Predict: function to analyze facial expressions from images and map them to 3D models in Maya
LM: display Landmark
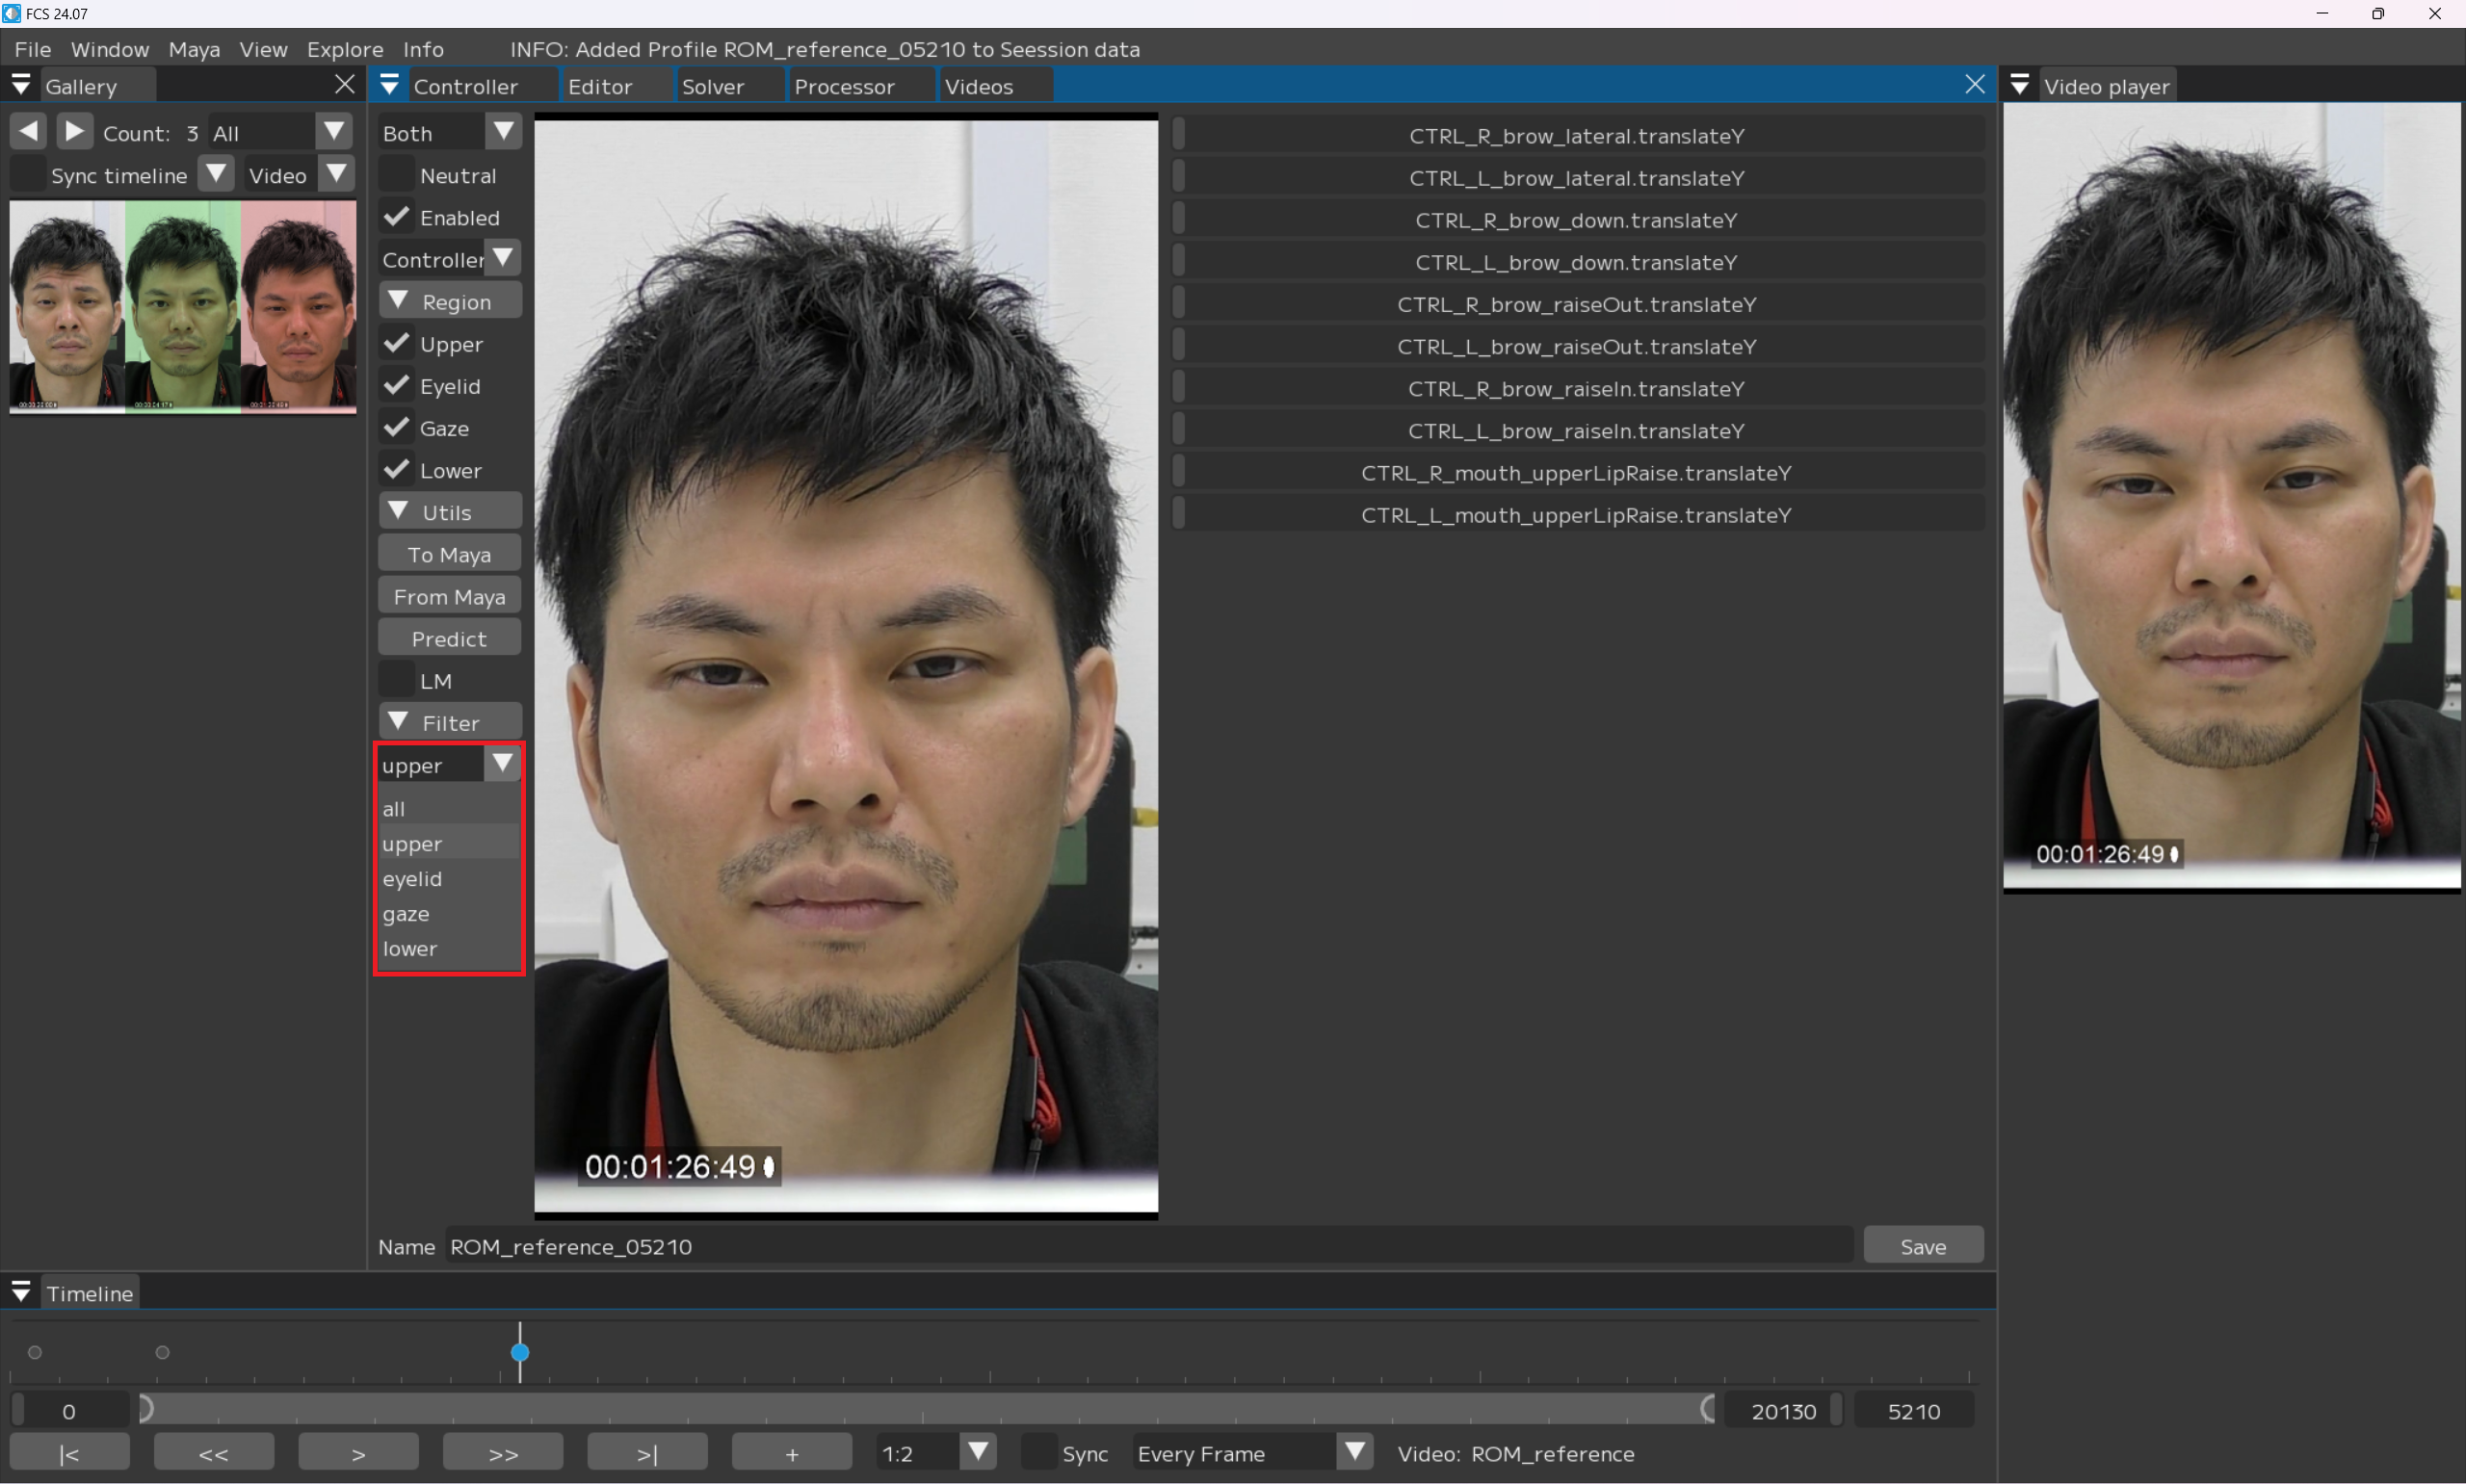
▼Filter
▼all/Upper/Eyelid/Gaze/Lower: display controllers by selecting items
[ ]: display controllers by entering characters
▼Reset: delete the entered information
Name: name to register the profile
Save: save the changed information
Image segment: image added by clicking + from Timeline is displayed
Controller: controllers registered in Controller Info are displayed
Gallery

作成したProfileが表示されるウィンドウ
←→:1列に表示するprofileの数を変更する。◀を押すと少なく、→を押すと多くなる。最小3、最大10。 Count:○○:登録しているprofileの総数
All↓:該当する項目を絞り込む
All: Display all profiles
Enabled: Display profiles used for analysis. Profiles with a check in the Enabled box ☑ will be targeted.
Disabled: Display profiles not used for analysis. Profiles registered without a check in the Enabled box ☑ will be targeted.
Default: Display profiles with default values.
Not Default: Display profiles with values that are not set to default.
Neutral: Display profiles registered with the Neutral box checked.
(Region) Enabled: Display profiles registered with a check in the (Region) Enabled box ☑.
(Region) Disabled: Display profiles registered without a check in the (Region) Disabled box ☑.
Sync timeline ☑: When a profile is selected while the same video as the registered profile is open, it will jump to the corresponding frame.
↑↓:ソートの昇順 降順を変更する
Video ▼: Sorting function.
Video: Sort profiles by Name.
Created At: Sort profiles in order of creation date and time.
Saved At: Sort profiles in order of the date and time they were saved.
(controller name): Sort by the values registered for the corresponding controller.
Selected images
Green: Profile registered with the “Neutral” box checked ☑.
Red: Profile with default or unedited values.
Blue: Currently selected (being edited) profile.
Black: Profile registered with the “Enabled” box unchecked ☑ and marked as “Disabled.”
White: Profile registered after retargeting.
Creating profiles
By adding various profiles, the accuracy of the analysis improves. However, simply increasing the number of profiles is not enough. If the controller values differ for similar expressions, it can introduce noise, so attention must be paid. Additionally, you need to create at least one profile for each video being analyzed.
Note
We recommend creating about 50 profiles with ROM (Range of Motion). For the expression of ROM, please refer to the starter kit.
Note
It is generally recommended to register all regions in a profile, but there are some exceptions. Please refer to “Note: When Creating Profiles: Gaze Registration for Closed or Half-Closed Eyes.”
Load the video you want to analyze:
Right-click on the name of the opened video file.
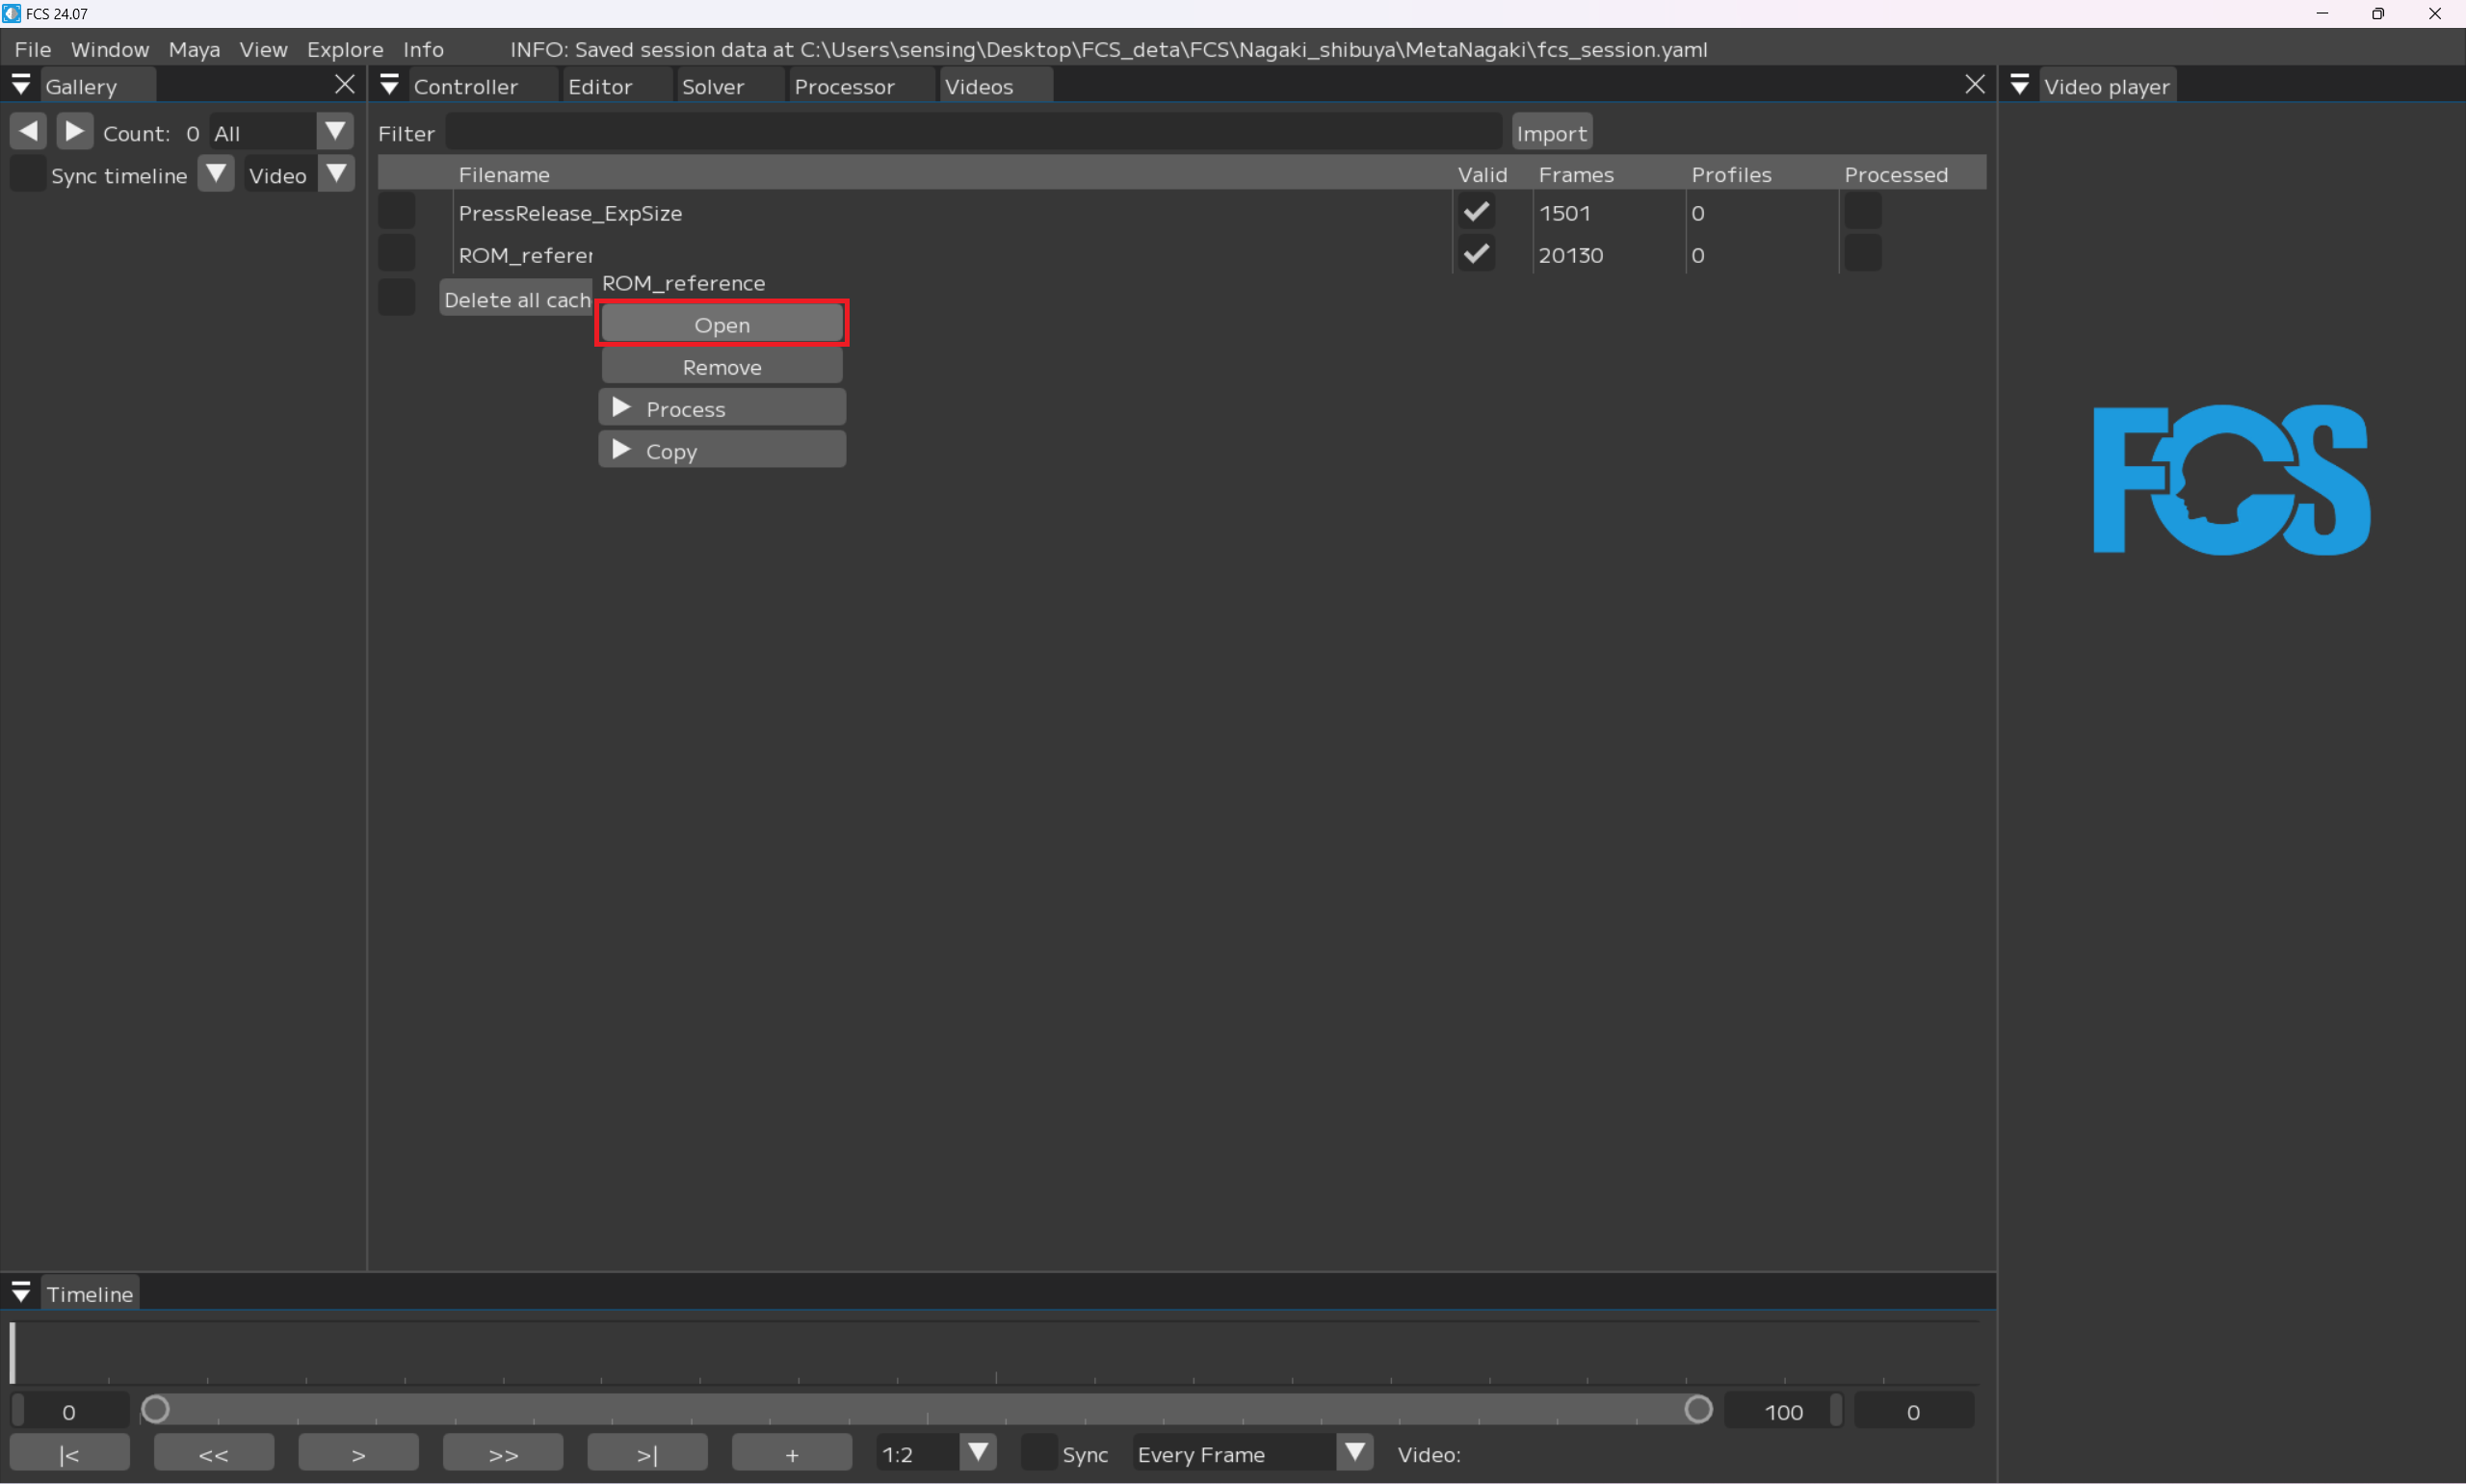
Open
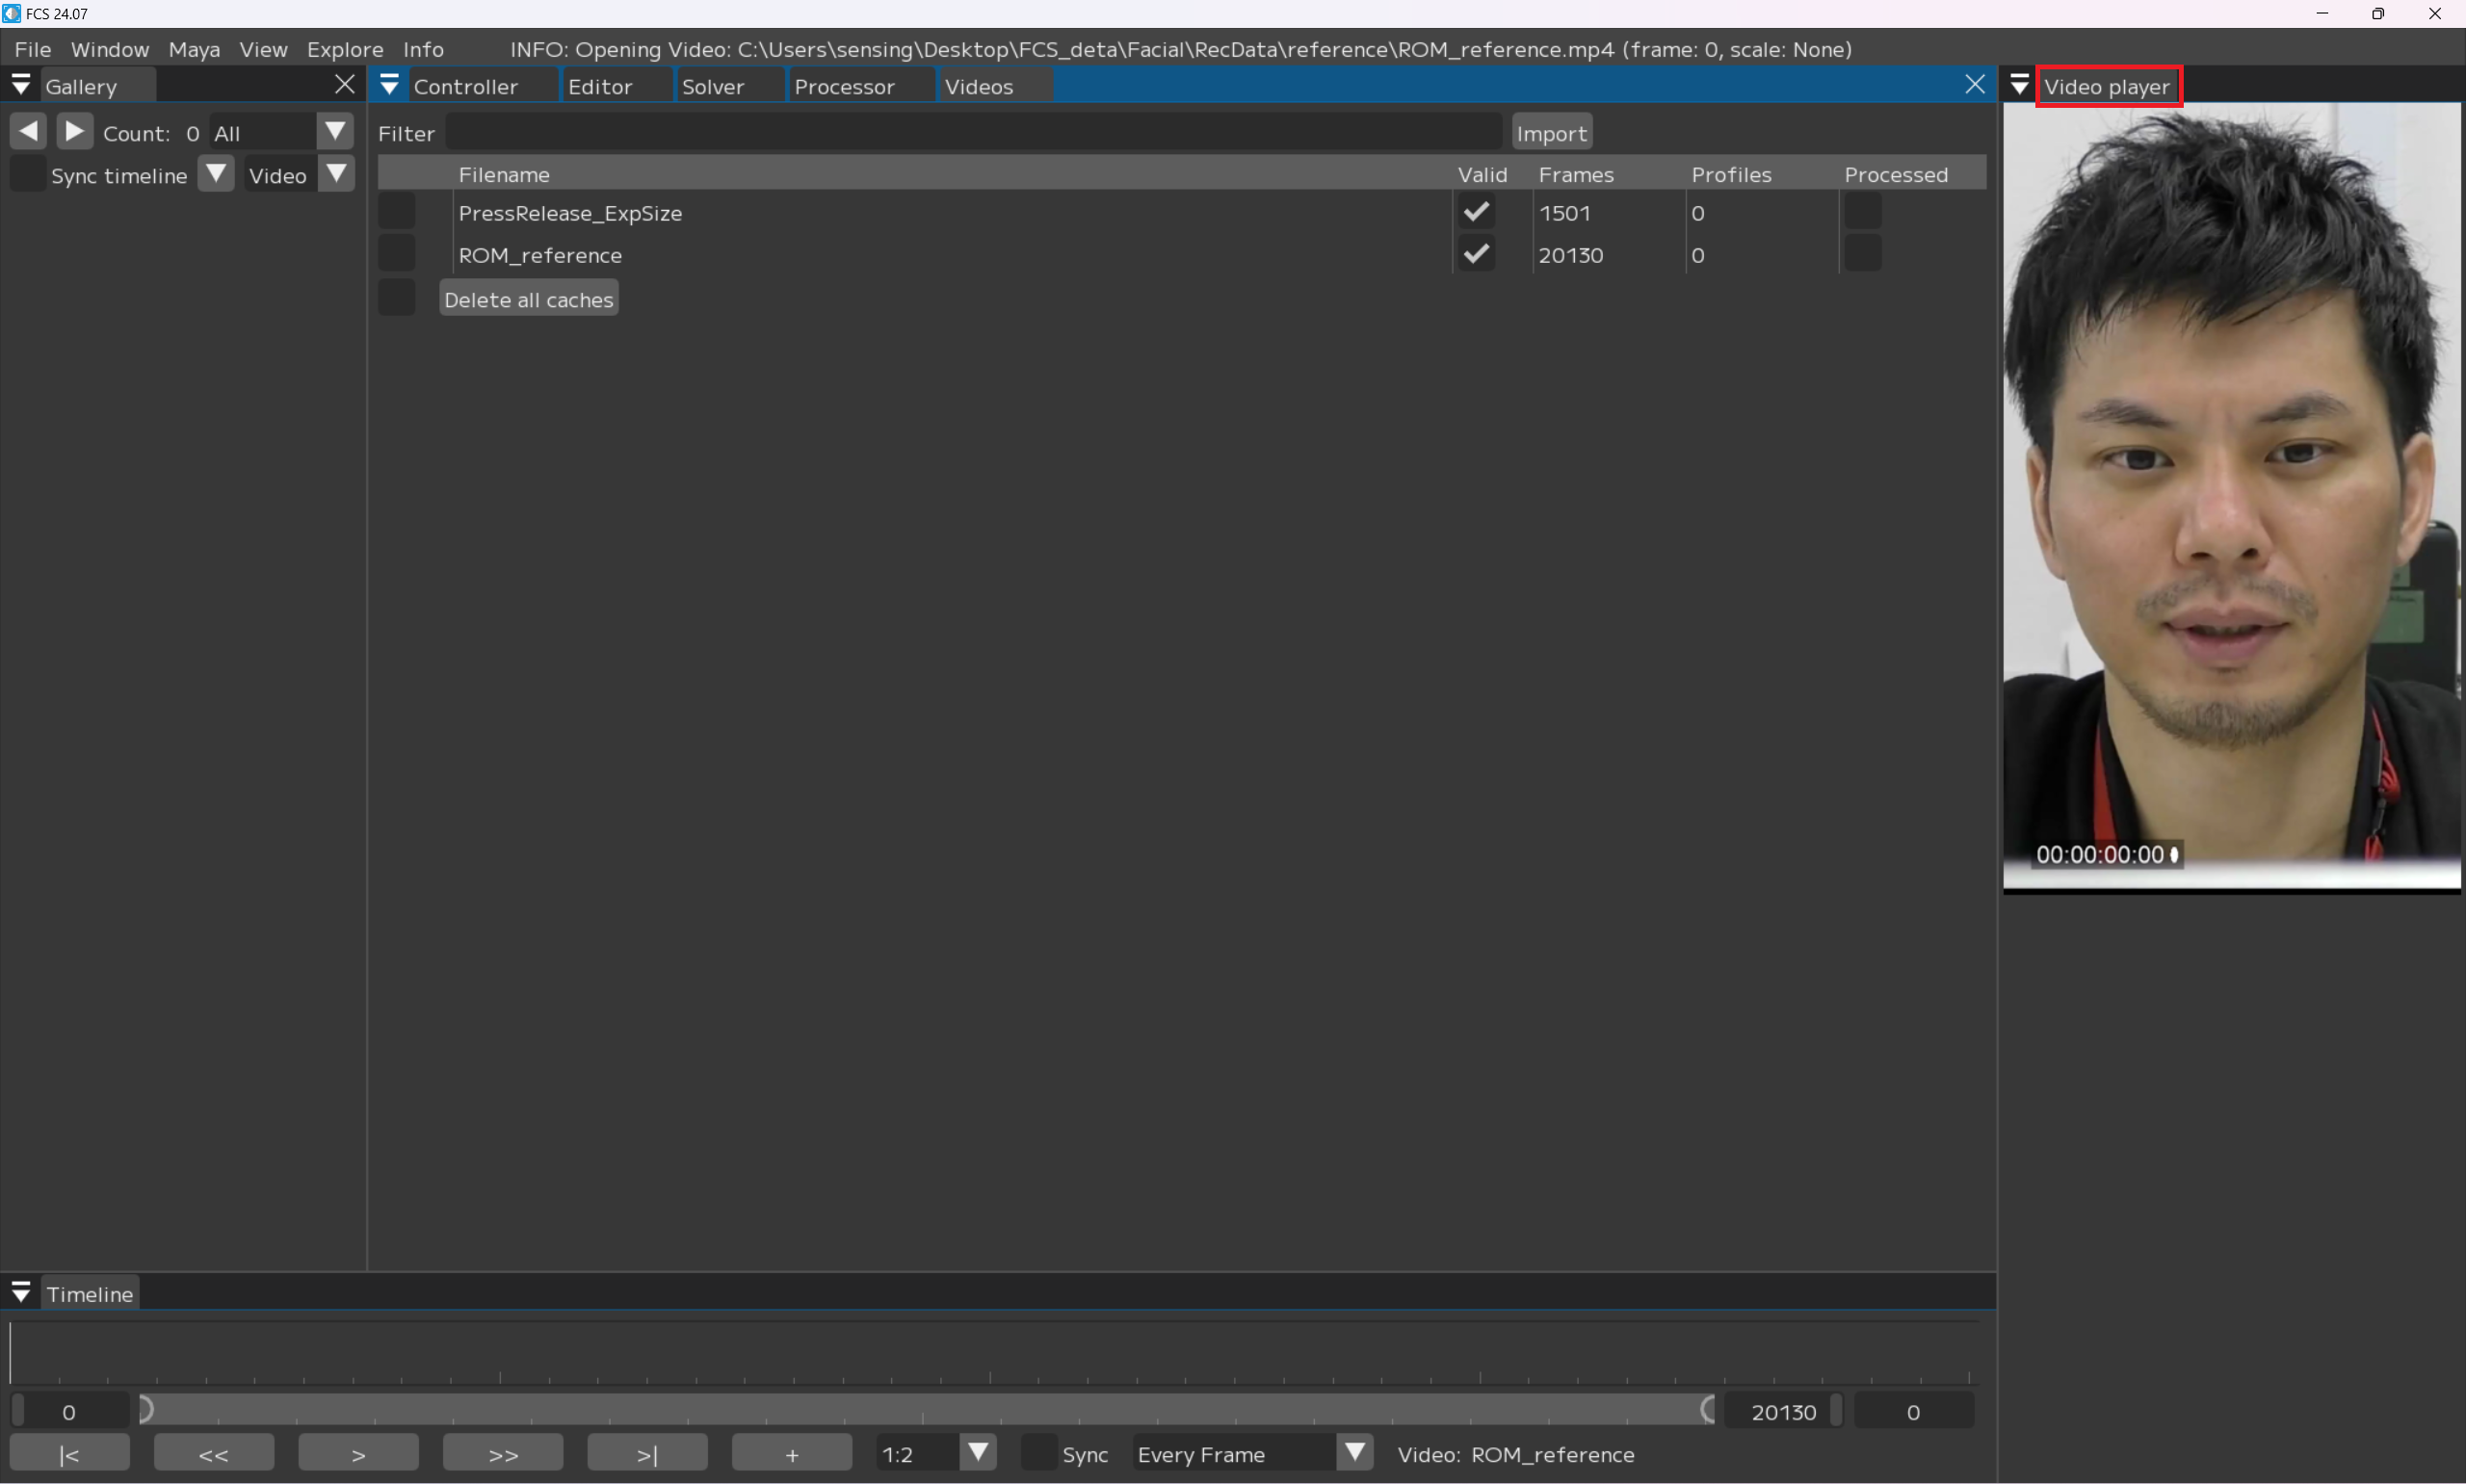
VideoPlayerに動画が表示されます
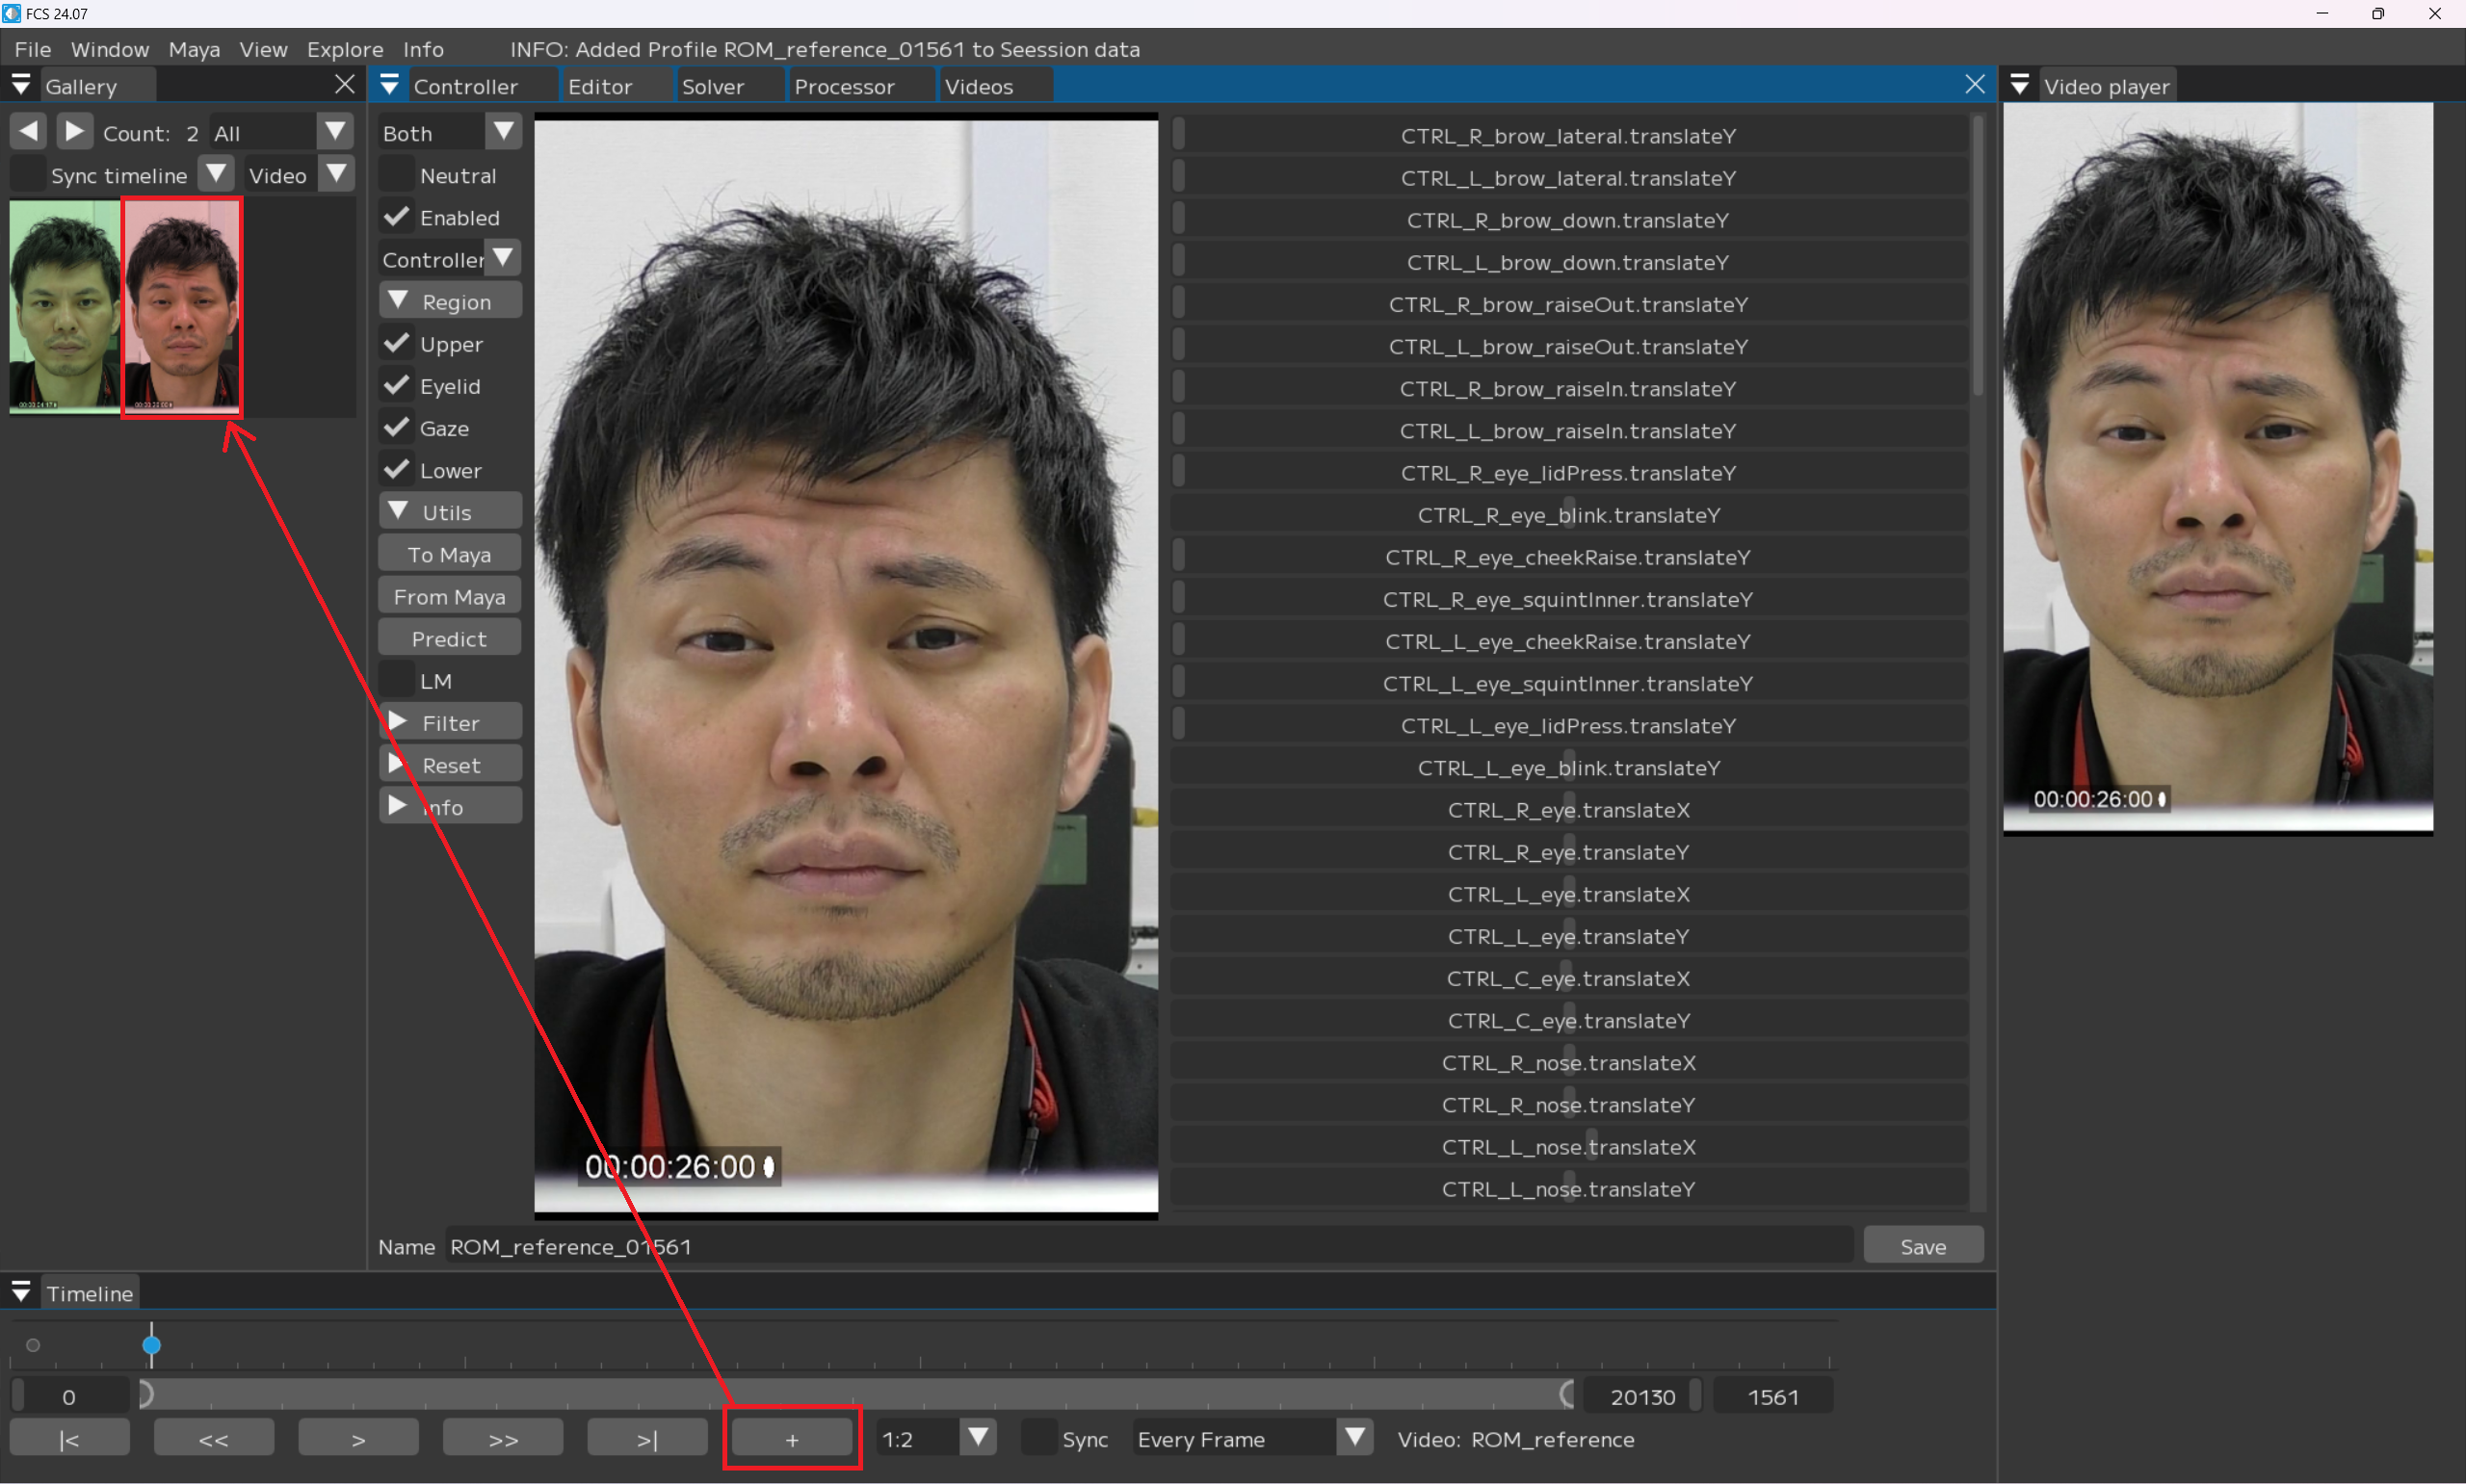
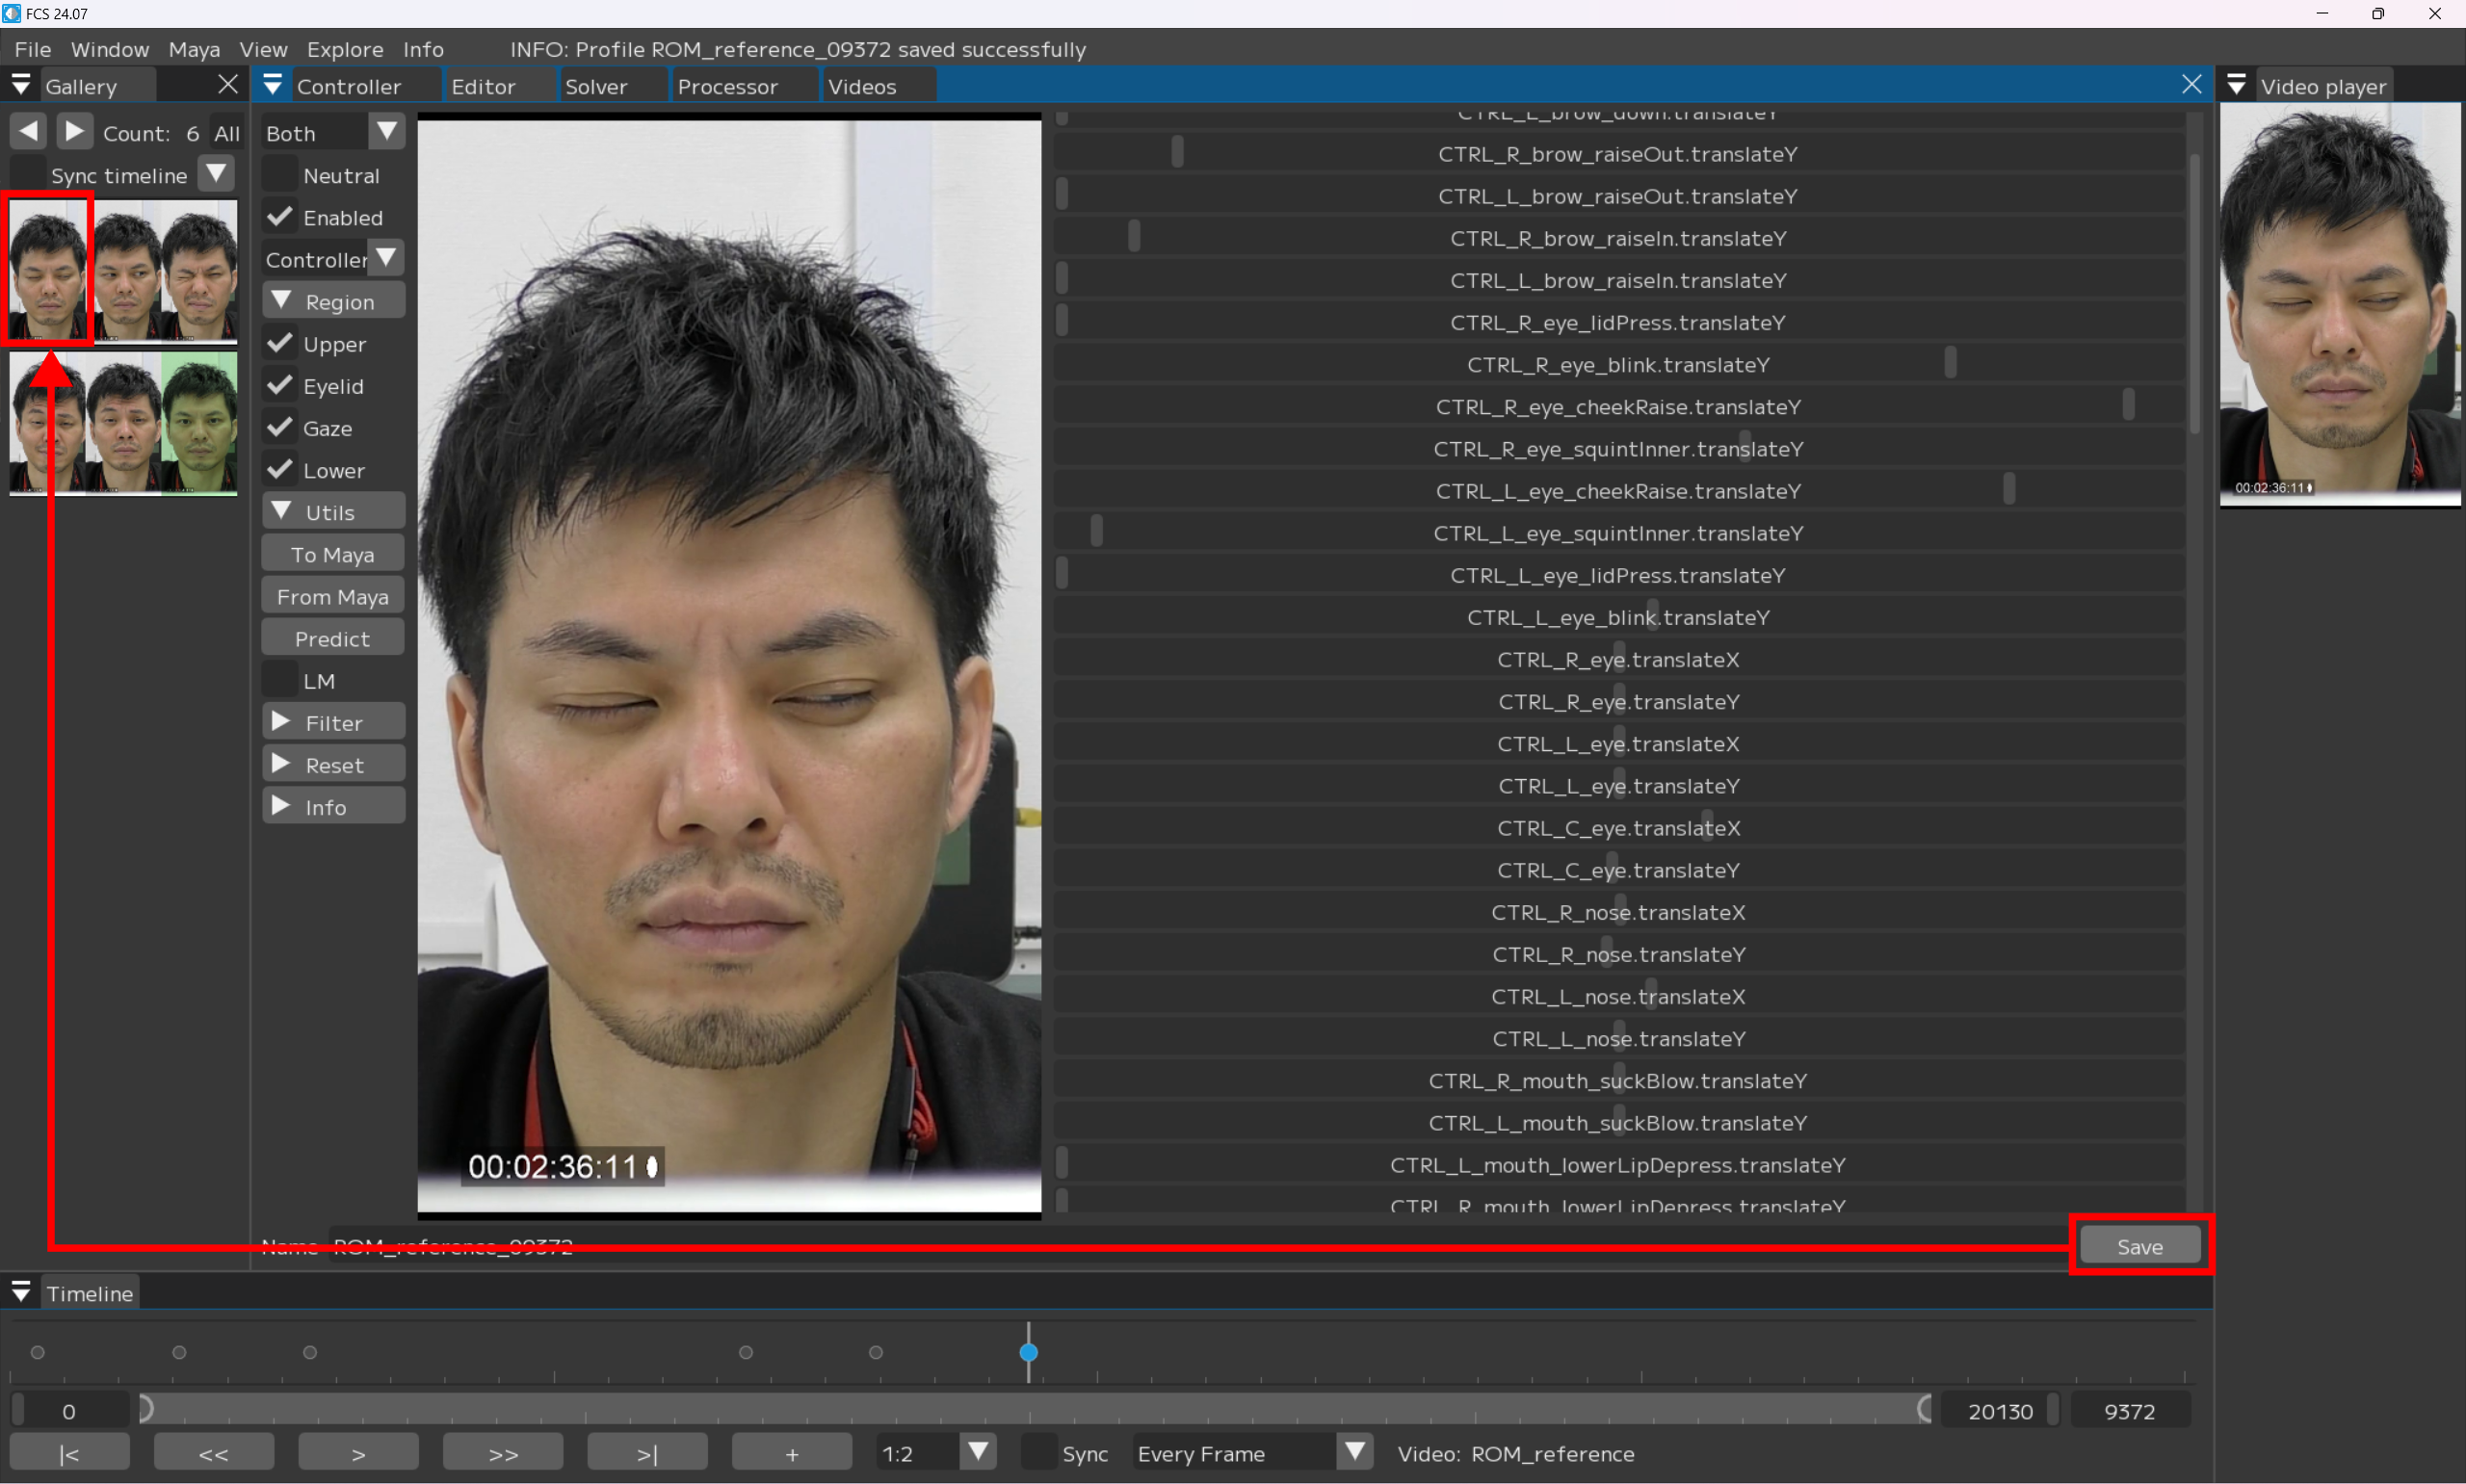
Adding Profile:
On the VideoTimeline window,
move the slider and stop at the frame where you want to register the expression.
press +
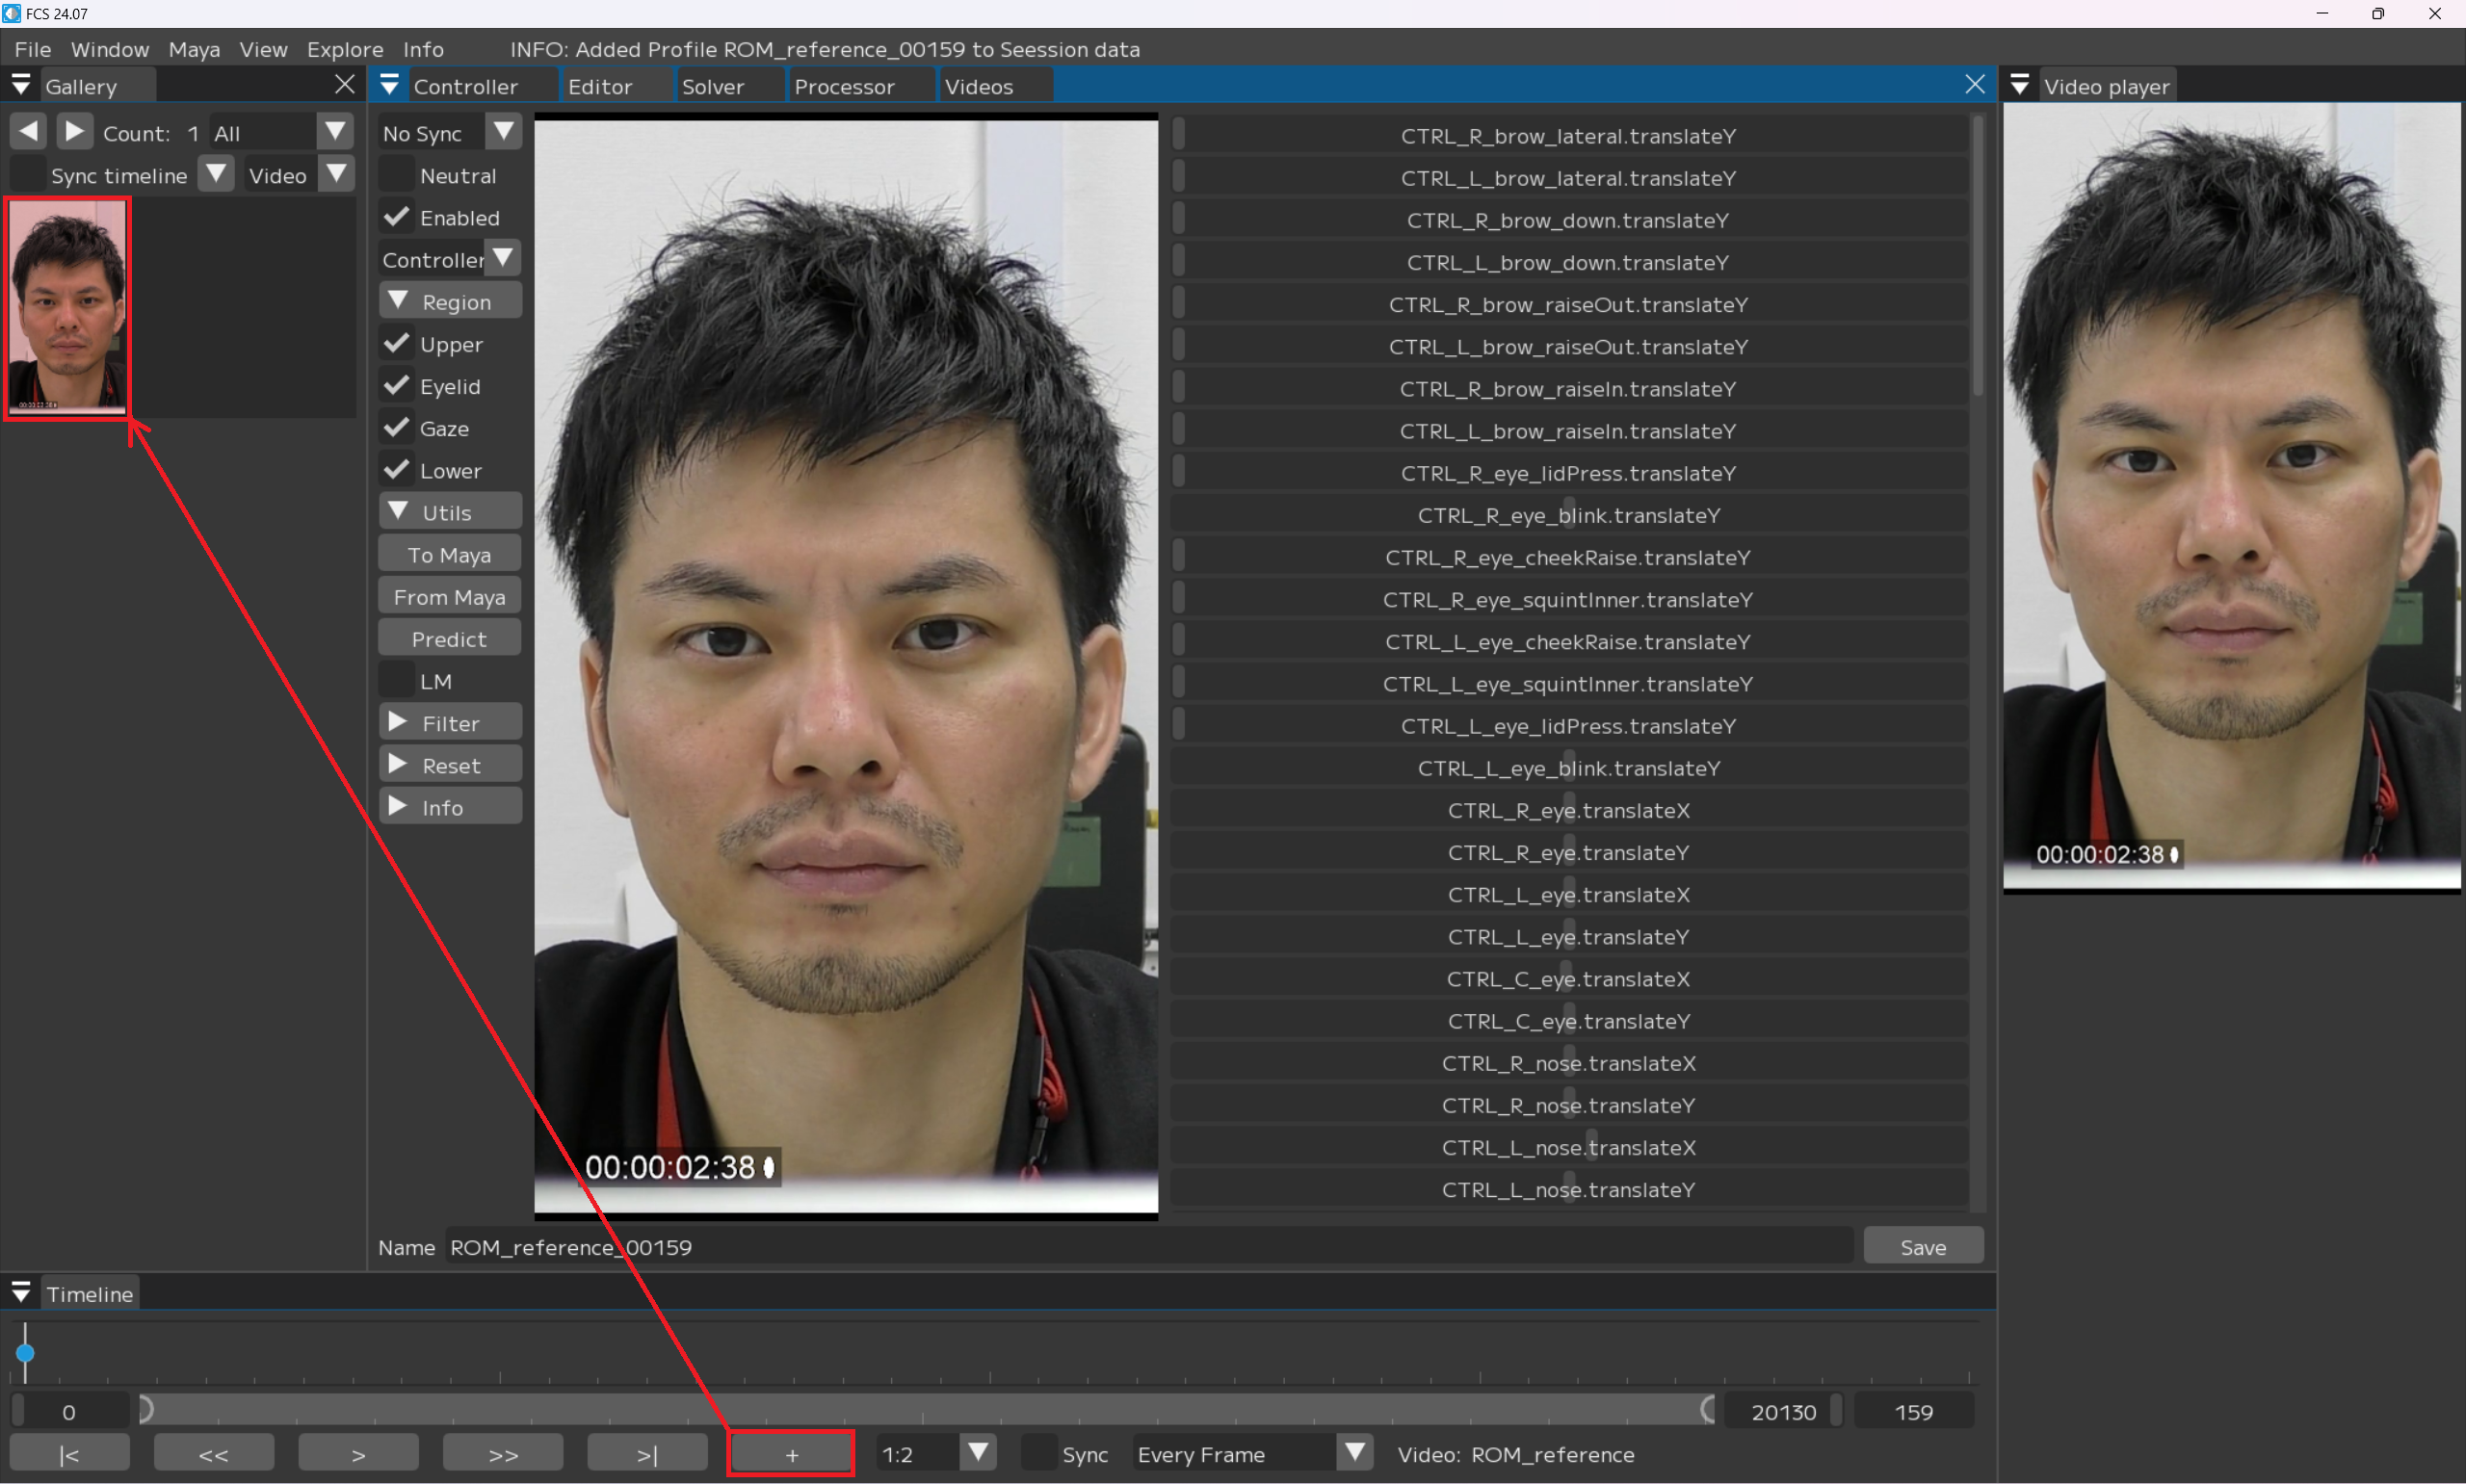
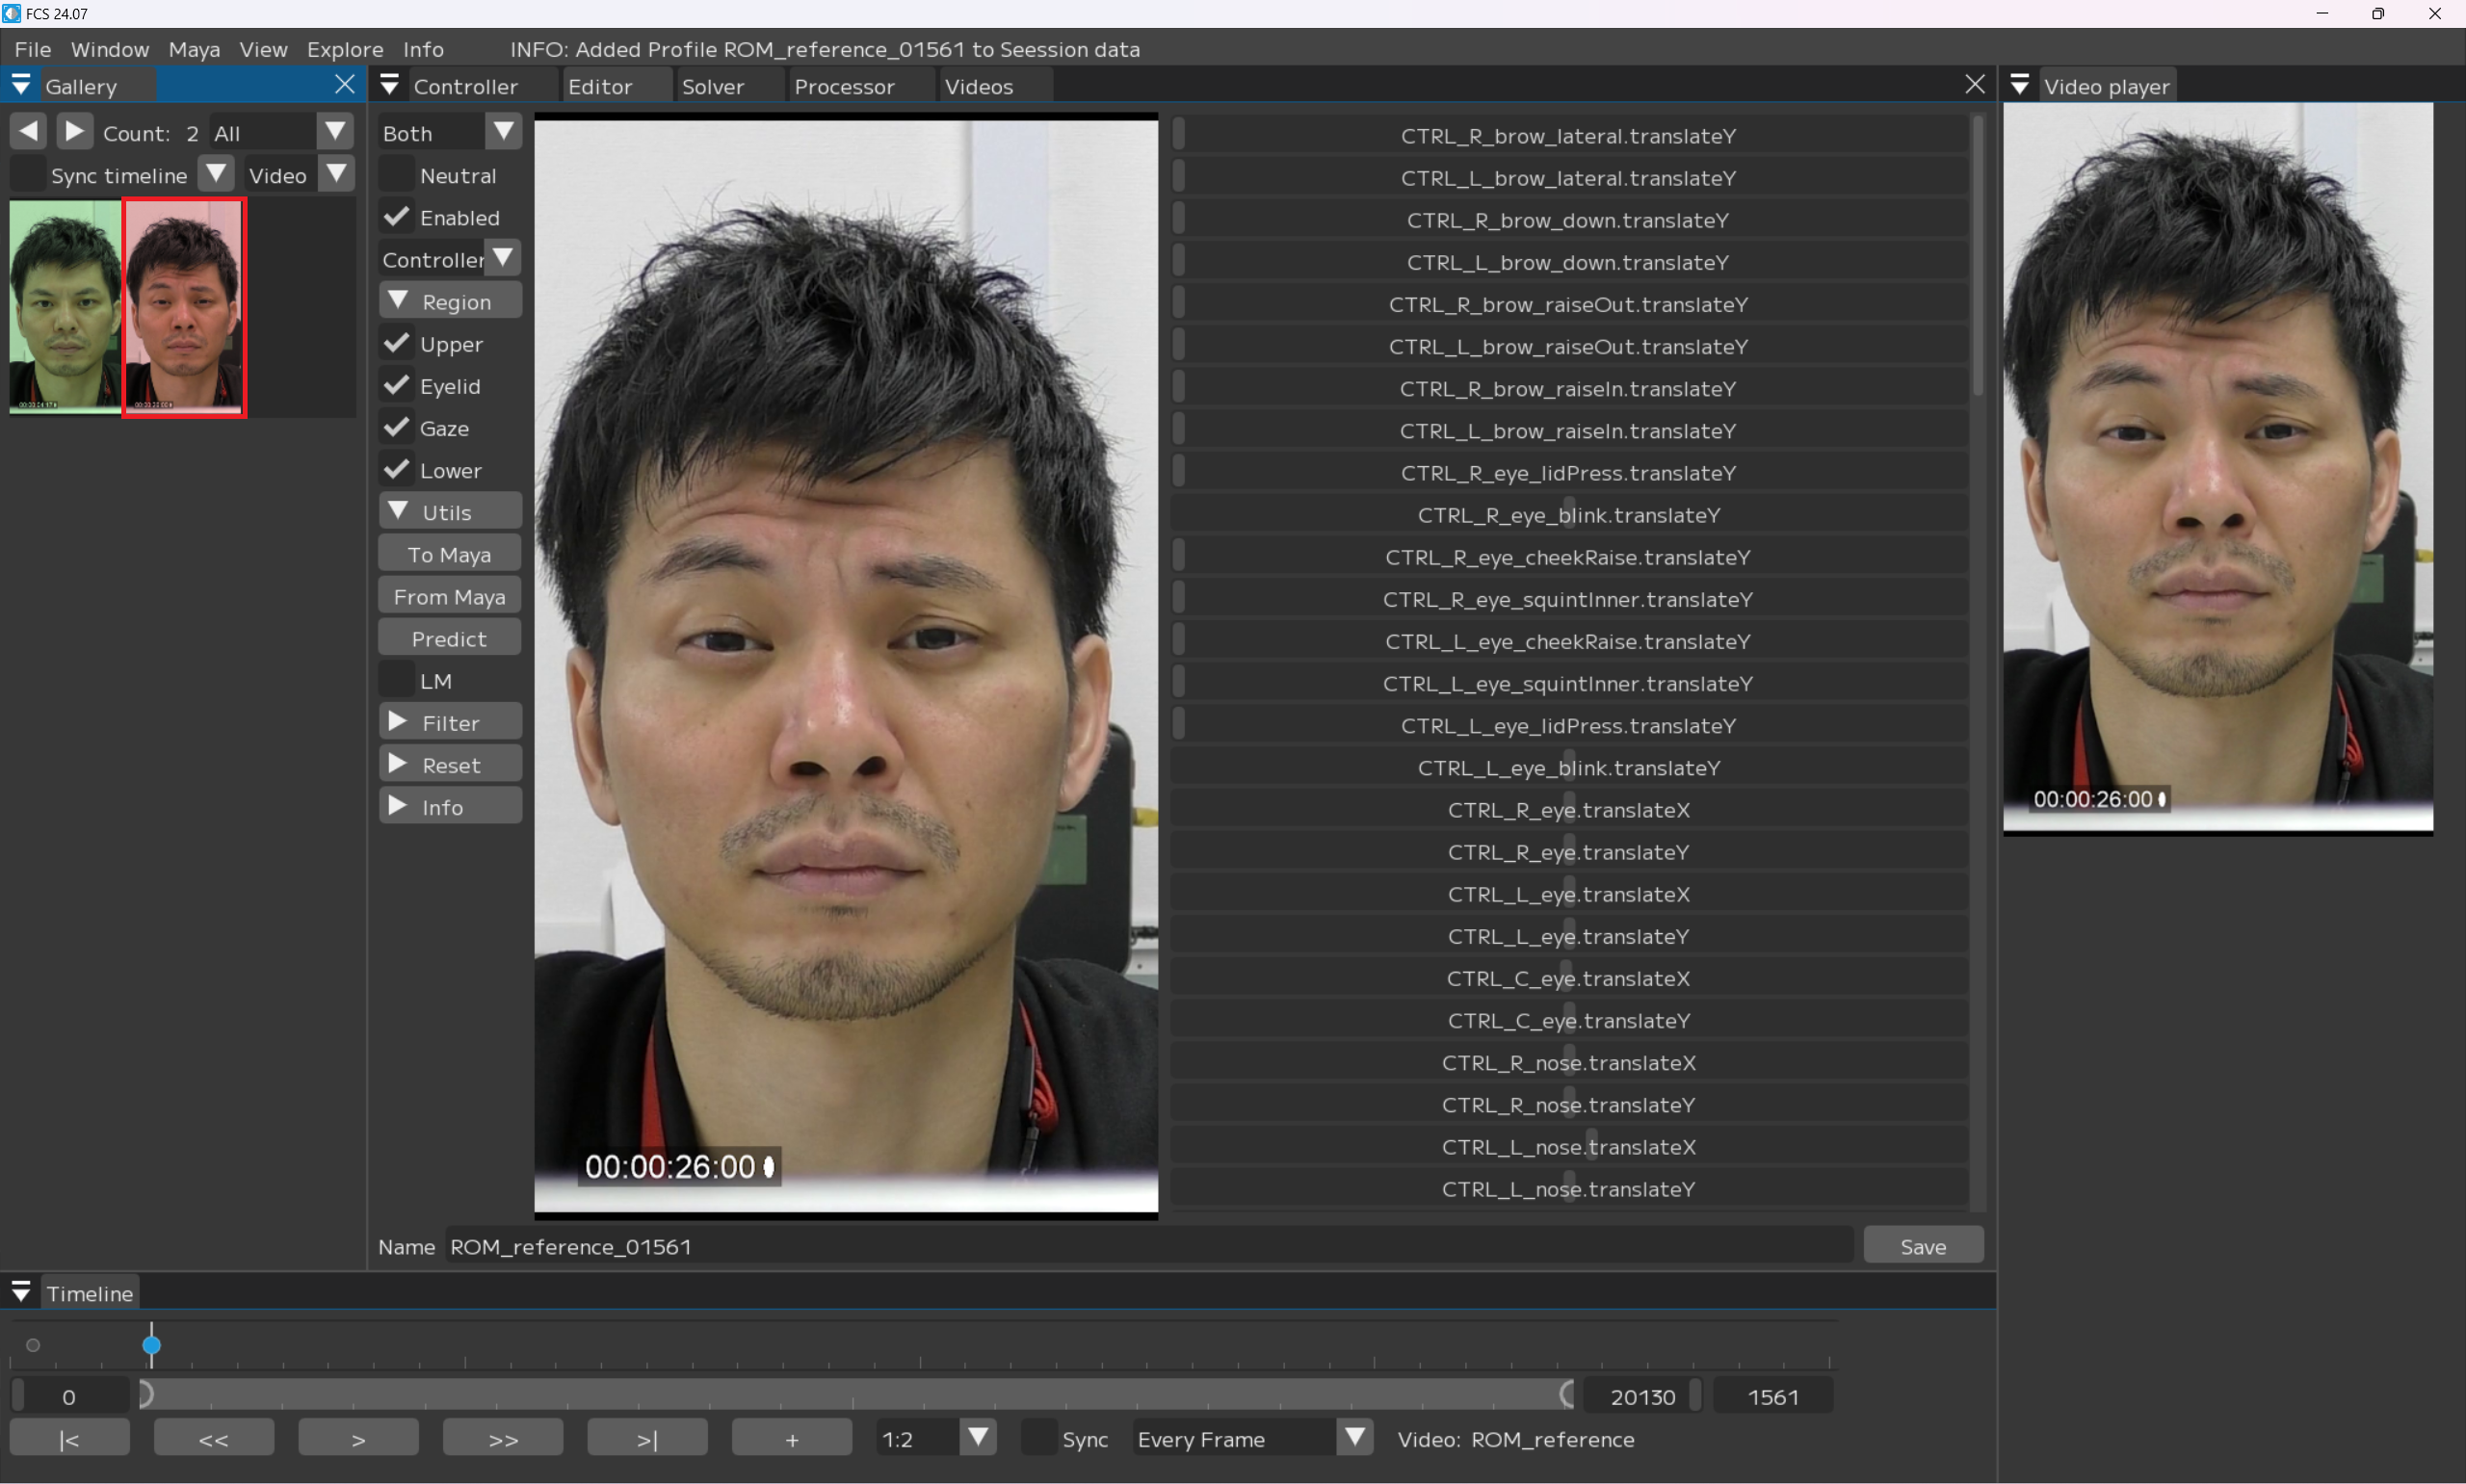
An image of the specified frame will be added to the Gallery.
Note
Profiles with a value of 0 (unregistered) are displayed in red.
Registering Neutral facial expressions
A neutral expression refers to a natural expression where the actor’s facial muscles are relaxed. Be sure to set at least one neutral expression within each session.
Check the box for Neutral ☑
Change the name to anything you like.
Save
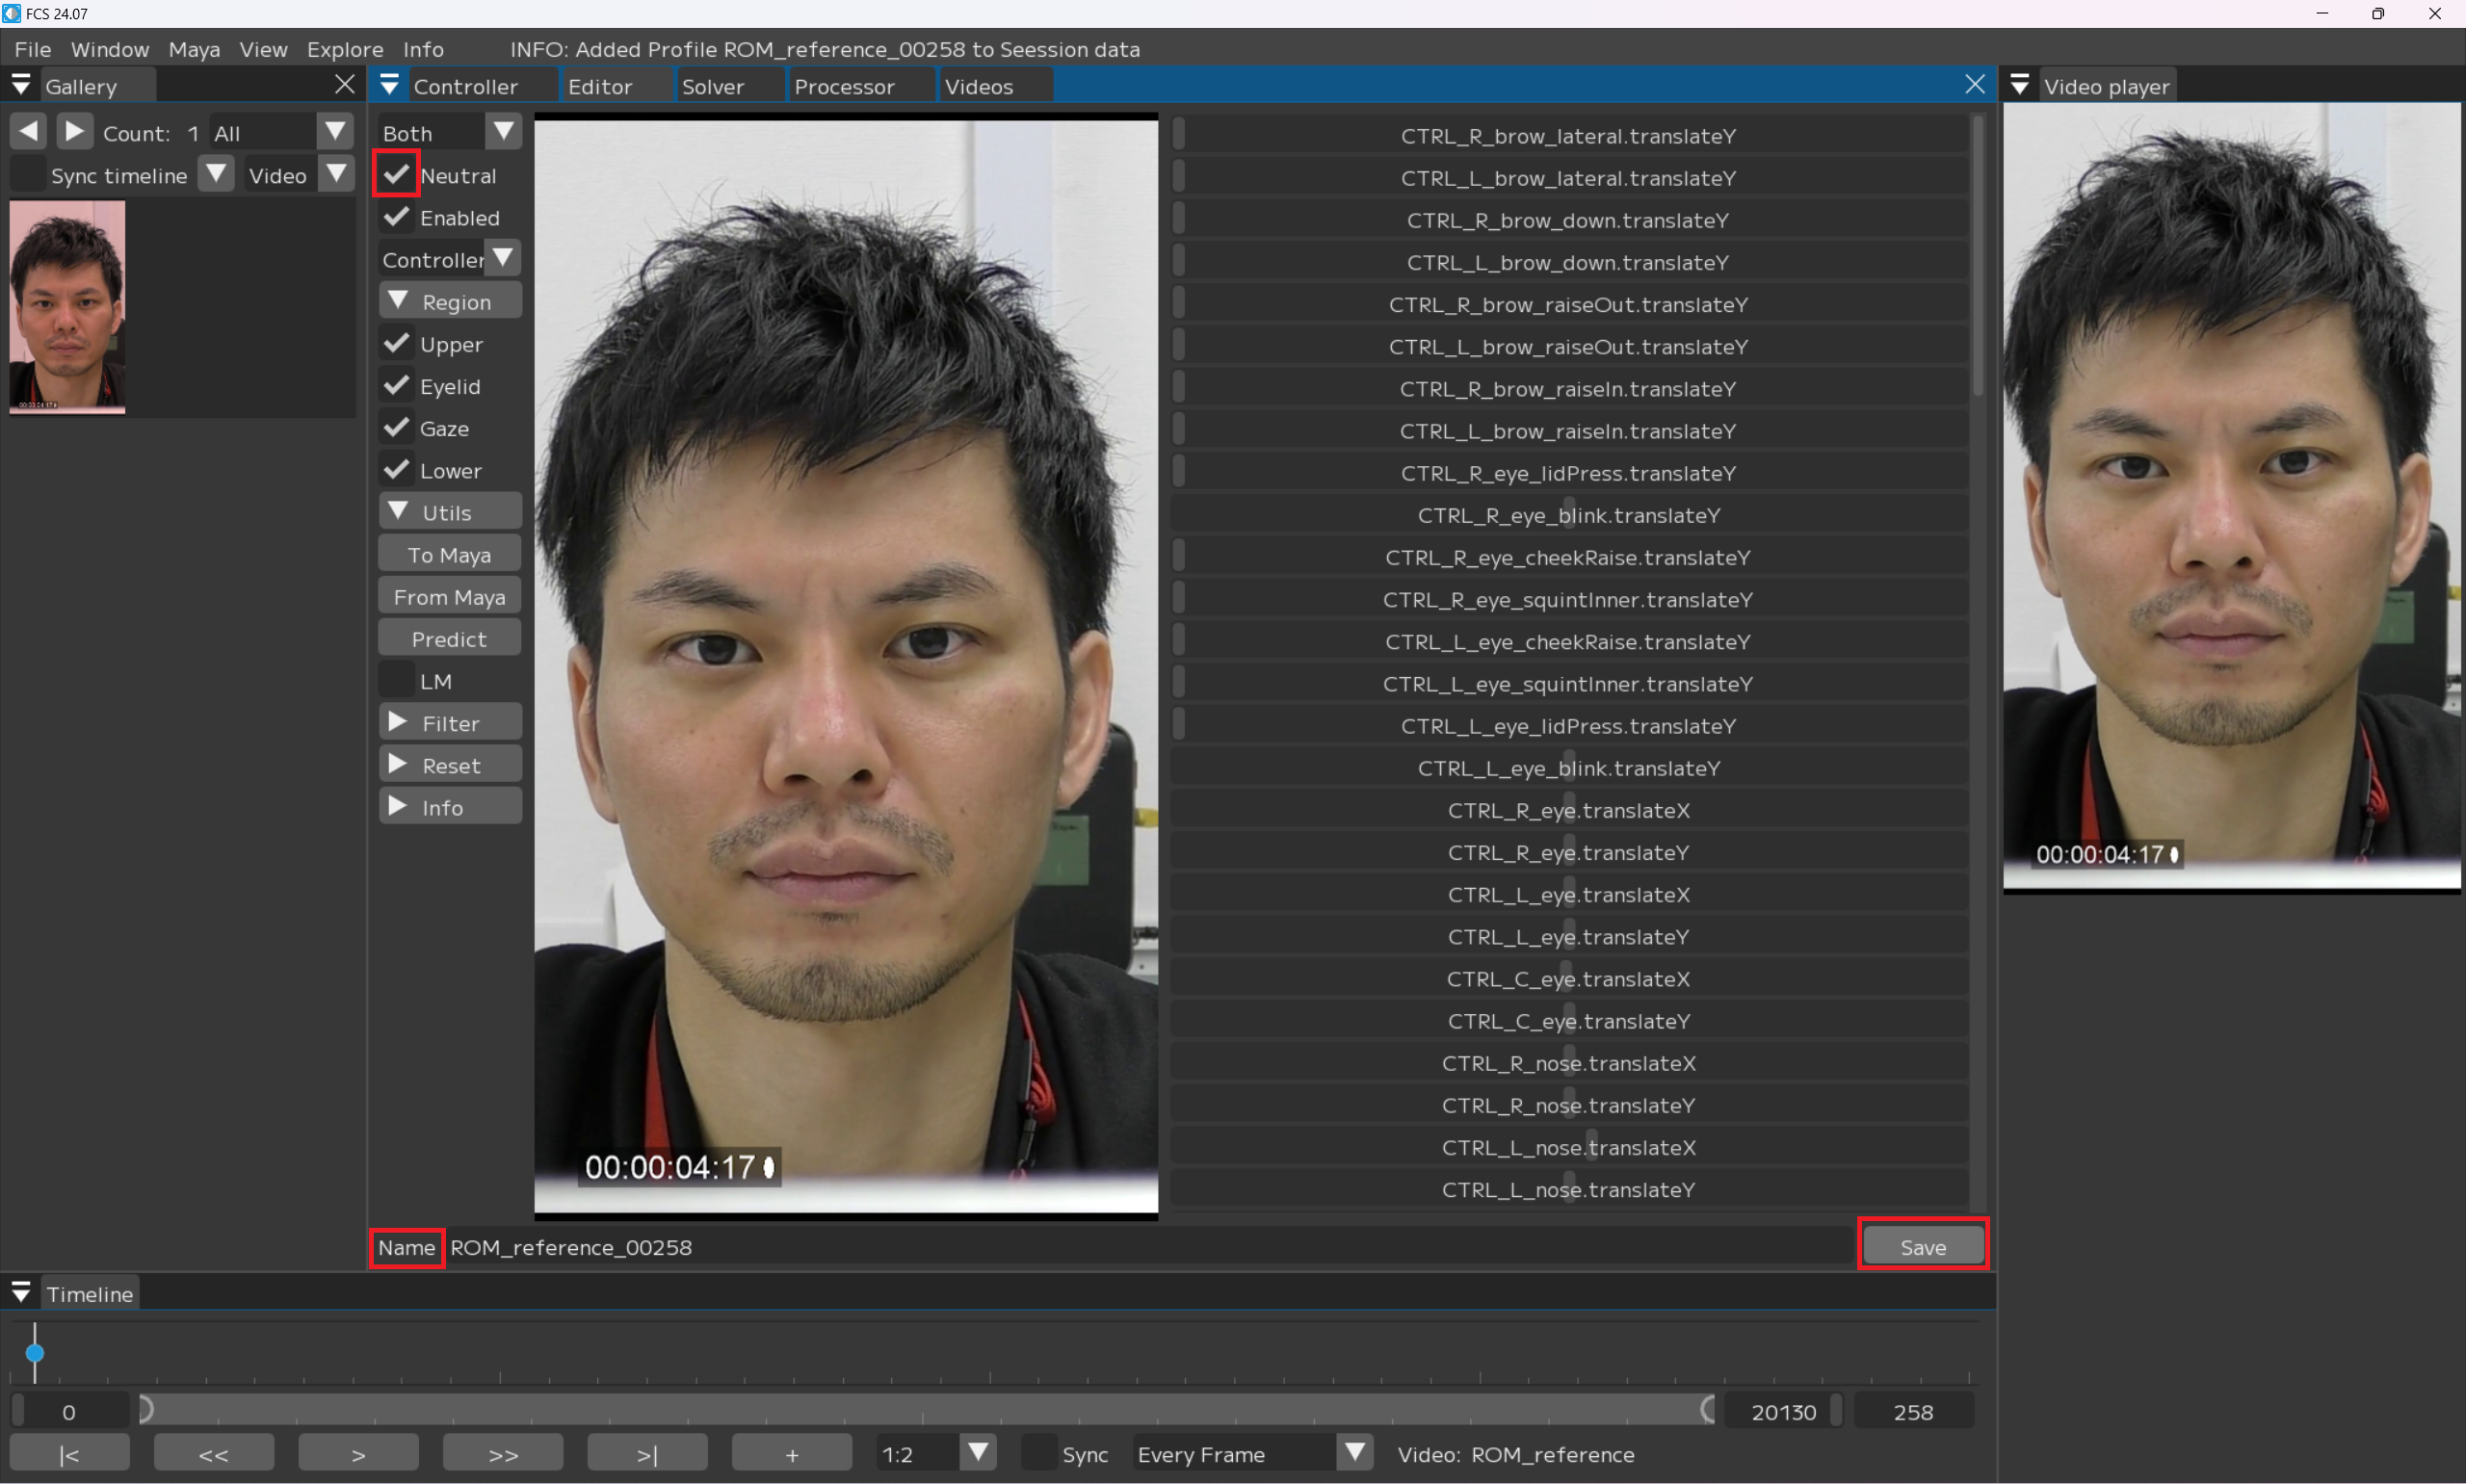
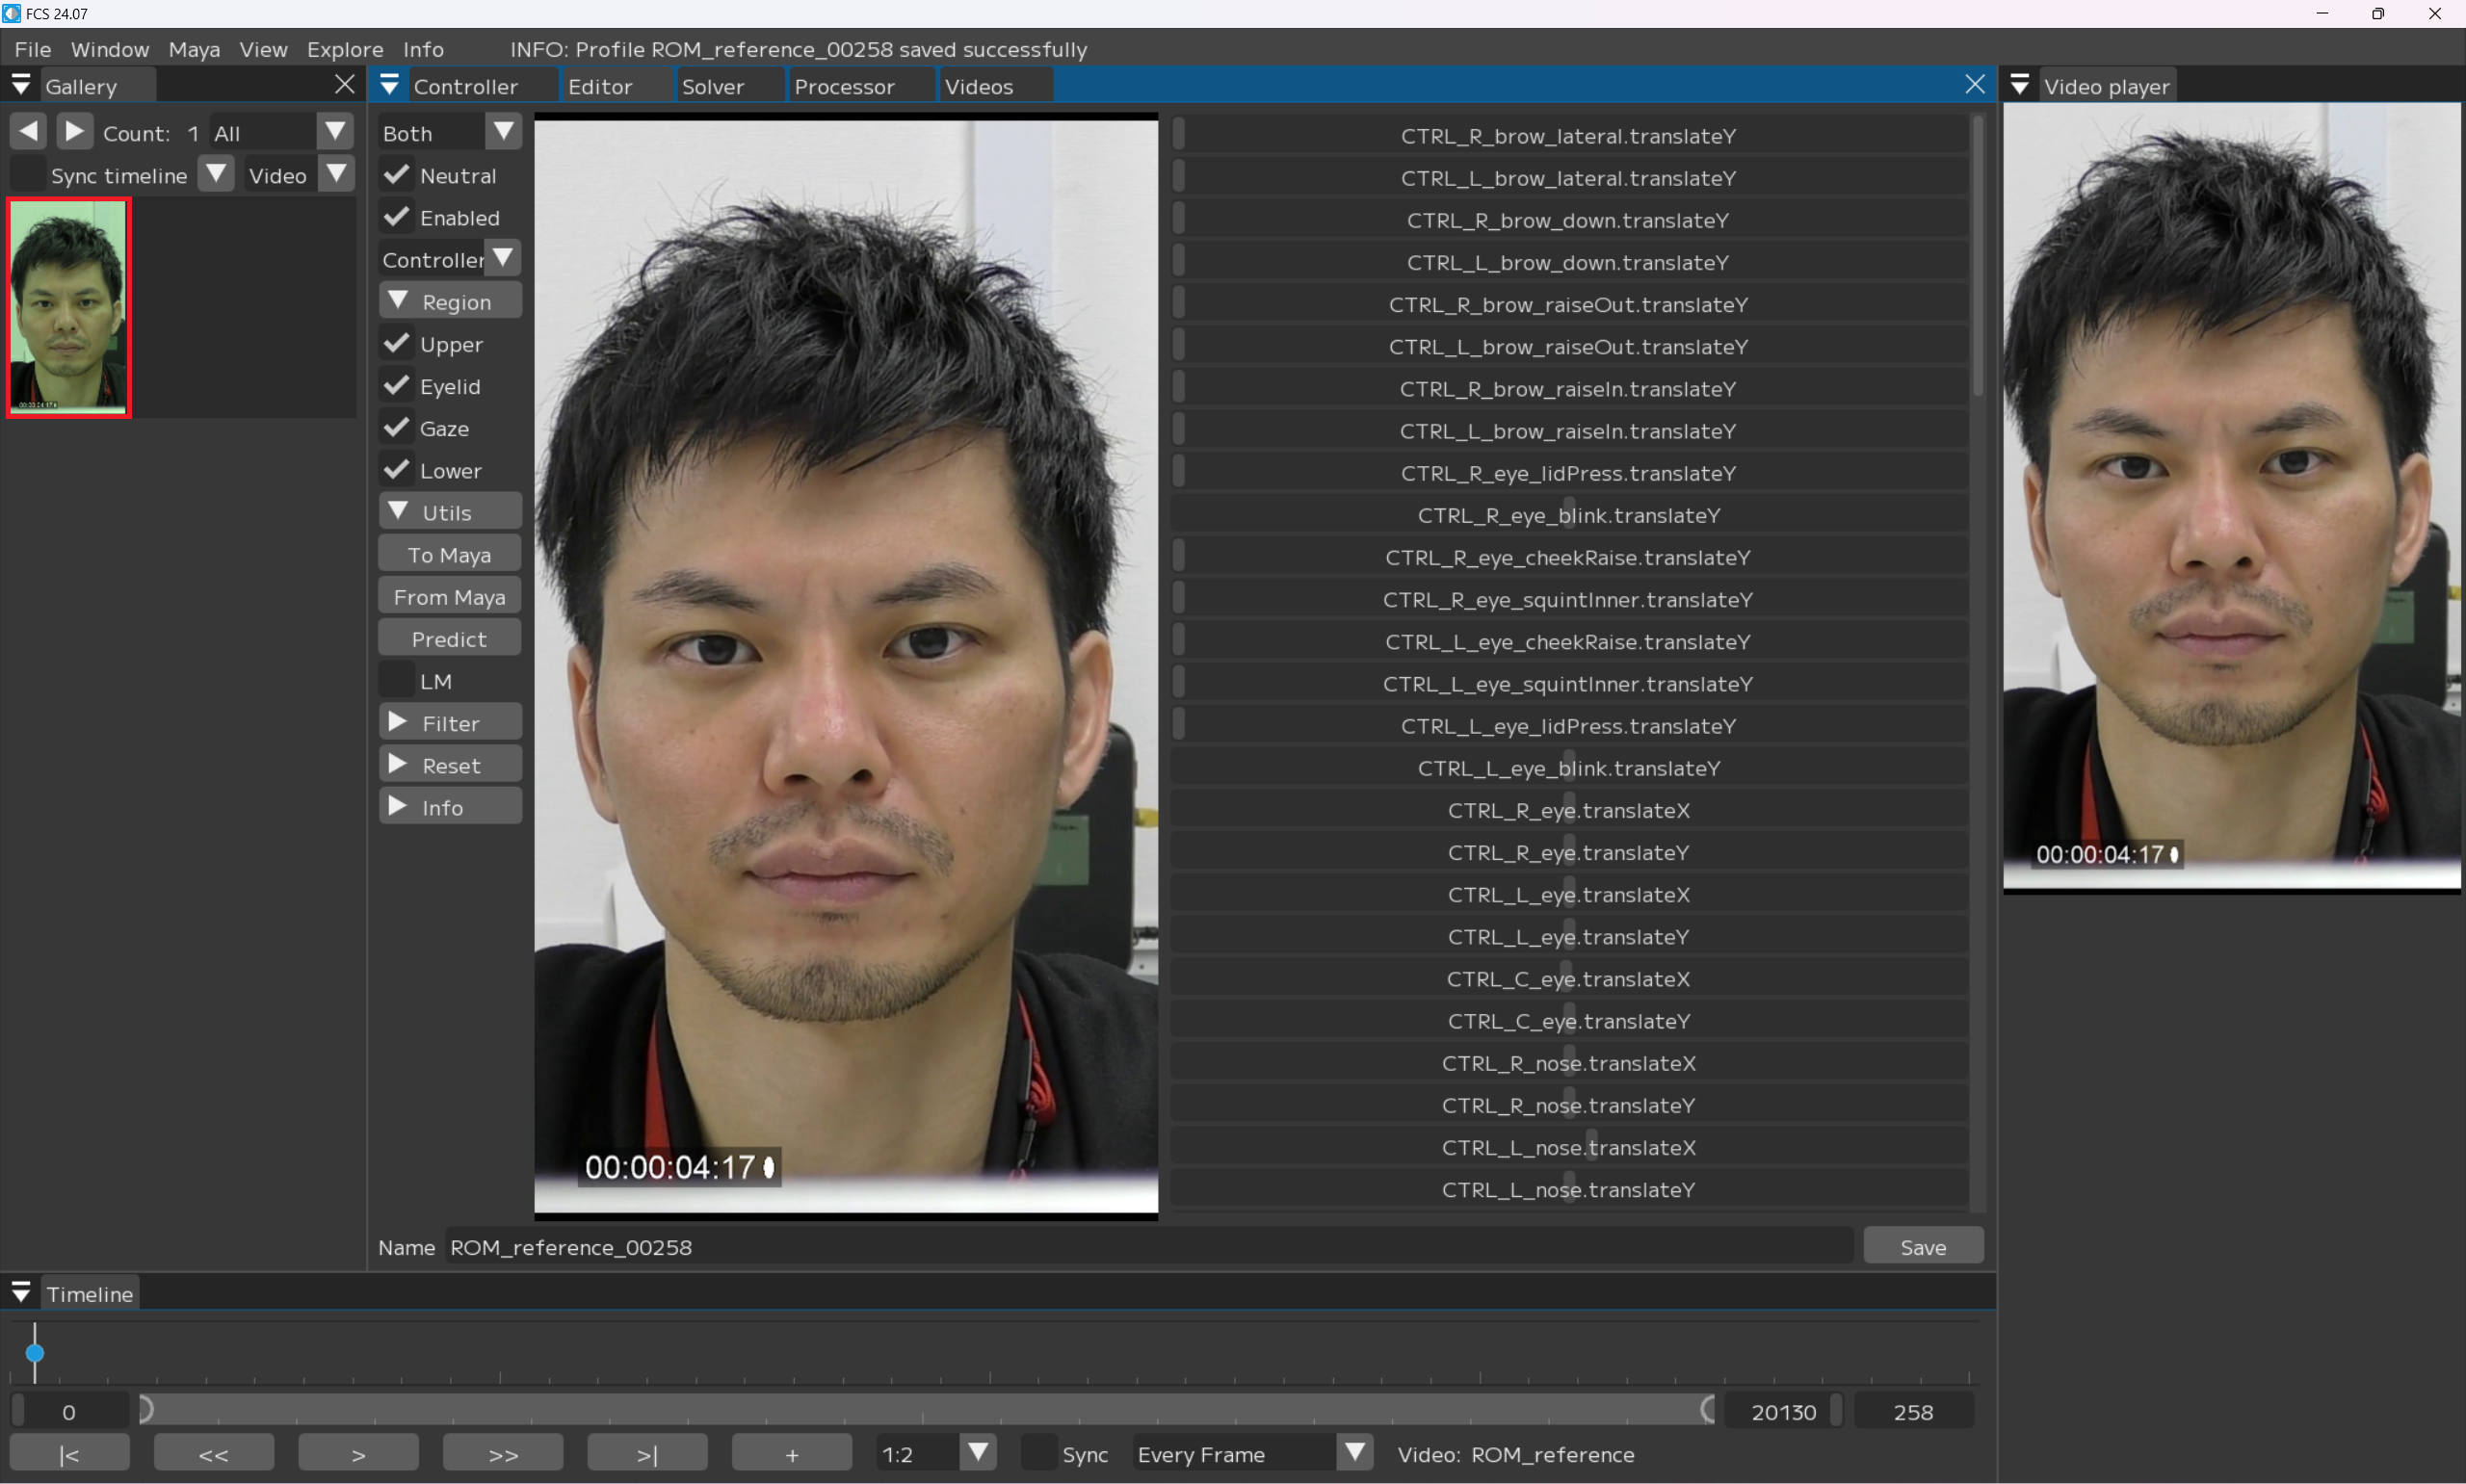
Note
Neutral’s profile will turn green when registration is completed.
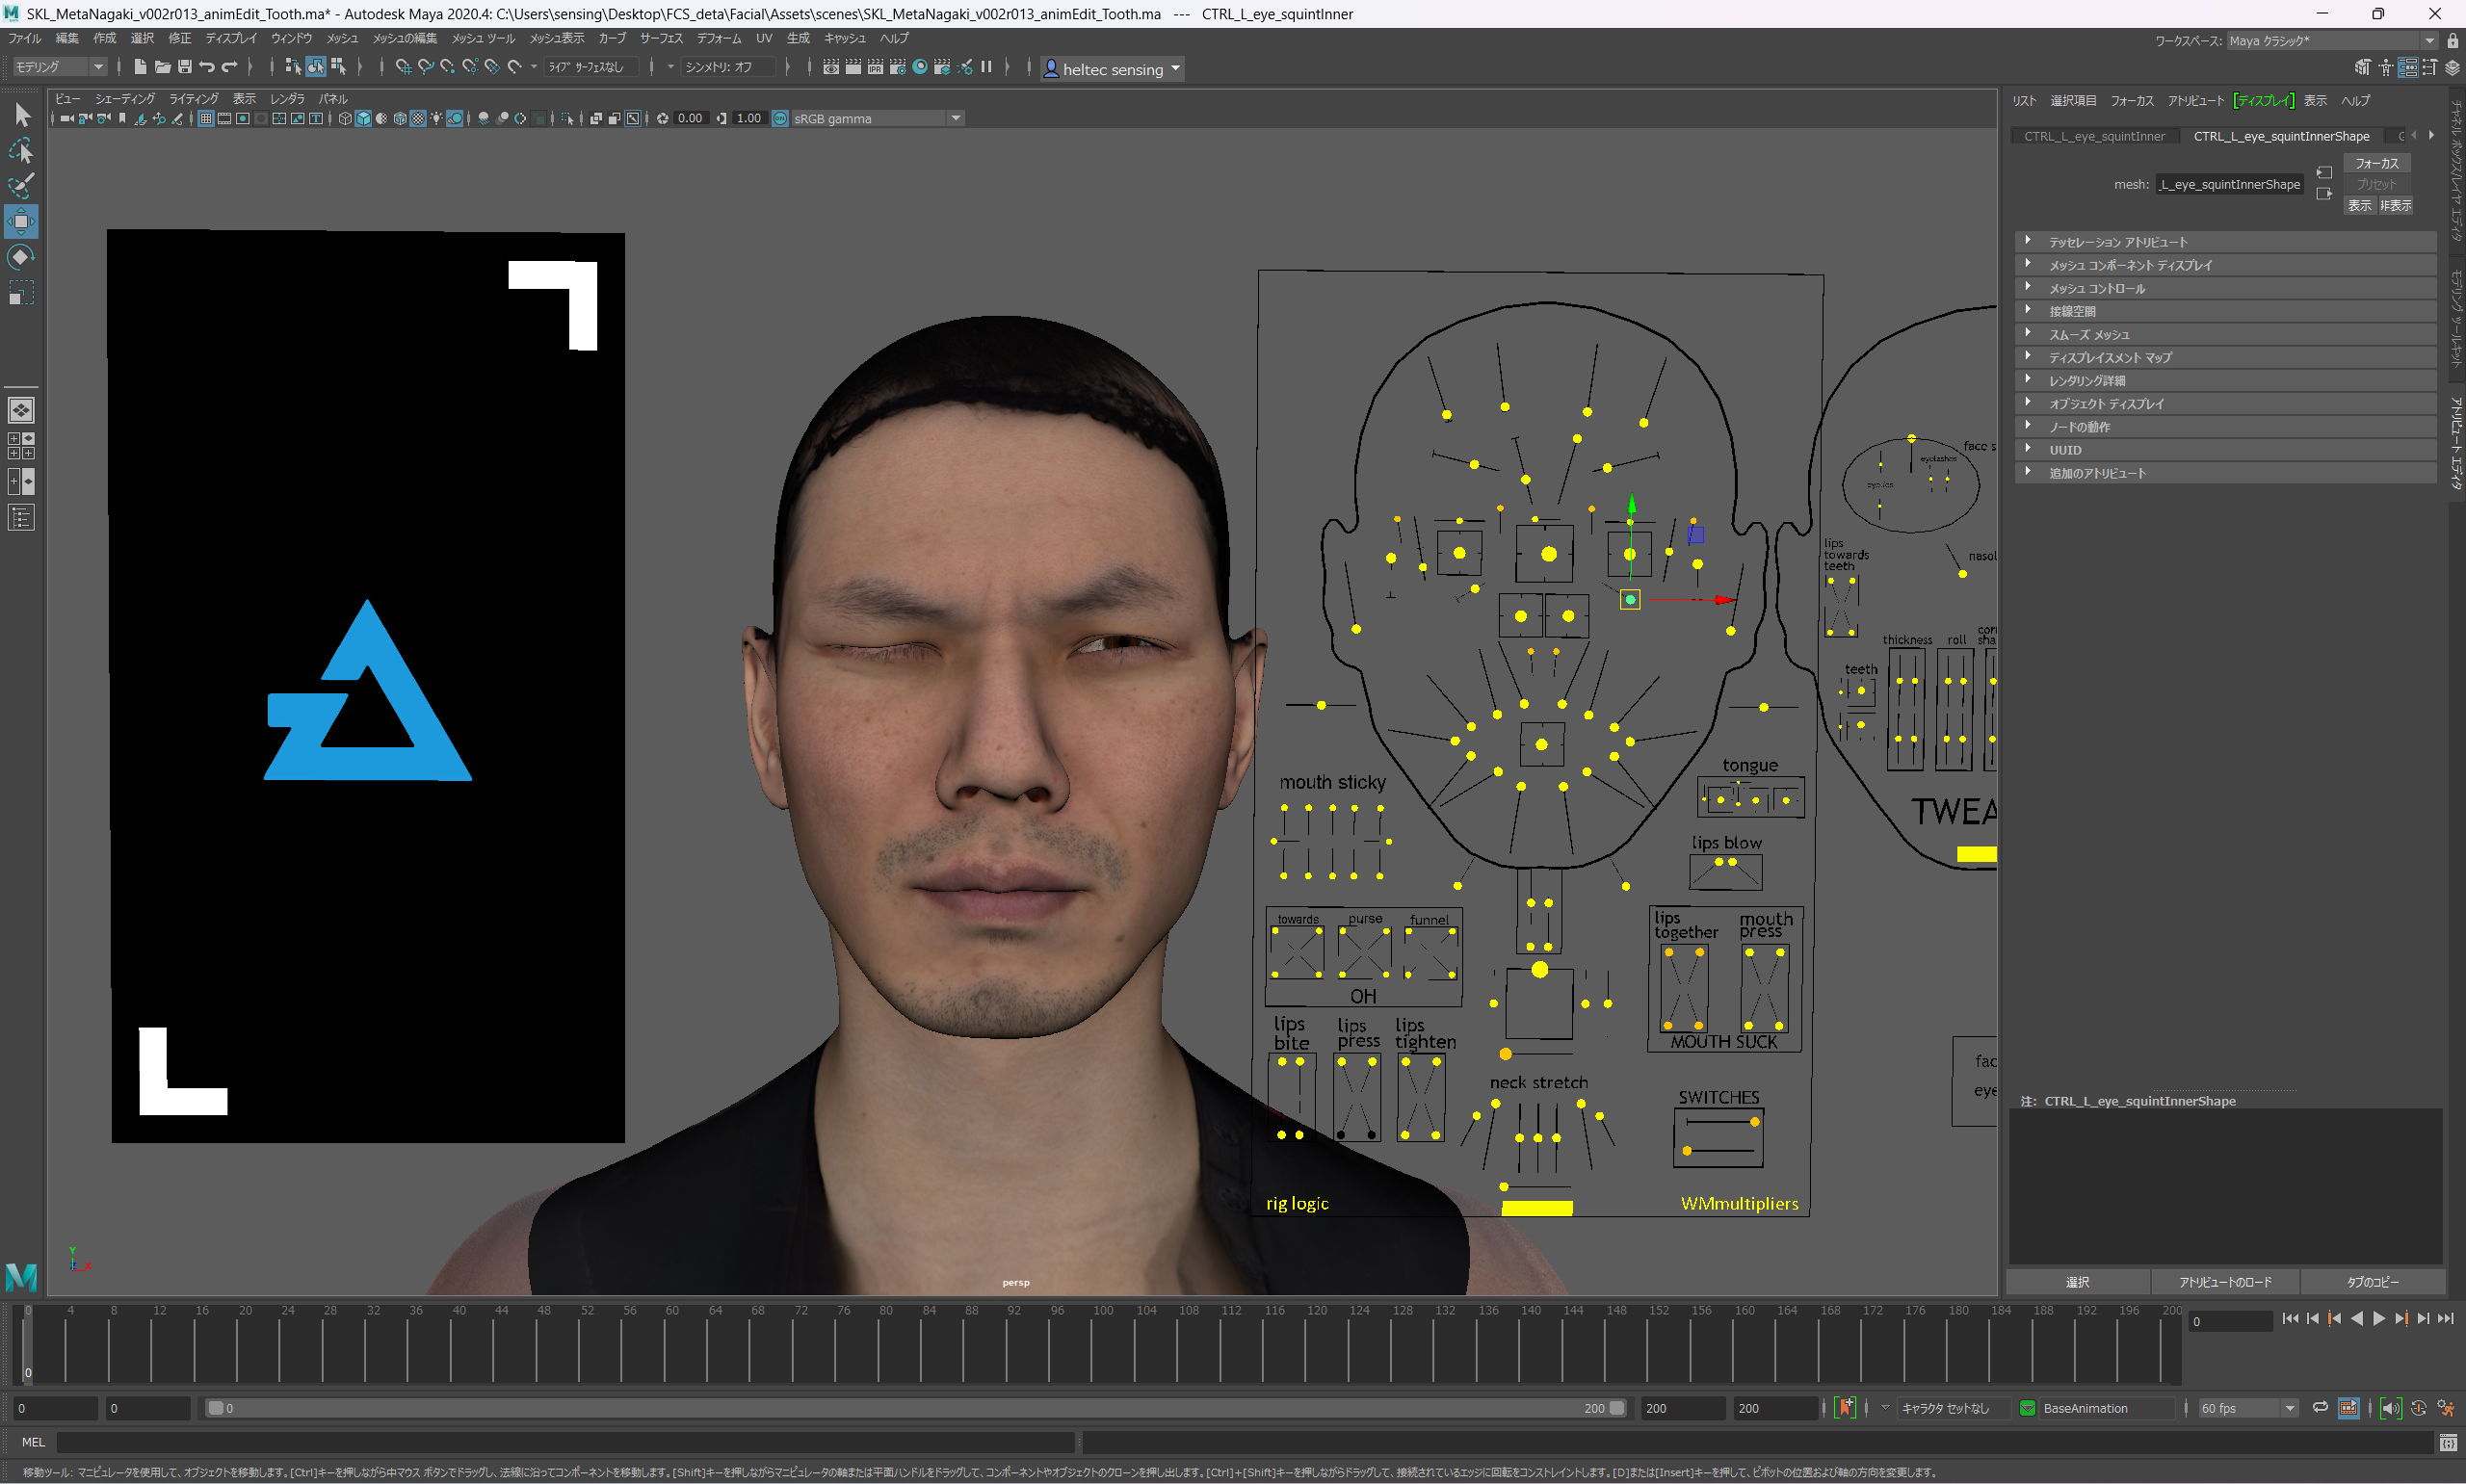
Adjust facial expressions in Maya
Move the slider on the VideoTimeline window, stop at the frame where you want to register the expression, and press the “+” button.
Galleryに指定したフレームの画像が追加されます。
Note
Profiles with a value of 0 (unregistered) are displayed in red.
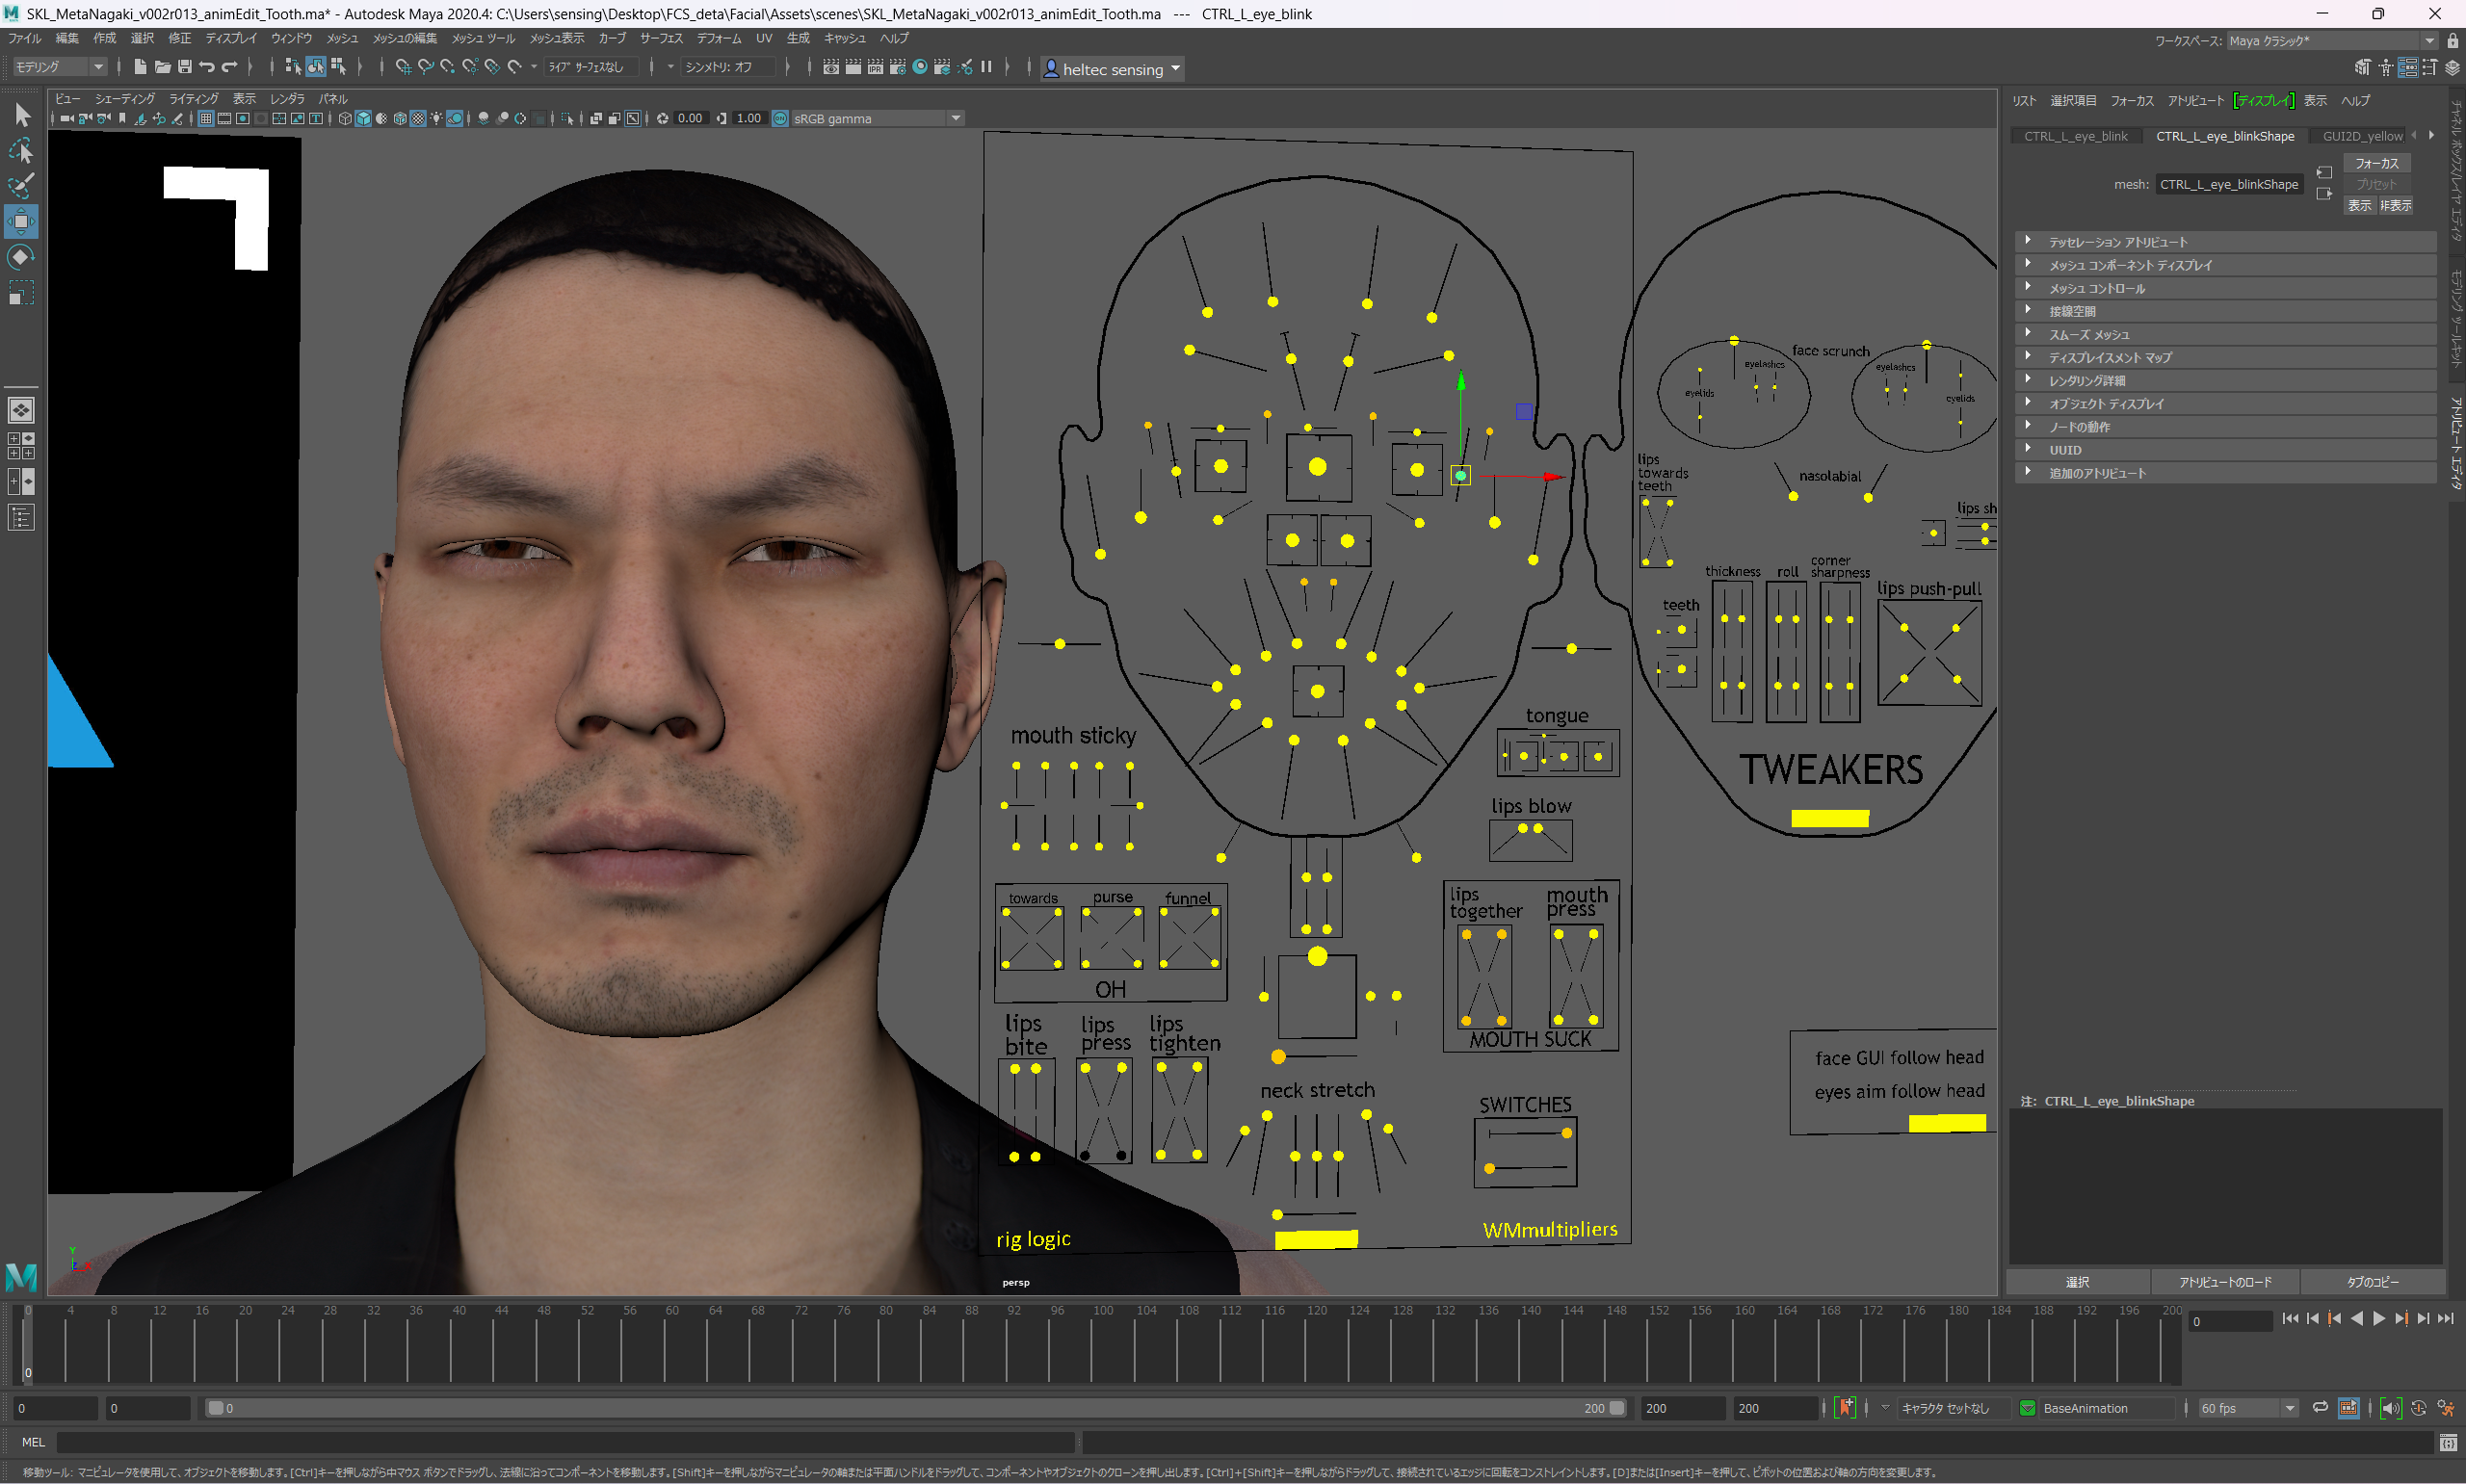
追加した赤色の画像をクリックし、Editor画面に表示されている画像が同じであることを確認
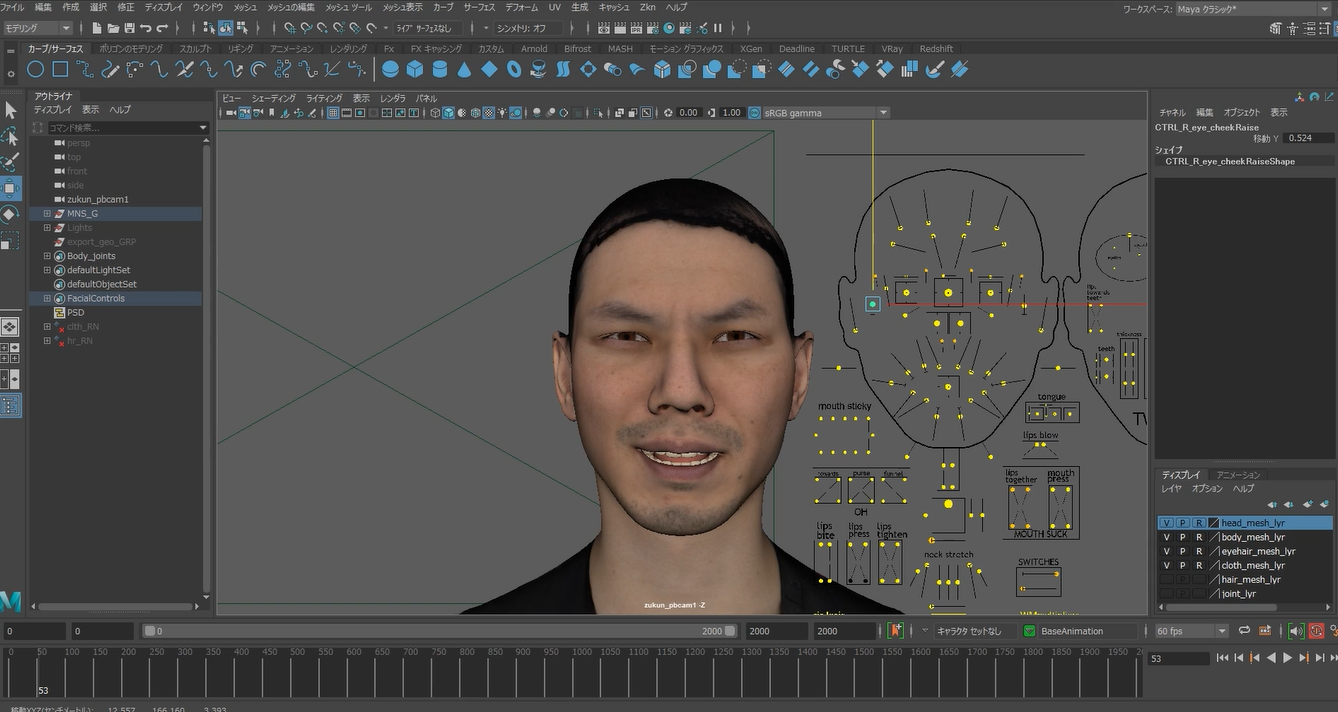
Mayaのコントローラーリグで、追加したアクターの表情と同じになるようにキャラクターの表情を調節
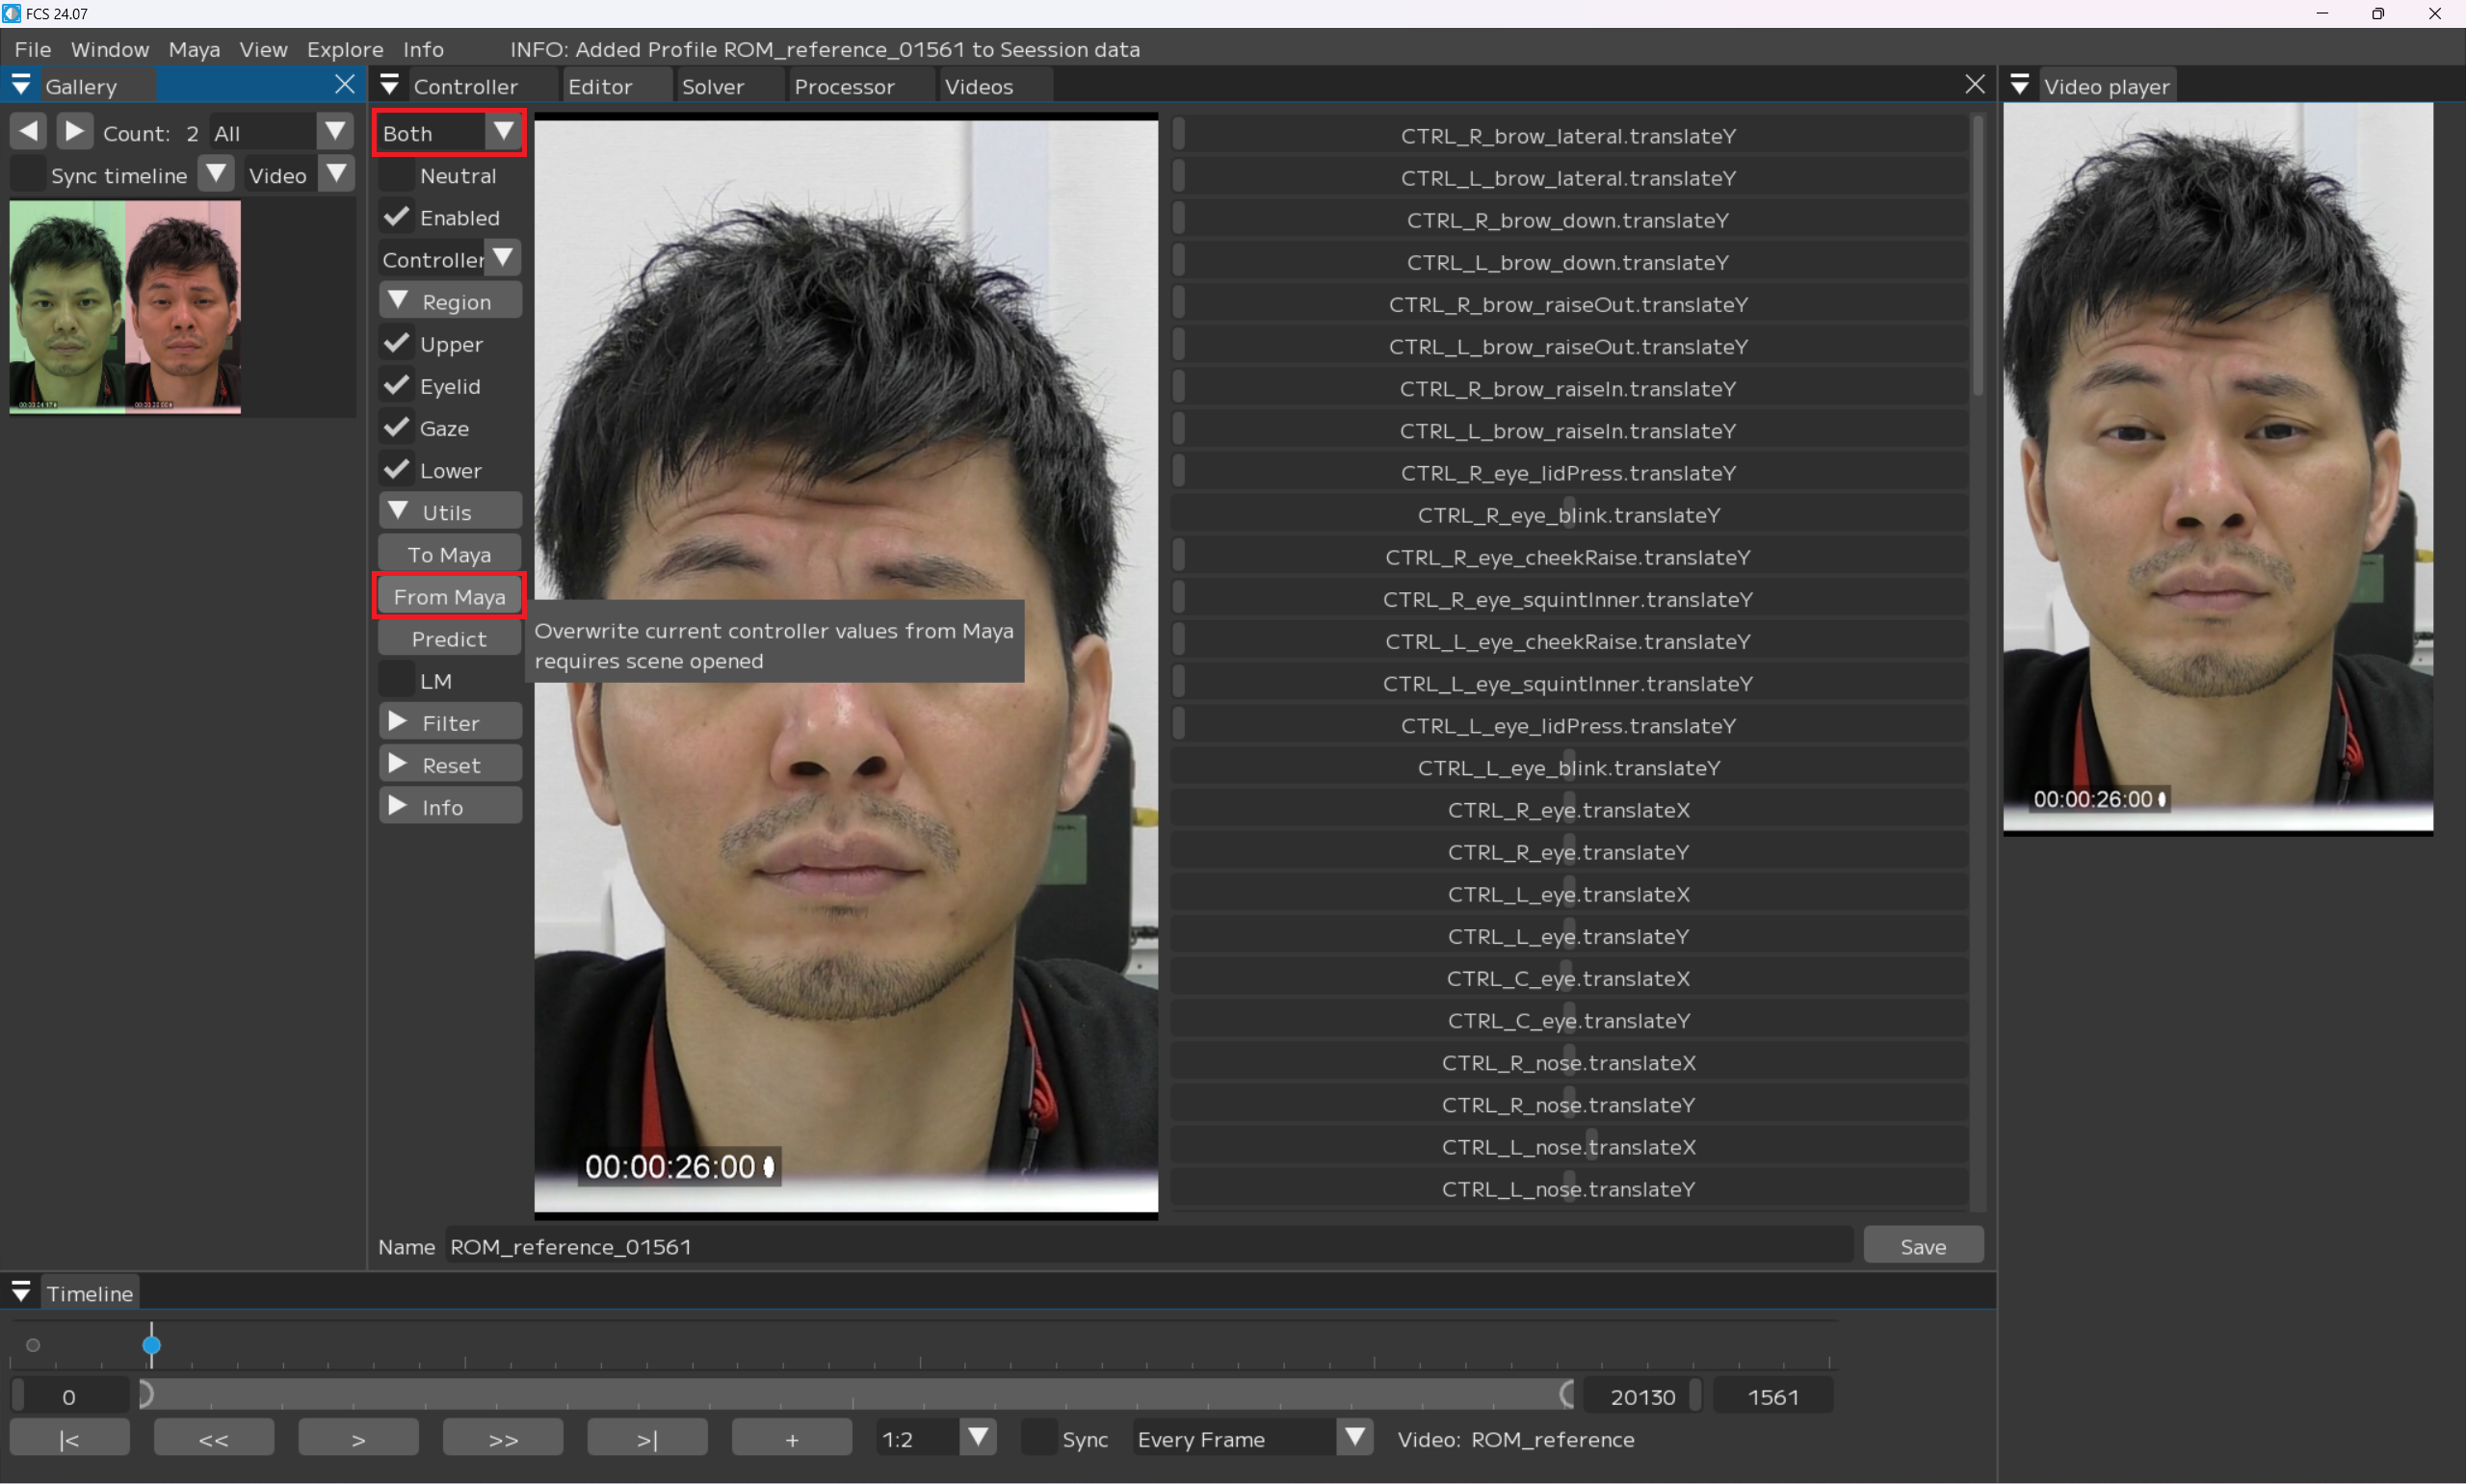
From Mayaをクリックで、Mayaでの調整情報がFCSに反映されます。
Note
If you select “From Maya at save” or “Both” in the Sync pull-down menu, the adjusted values are automatically synchronized.
Note
If you forget to register a controller, the expressions may appear different from the look you created when you reopen the window. In this case, please re-register the controller and re-register the profile.
Change the name to anything you like.
Save
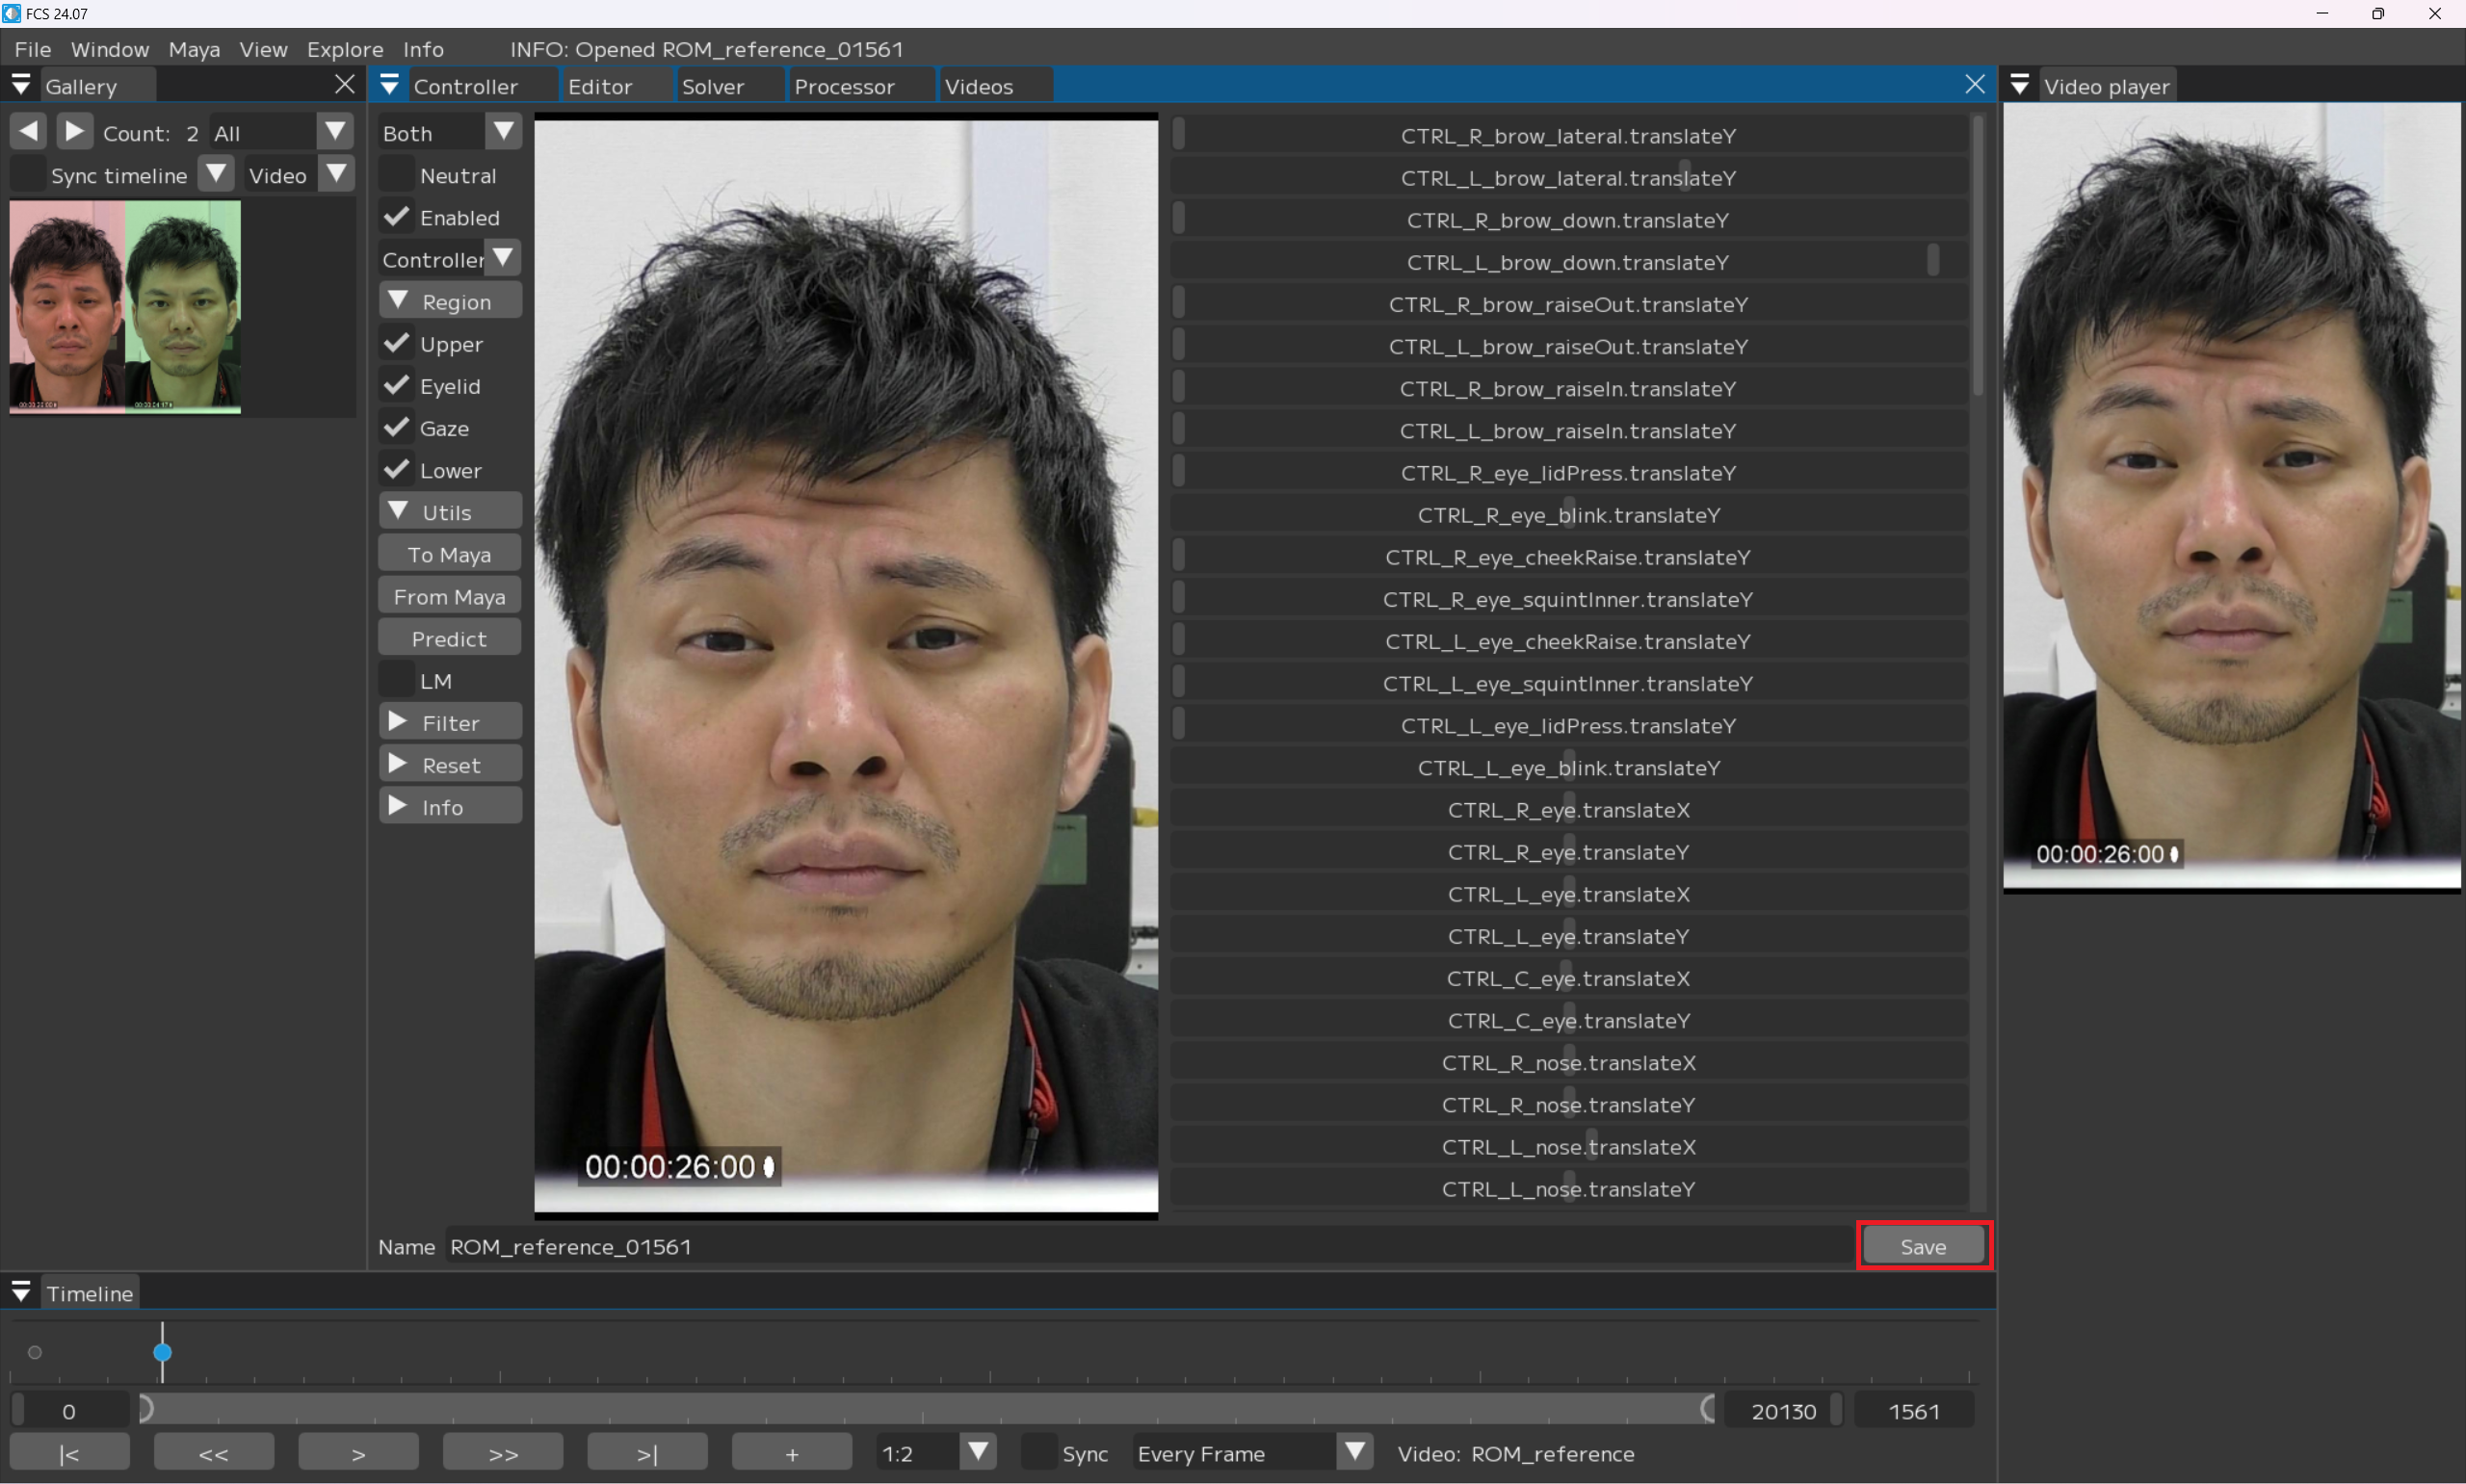
Note
Changing file name is not mandatory.
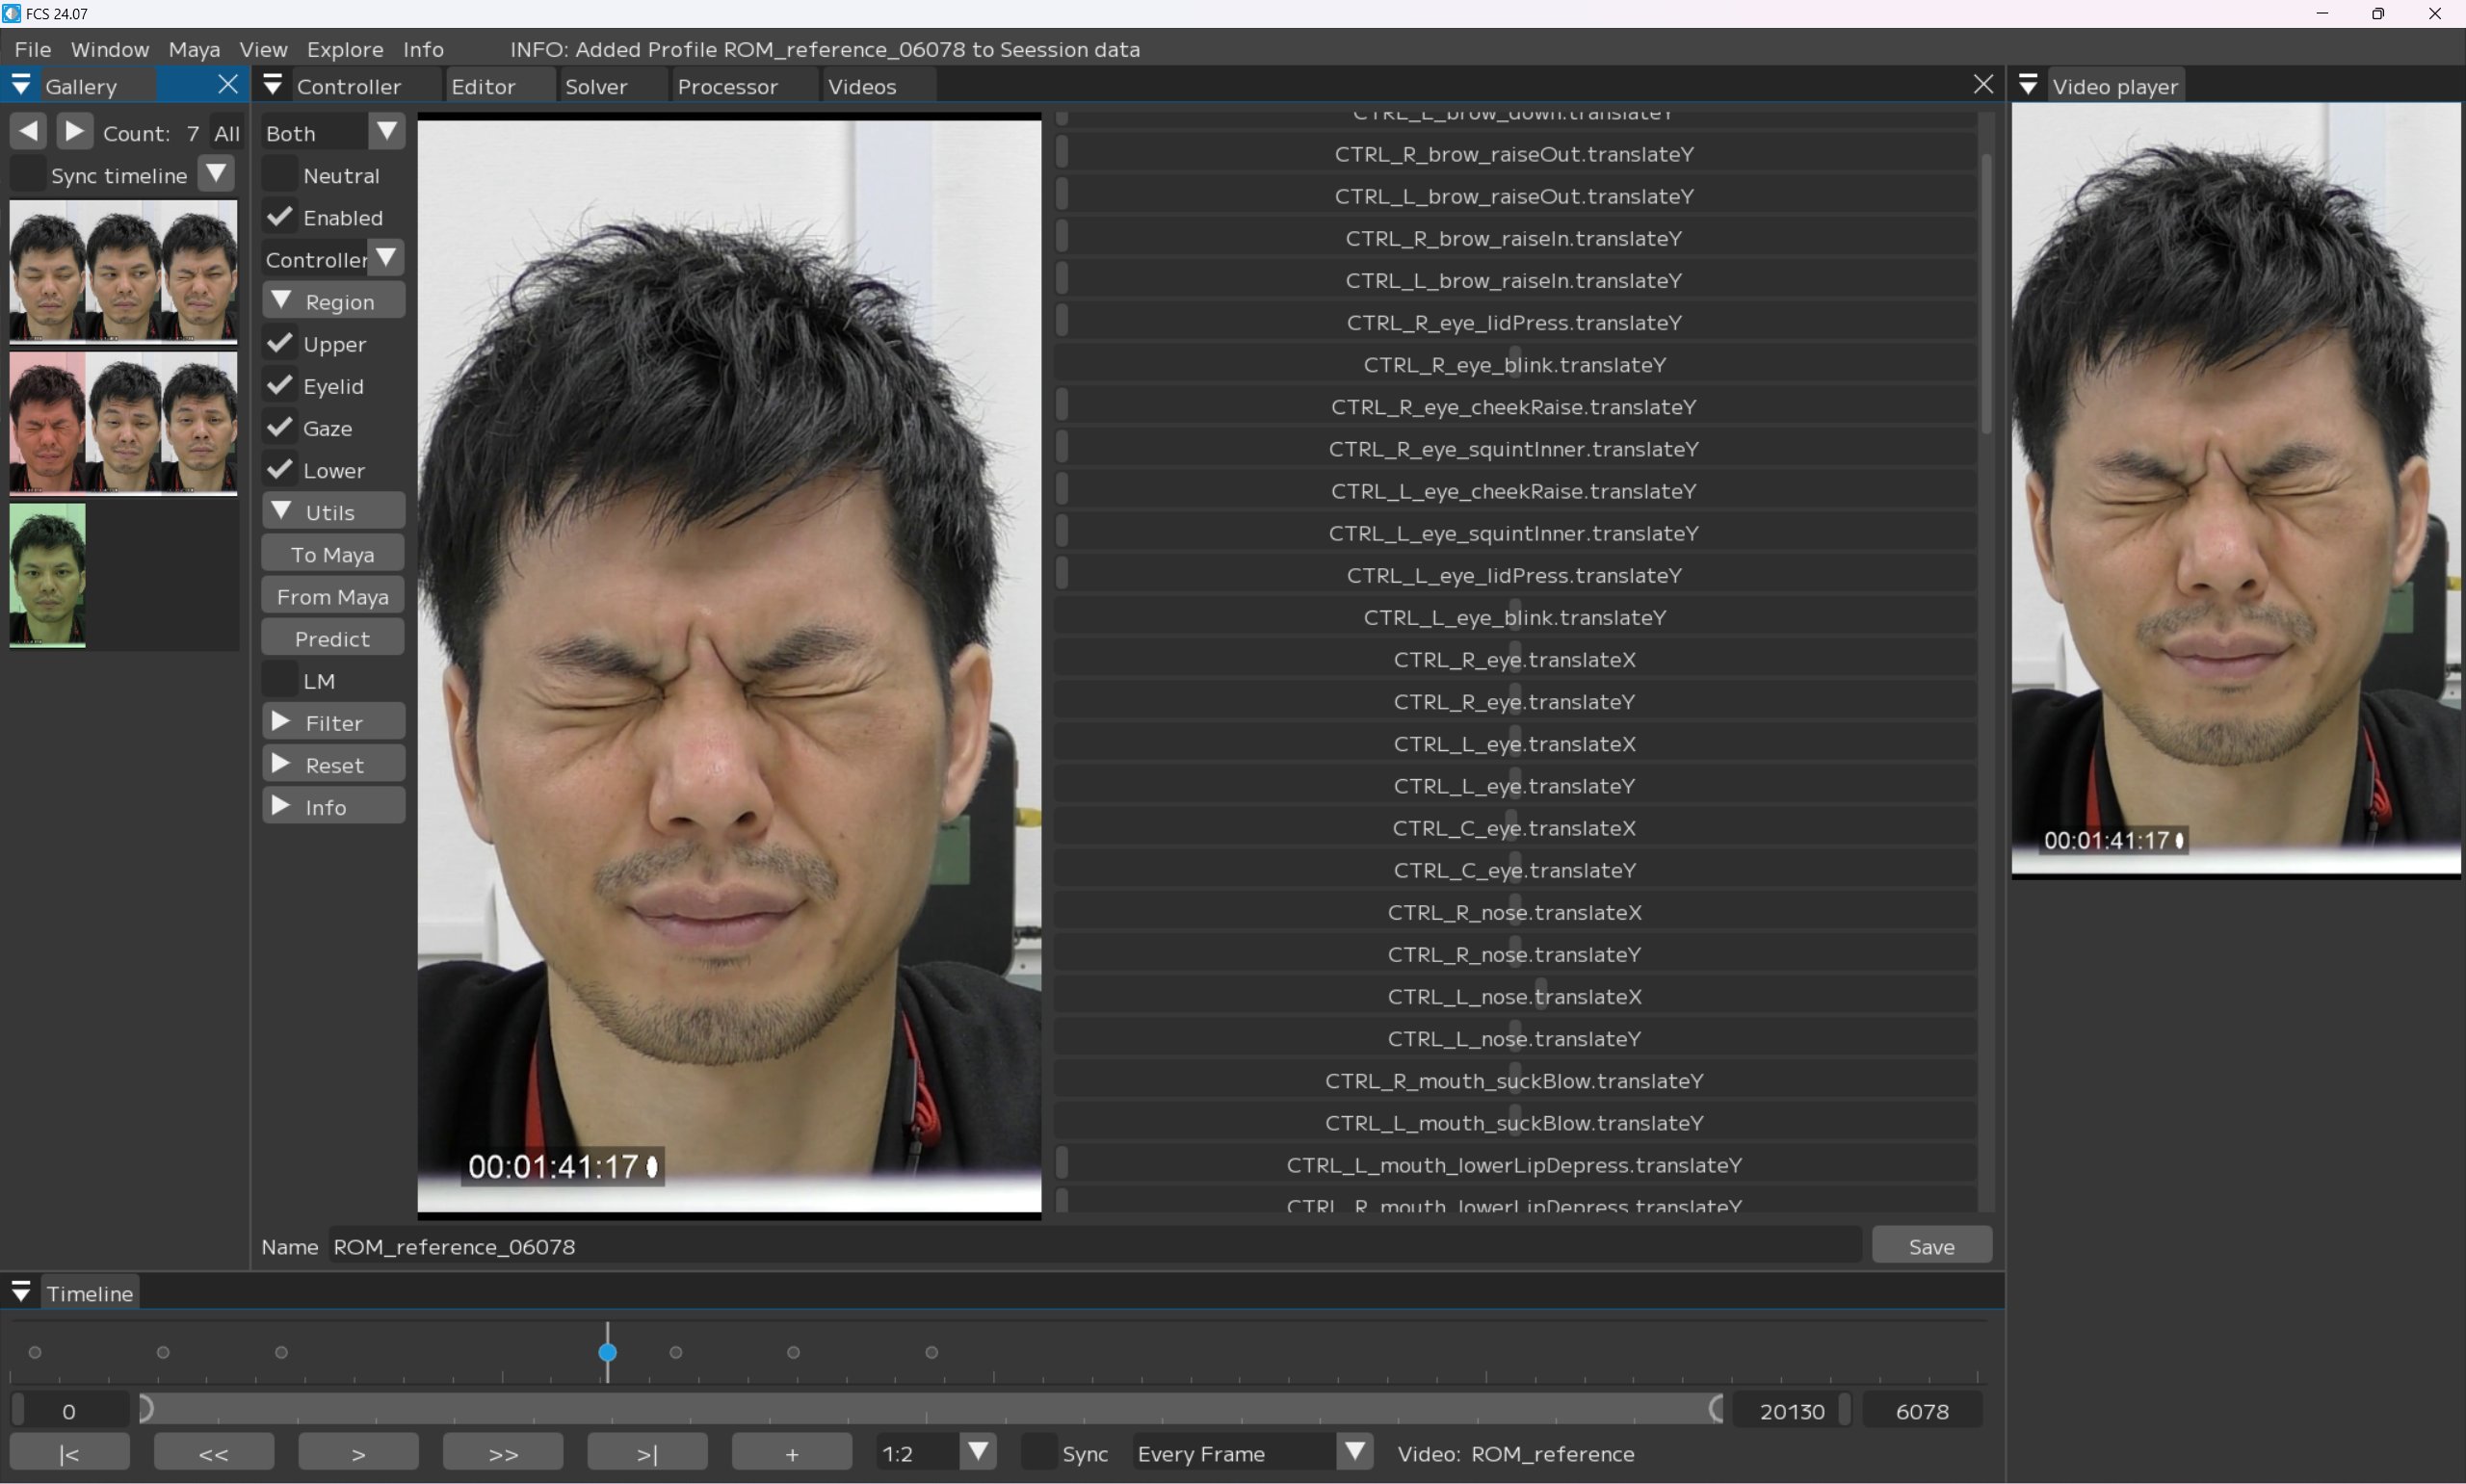
When you customize facial expressions in FCS
Move the slider on the VideoTimeline window, stop at the frame where you want to register the expression, and press the “+” button.
Galleryに指定したフレームの画像が追加されます。
Note
Profiles with a value of 0 (unregistered) are displayed in red.
追加した赤色の画像をクリックし、Editor画面に表示されている画像が同じであることを確認
Warning
When Sync function is set to “No Sync”, the profile information is not automatically shared, so the previously registered expression is displayed in Maya.

Note
If you reopen the window with Sync function set to “Both”, it will show the default look. Skip this process if it’s already set.
Mayaのコントローラーリグで、追加したアクターの表情が同じになるようにキャラクターの表情を調節
To Mayaをクリック
Note
When “To Maya” or “Both” is selected in the Sync pull-down menu, the adjusted values are automatically synchronized.
FCSで調整した内容がMayaに反映されます。
Note
To display only the items (including text) you want to filter…
Click on the item you want to filter from ▼Filter.
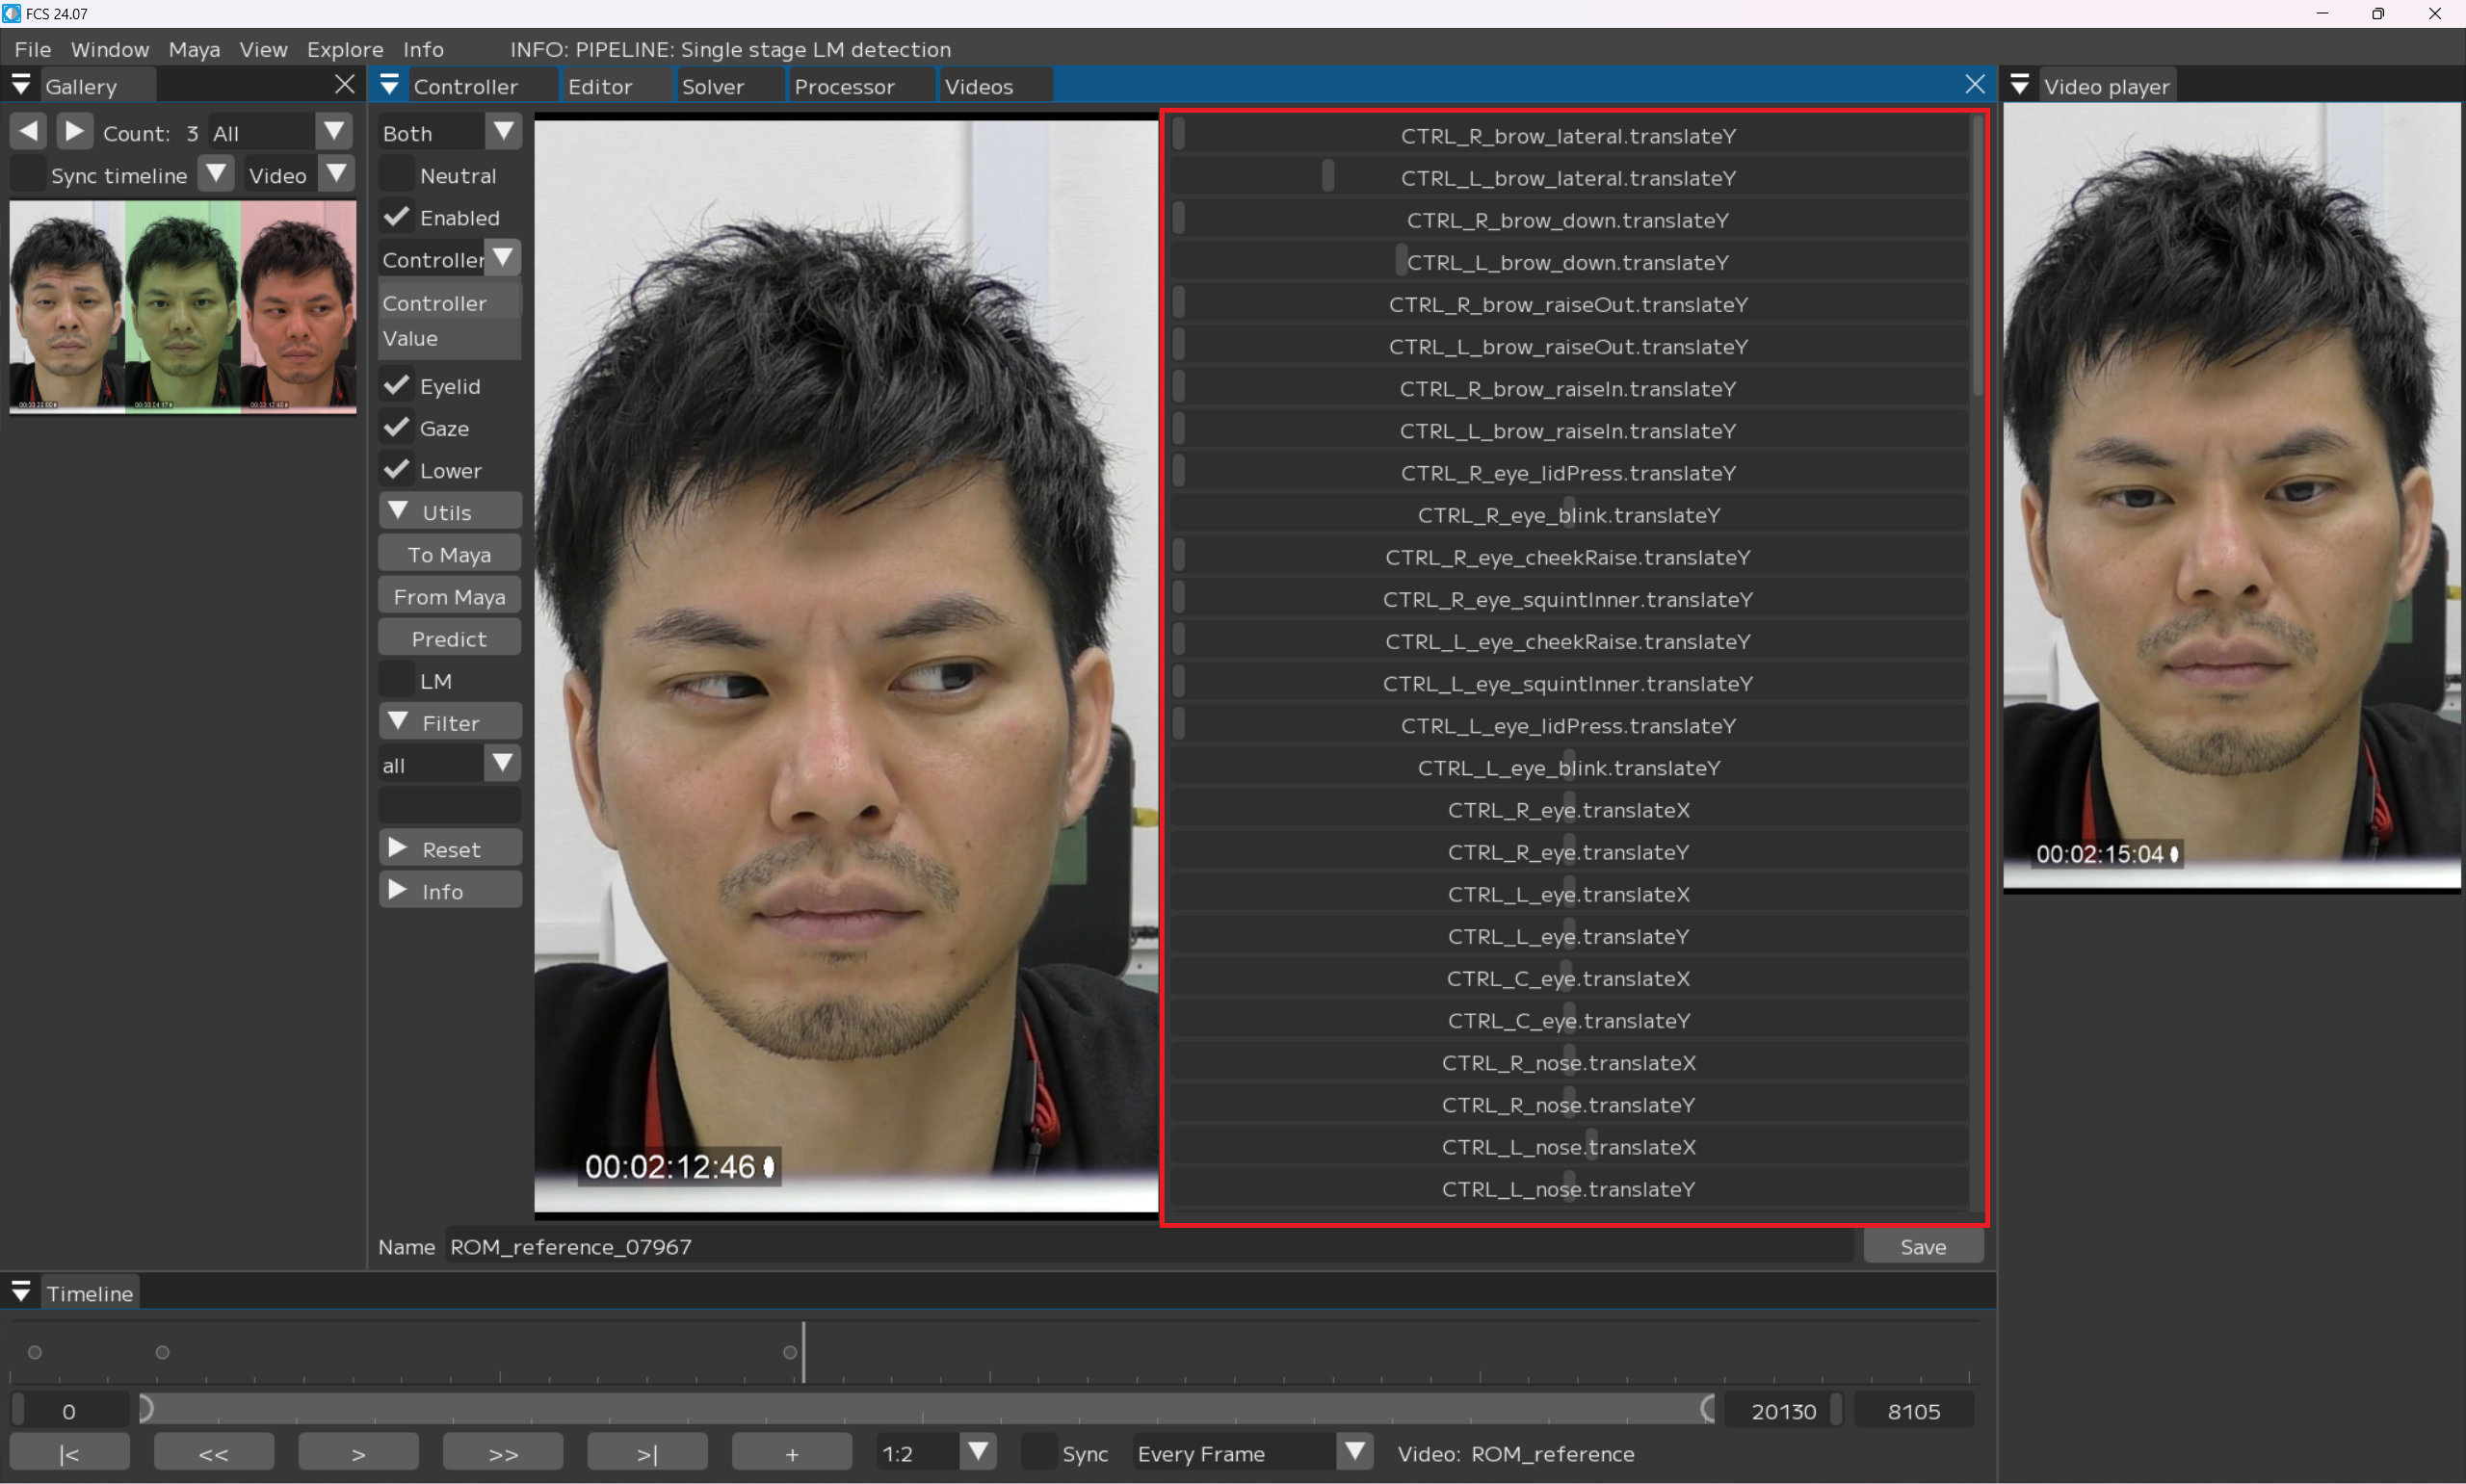
When creating a profile with Predict
This software automatically retargets from the created profile. Predict function After registering a certain number of profiles, you can use the Predict function to register additional profiles. The software will create a predicted expression based on the registered profile.
Warning
The accuracy of automatic retargeting by Predict is linked to the accuracy of the registered profile.
Also note that it does not analyze the entire video.
Move the slider on the VideoTimeline window, stop at the frame where you want to register the expression, and press the “+” button.
An image of the specified frame will be added to the Gallery.
Note
Profiles with a value of 0 (unregistered) are displayed in red.
追加した赤色の画像をクリックし、Editor画面に表示されている画像が同じであることを確認
Predict実行
valueの数値が変動します。
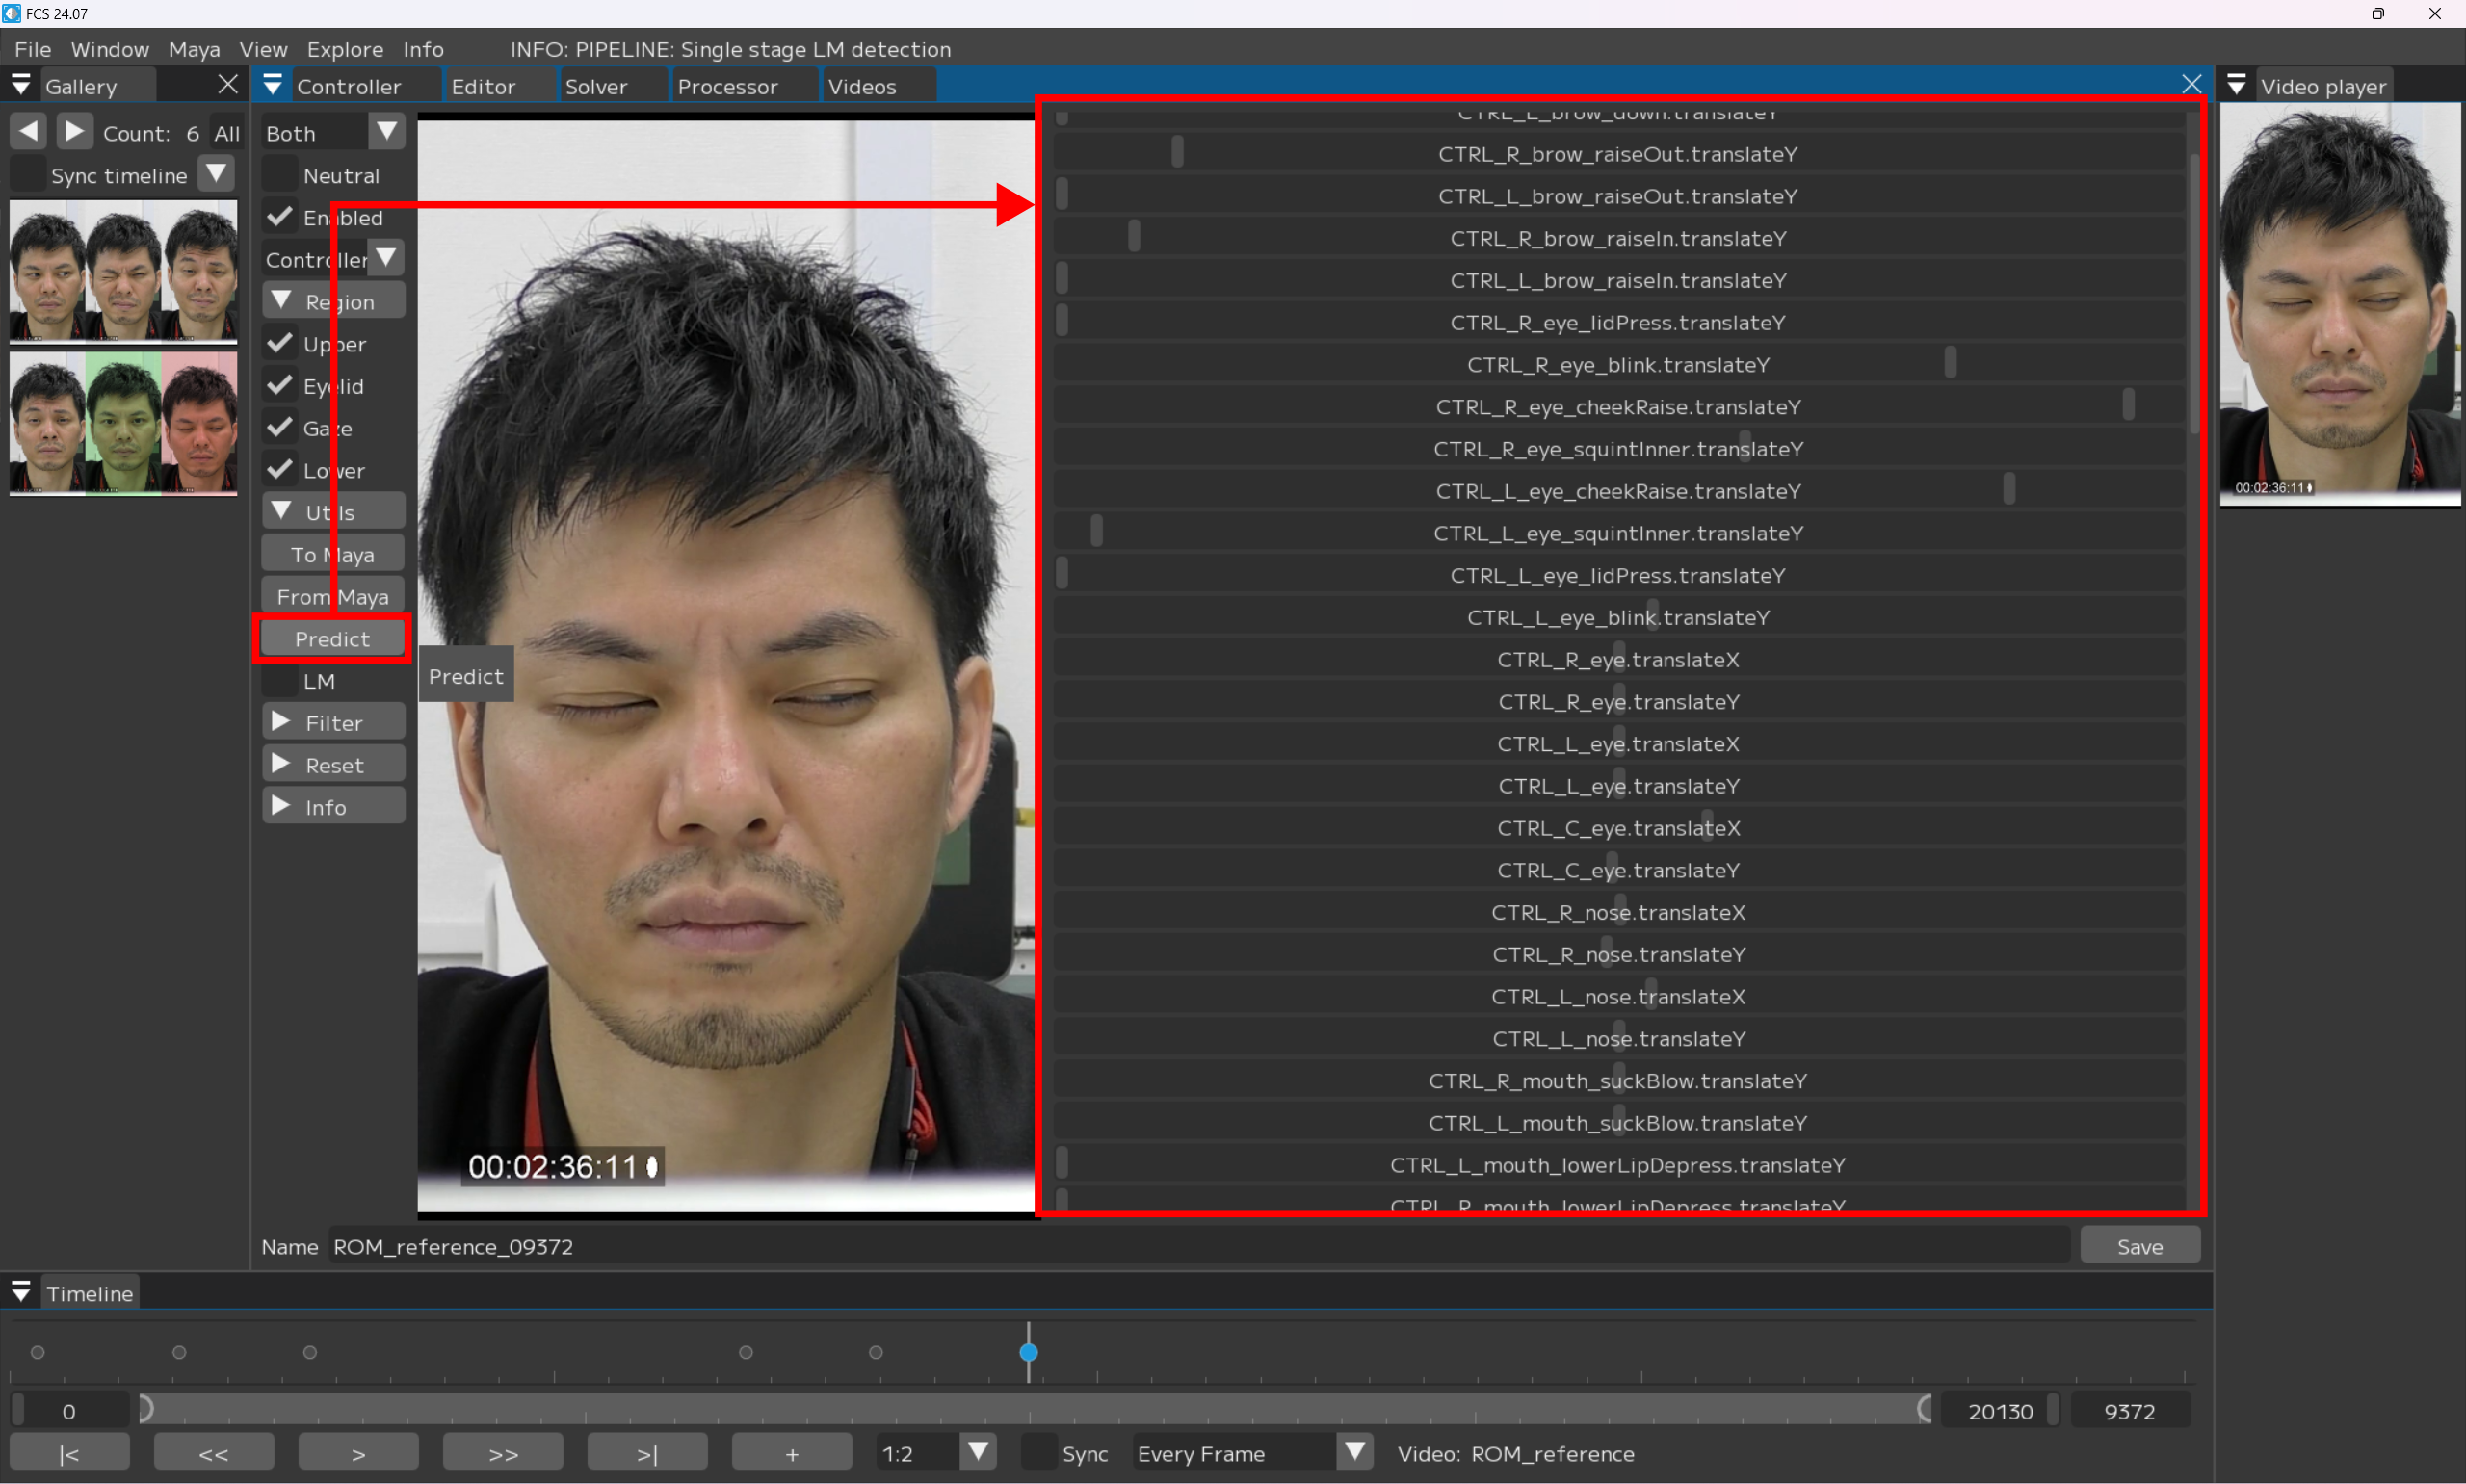
MayaにPredict結果が出るので、
調整が必要な場合は調整し、登録できる内容になったら
Save
Notes on creating a profile
Regarding Gaze registration for closed or half-closed eyes.
Warning
For profiles where the eyes are closed or half-closed and the pupils are not visible, please uncheck the Gaze box ☑ when registering. Otherwise, it may lower the accuracy of the analysis results.
例:眉のぎゅっと絞る動きを作りたい時には
表情を調整した上で
Regionのgaze/lowerの ☑ を外す
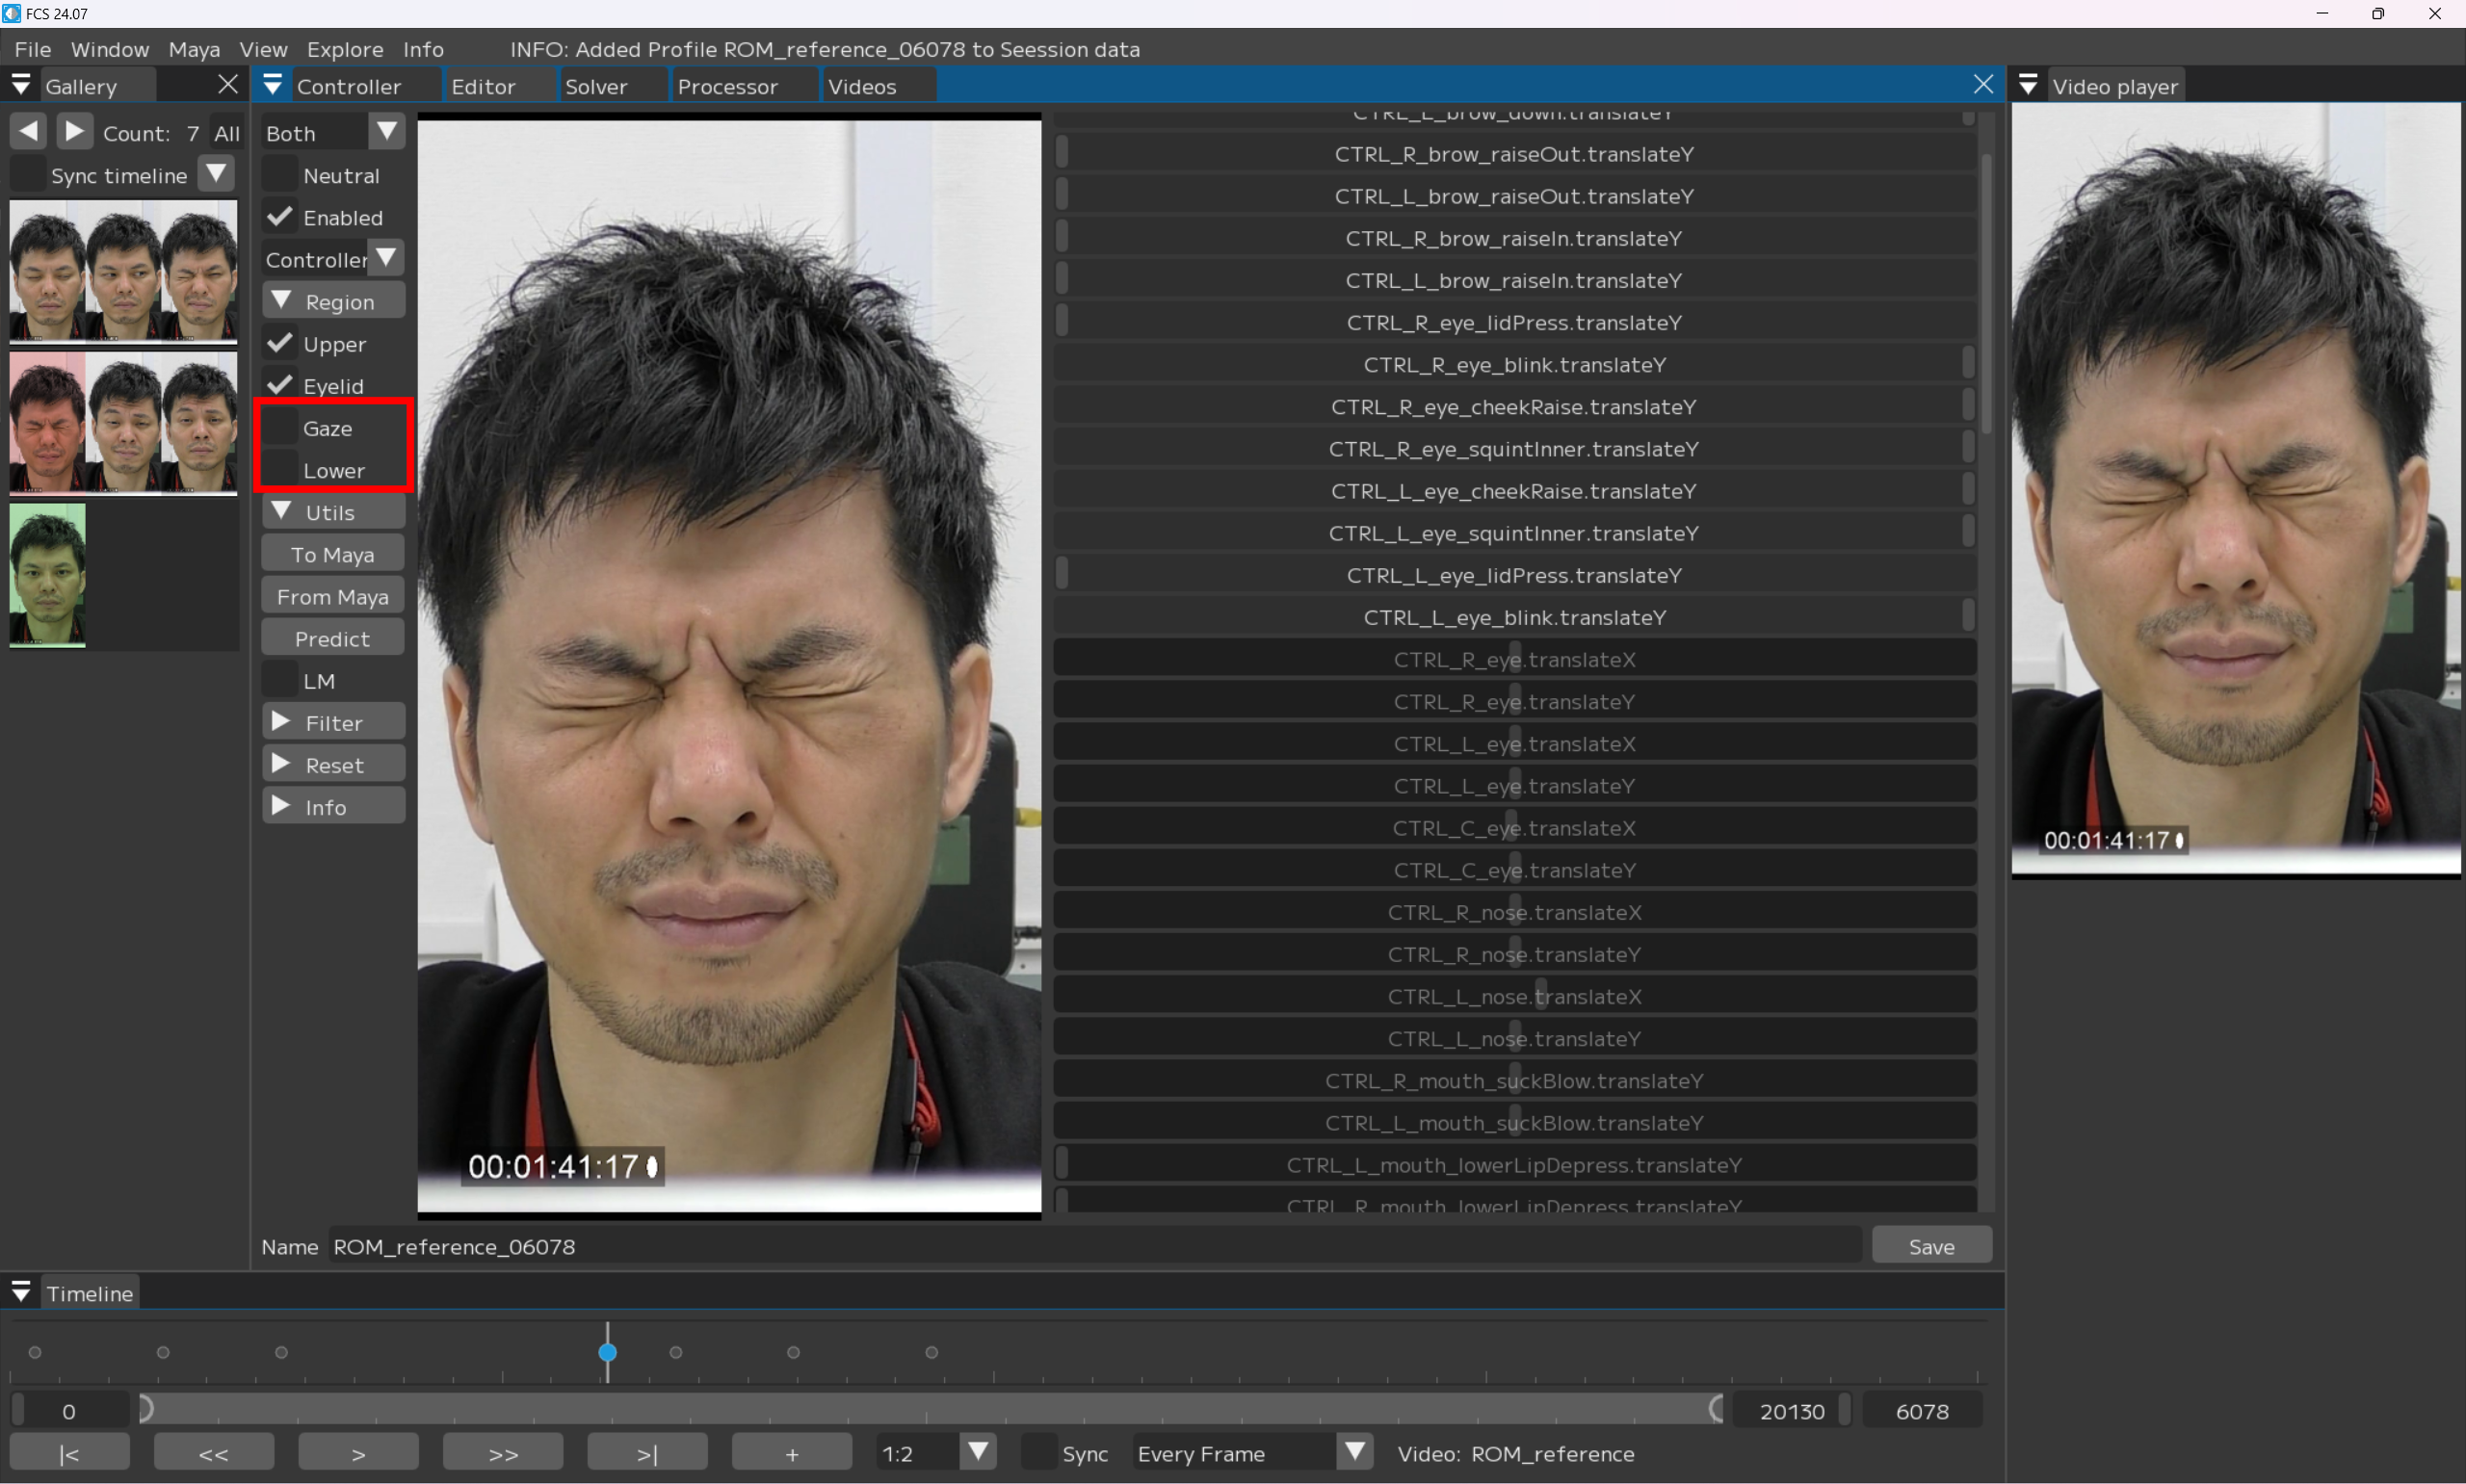
Save
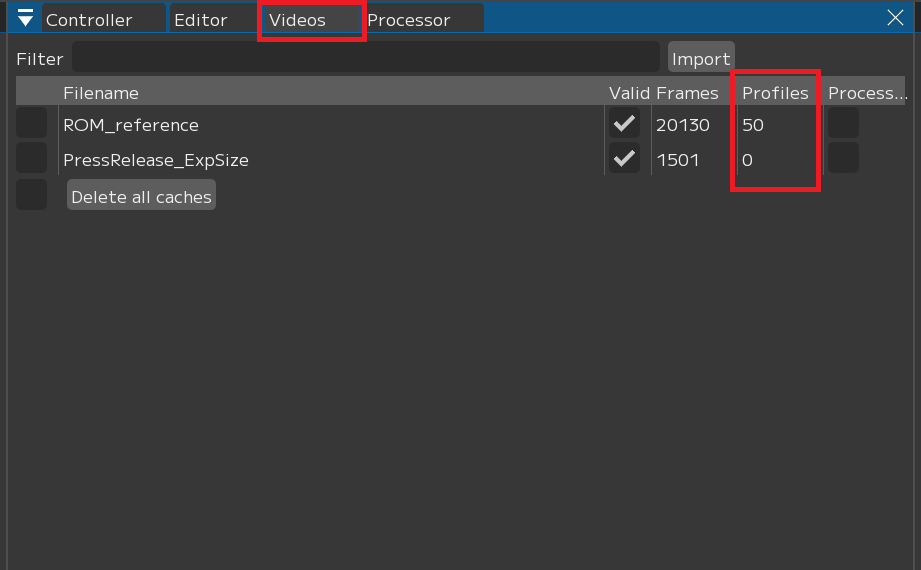
If the analysis results are not ideal.
Warning
Please make sure to create at least one profile for each video you analyze. If no profile is created, the analysis results may not be accurate.
Videosウィンドウの「Profiles」をご参照ください
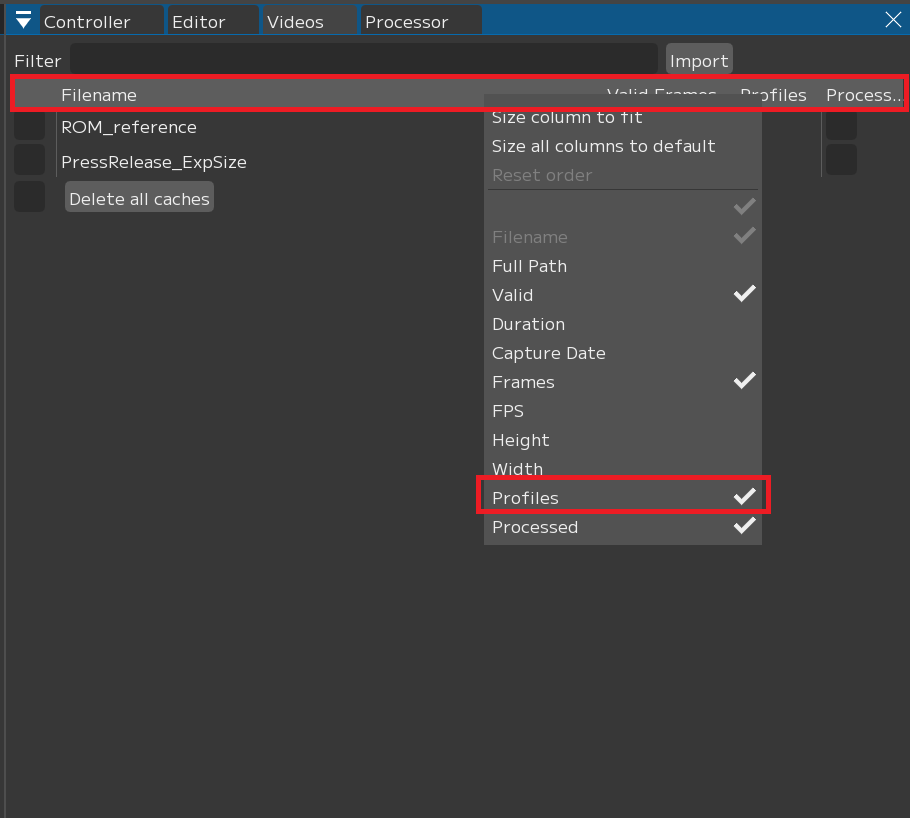
If “Profiles” is not displayed.
Right-click on the top of the menu bar.
「Profiles」に ☑ を入れる
Troubleshooting
If a Profile is not added to Gallery after pressing the + key
+キーを押してもGalleryにProfileが追加されない場合
Galleryの表示ウィンドウが小さいケースが考えられます。
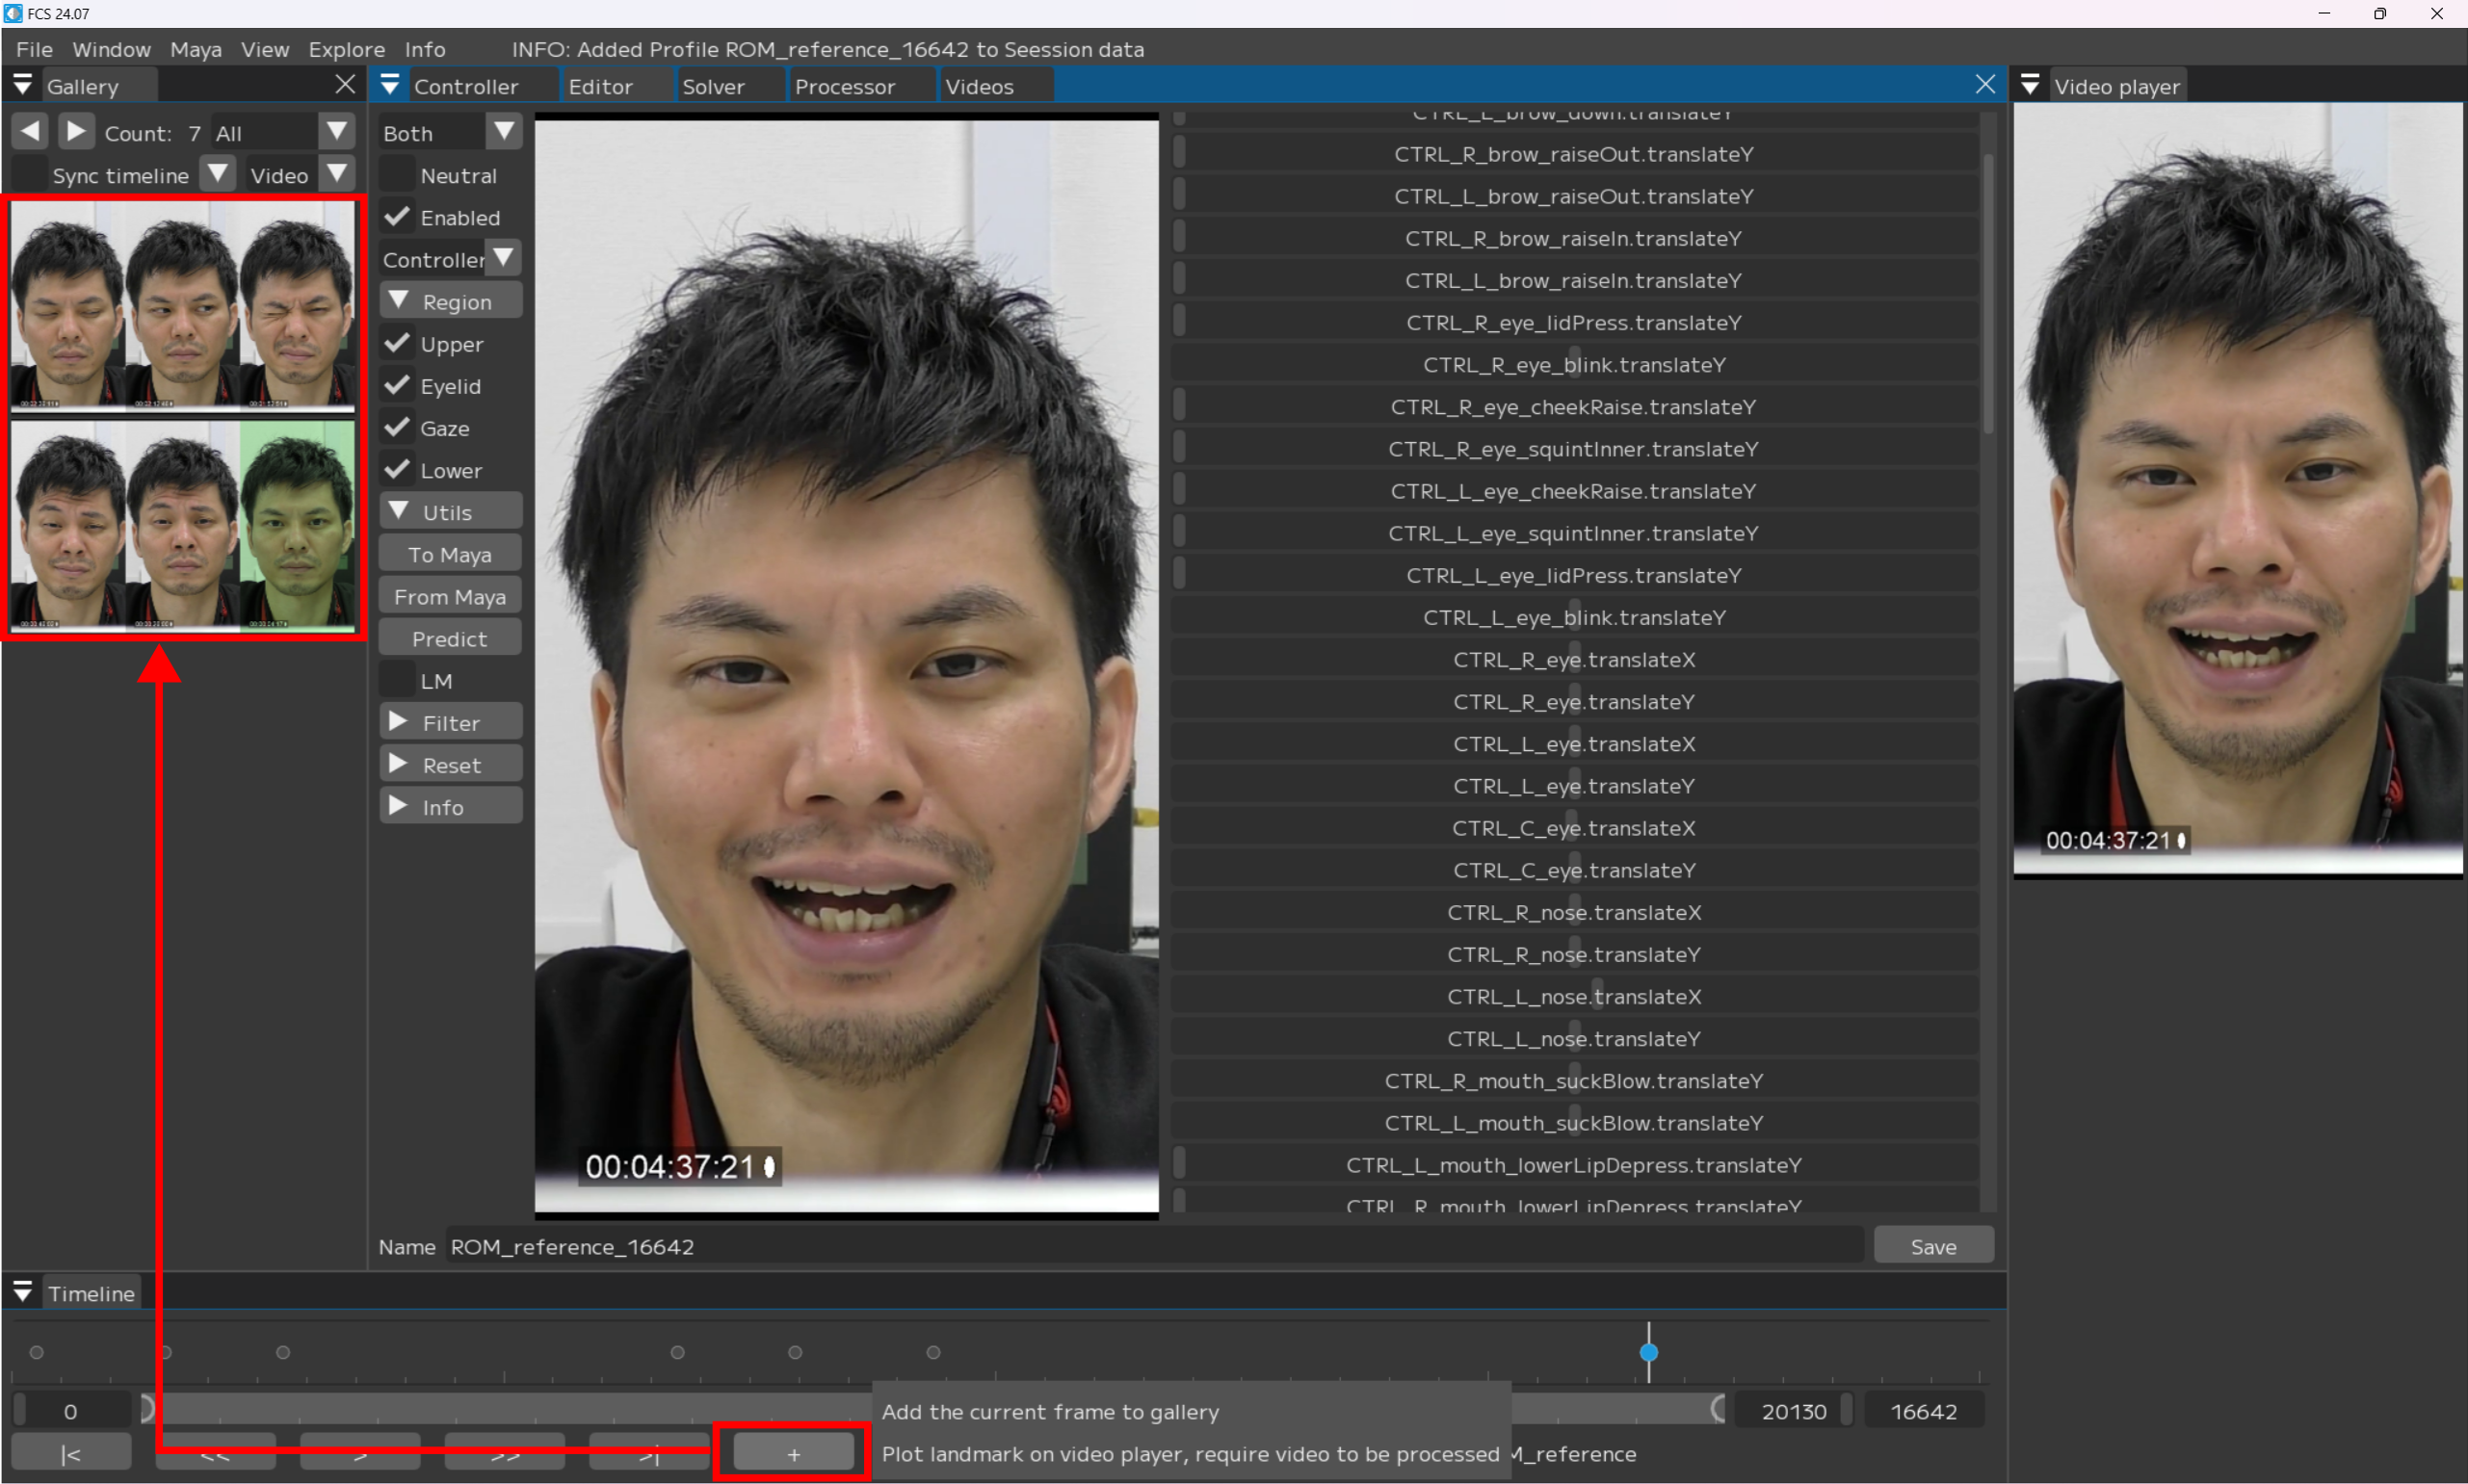
その場合、Galleryウィンドウの◀→をクリックすると追加したProfileが表示されます。

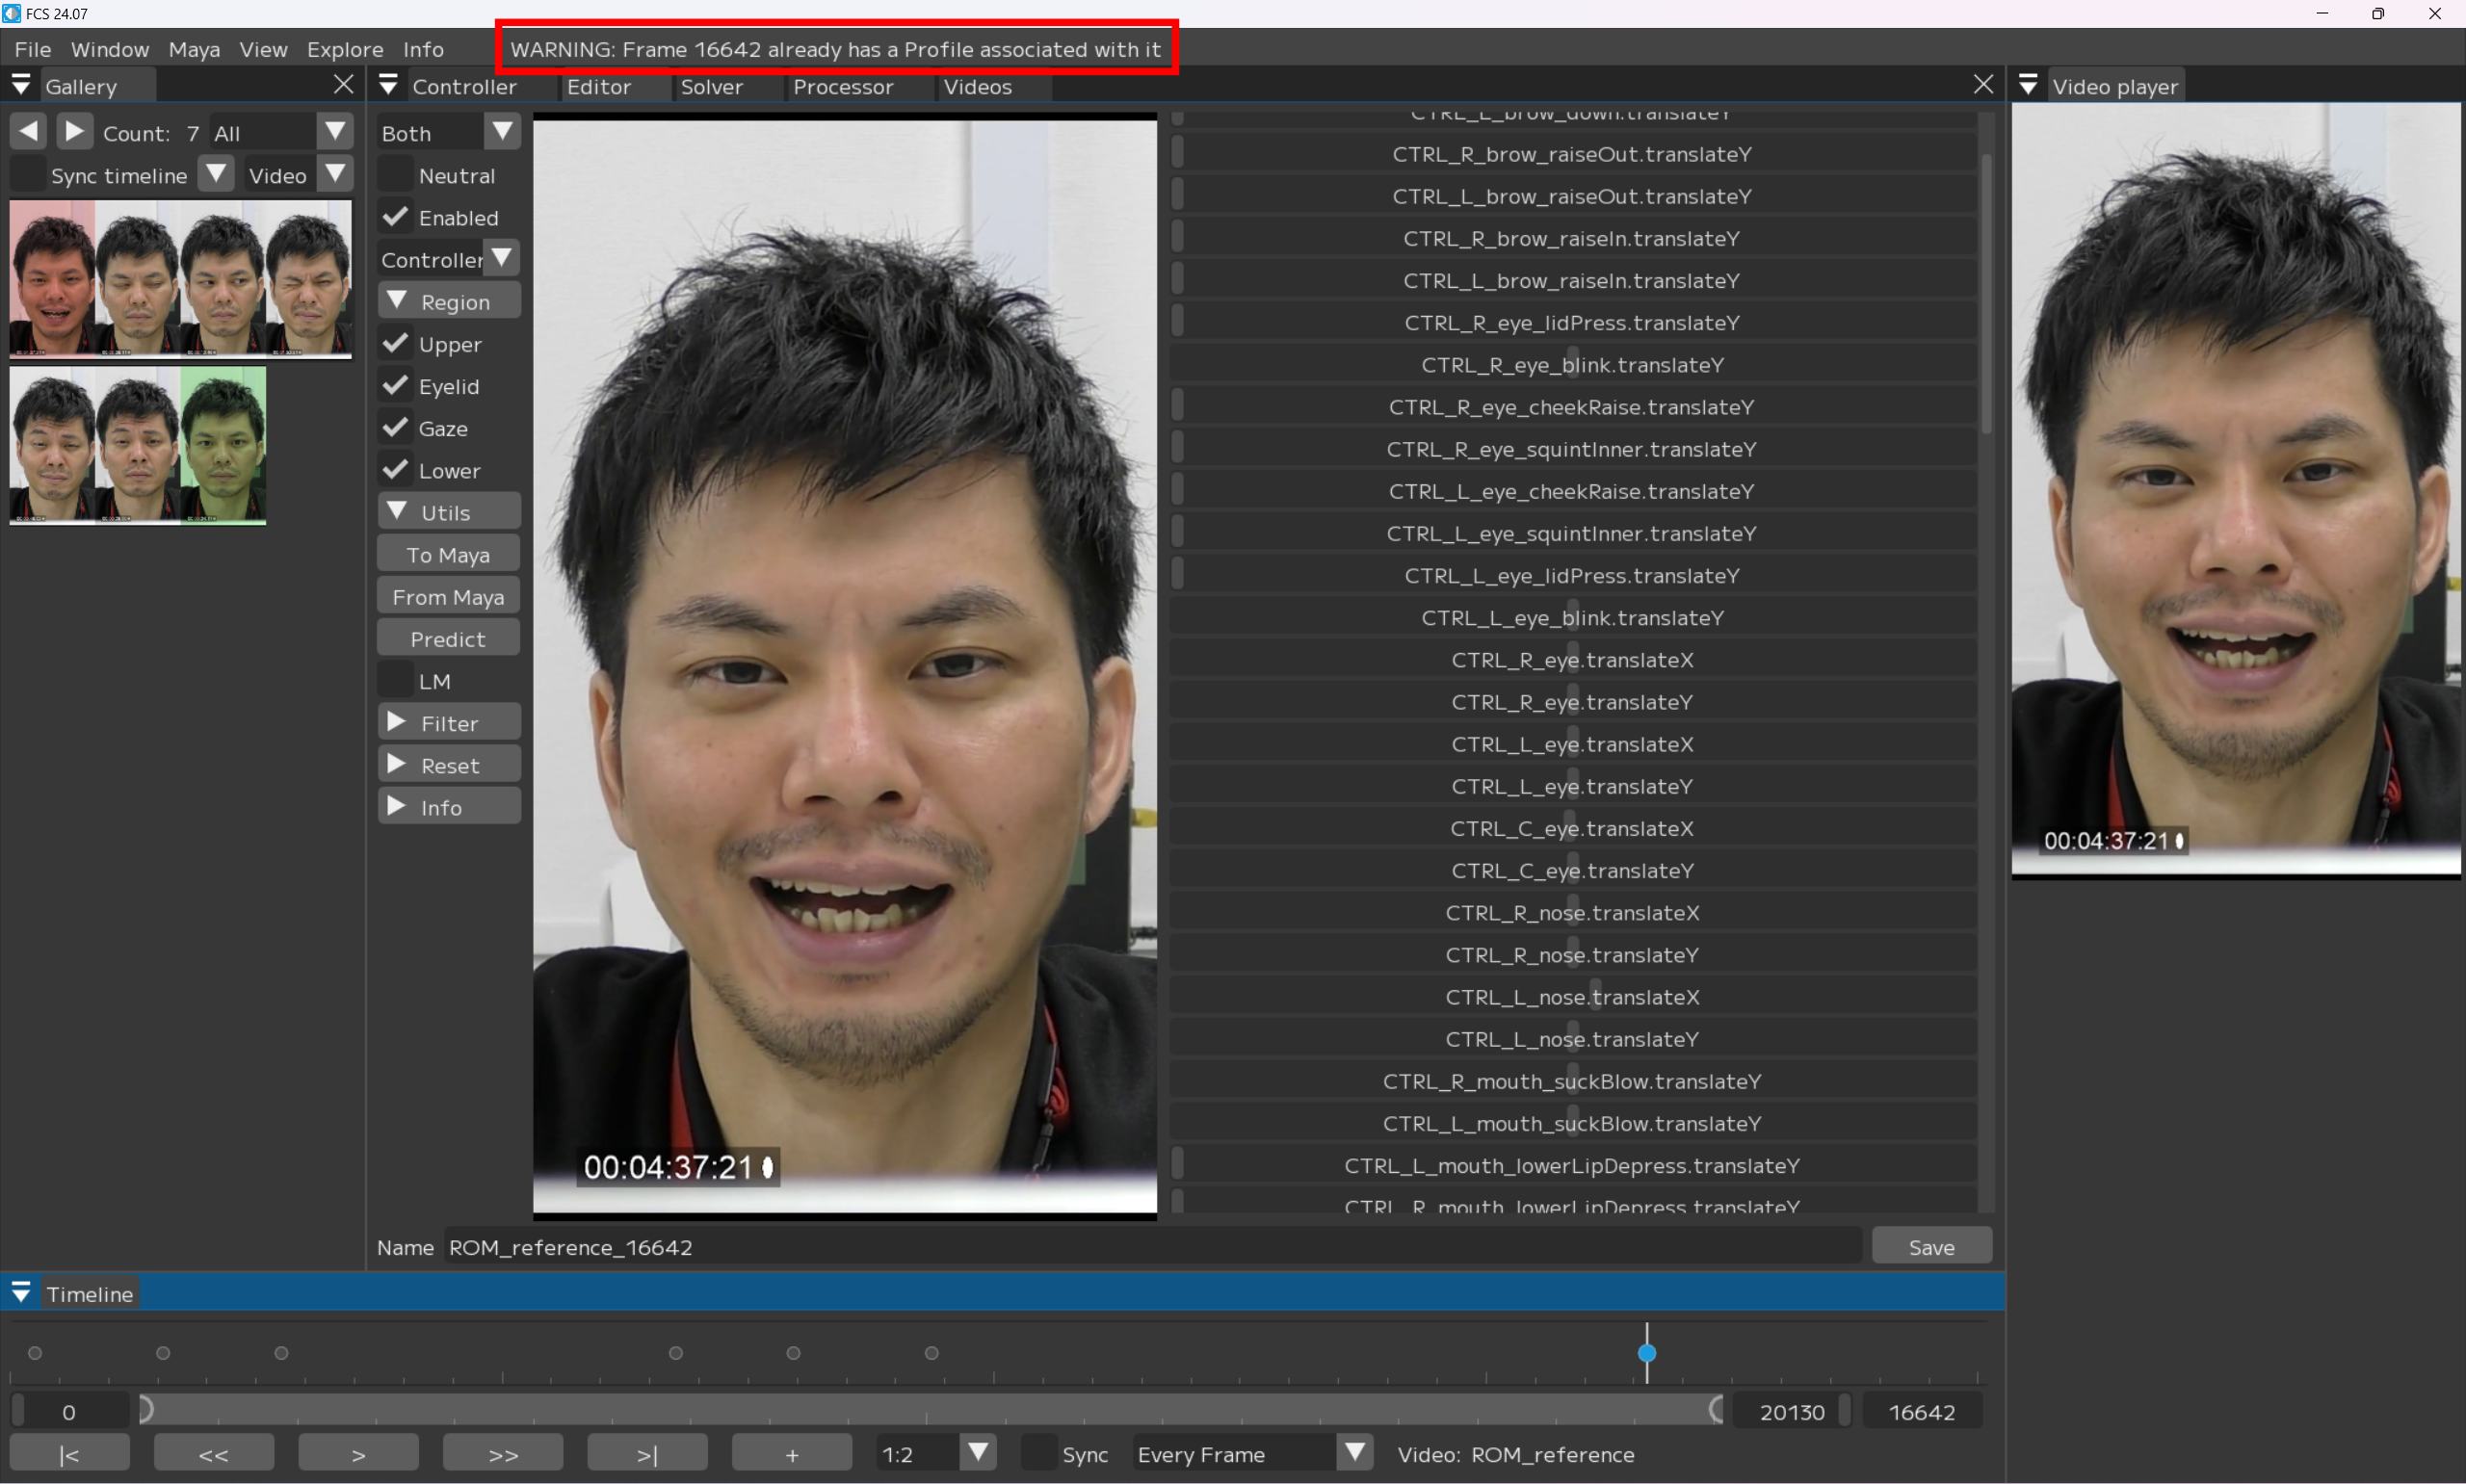
Note
FCS does not add duplicate profiles for the same frame. If a duplicate is added, the Log window will display “WARNING: Frame XXX already has a Profile associated with it.” in the Log window.